Have you been looking for a way to sell your products online completely for free?
Well, you’ve come to the right place!
In this tutorial, we’ll introduce you to Wix and Ecwid, the two platforms you’ll require to start selling online.
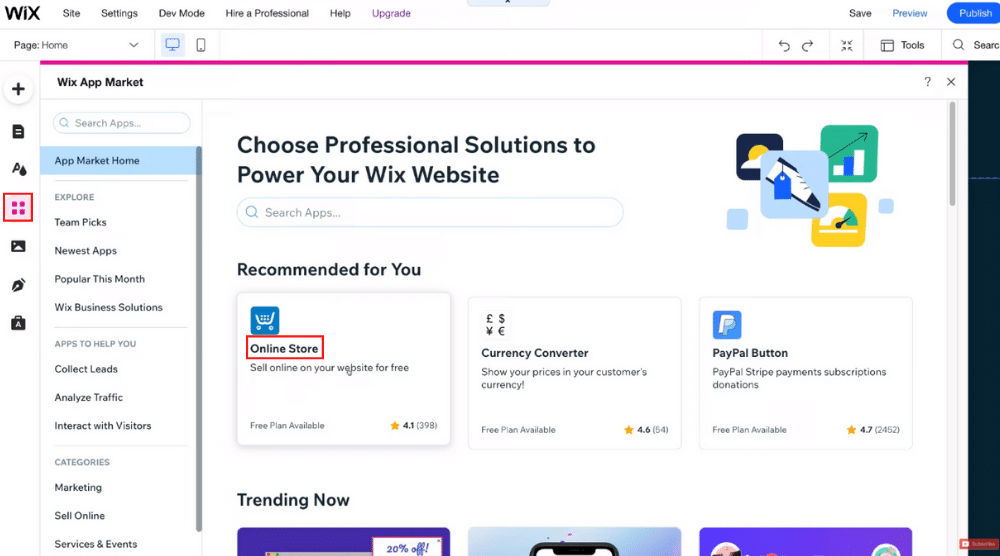
Using Wix, you can easily and quickly create an online store for free using an app integration called Ecwid.
Can you sell on Wix for free?
While you can create a free Wix online store, you do need a premium plan to start selling your products online.
However, today I will explain the process that does NOT require you to spend anything! How?
By integrating Ecwid and Wix!
We will explain how to:
1) Create an online store using Ecwid
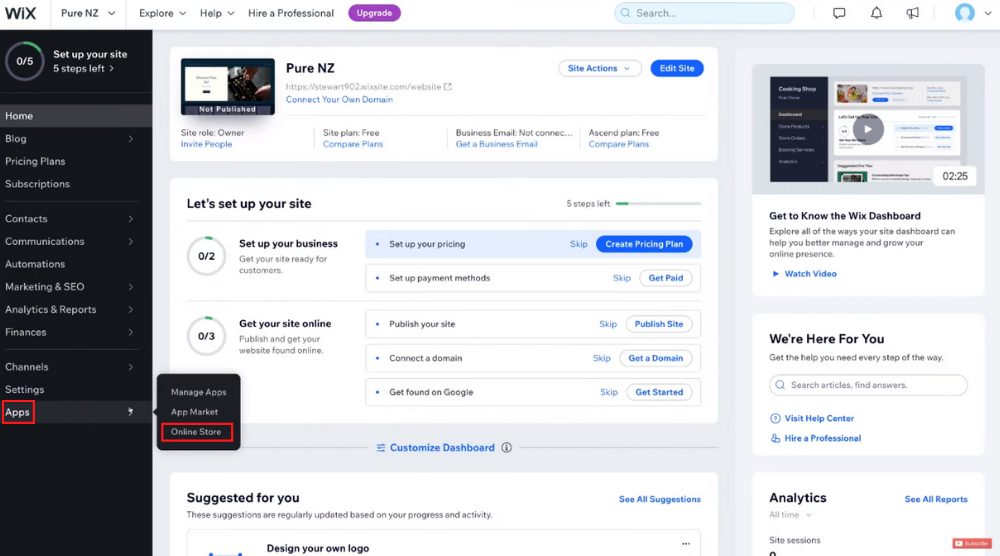
2) Build a free Wix website
3) Integrate Ecwid with Wix to create a free online store
This tutorial is ideal for beginners who wish to get started with e-commerce completely for free!
Steps to Sell Products on Wix for FREE
Let’s understand how to sell products on Wix for free:
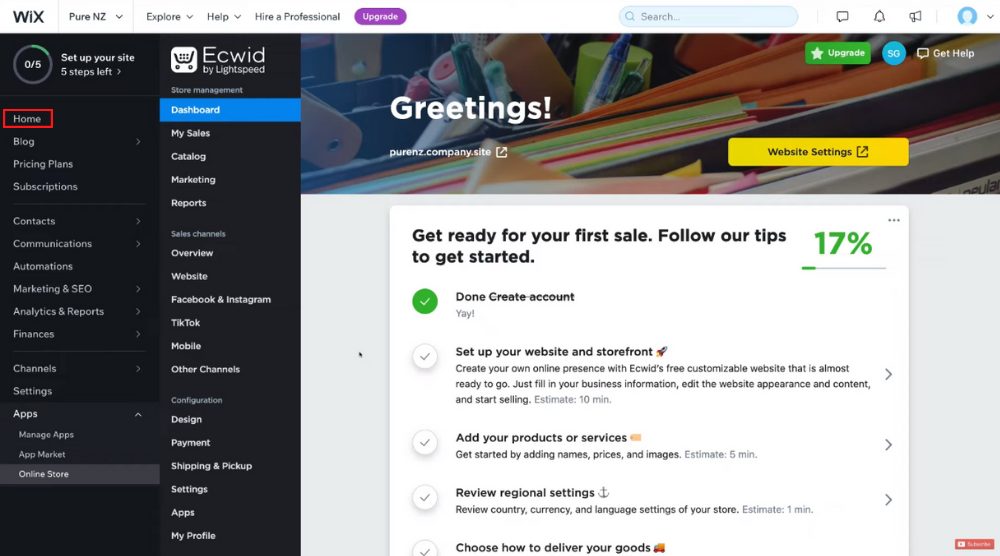
Step 1: Getting Started with Ecwid
The process starts by learning how to create an online store with Ecwid, first.
Using Ecwid, you can upload a maximum of 10 products completely free of cost.
You can sell products on a website that is built within Ecwid.
Or alternatively, you can build a free online store with Ecwid and then integrate it with other website builders like Wix and that is exactly what we are going to show you.
This approach is ideal if you already own a website and intend to sell products through it.
*The link above is an affiliate link, which means we will get a commission if you upgrade to a paid plan (with no extra cost to you). This helps support our education-based website and we thank you in advance!
*The link above is an affiliate link, which means we will get a commission if you upgrade to a paid plan (with no extra cost to you). This helps support our education-based website and we thank you in advance!
Either sign in or sign up to begin website creation depending on whether or not you already have a Wix account. You can sign up to Wix through Facebook or Google.
When you’re completing the sign-up, make sure you select the type of business website you intend to create (refer to the screengrab). It could be a blog, portfolio, online store, consultant, etc. For this Ecwid and Wix tutorial, let’s go for jewellery Just type in the keyword and select the relevant option from the suggestions.
Next, you want to name your free online store. It’s possible to change this name later on.
Select features that you want your Wix website to have. Examples are chat, bookings, forum, online store, forms, etc. For this Ecwid and Wix tutorial, we’ll go for the following features: pricing plans, blog, and an Instagram feed. You can add more features to your site later on.
Hit ‘Next’
Wix will now ask if you’ve created a website before. We’ll go for ‘This is my first time’.
2.1 Create a Free Wix Website (ADI)
For Wix to auto-generate a website for you, some more steps are required:
Click the ‘Start Now’ button. You can now import data from your existing website from Google Business profile (if you have one). Otherwise, you can skip this part.
Next, under ‘Review and edit your info’, start adding your business info like name, email, address, phone number, and social accounts. Ensure that those details are accurate.
Now, pick a theme color that best resonates with your brand, which is also changeable later on.
Based on your preferences recorded by the Wix website builder, it will recommend three homepage designs for you. Click on ‘Use this design’ to select one.
Add additional web pages to your new Wix website, such as Contact, Policies, About Us, Our Products, etc. These pages can also be added later on.
Hi! My name is Stewart, I have a strong passion for digital marketing, business software and small business strategy.
My #1 goal is to provide simple, understandable and actionable information for small businesses located all over the world.
I'm a lover of travel, water sports and spicy food!
We use cookies on our website to give you the most relevant experience by remembering your preferences and repeat visits. By clicking “Accept”, you consent to the use of ALL the cookies.
This website uses cookies to improve your experience while you navigate through the website. Out of these, the cookies that are categorized as necessary are stored on your browser as they are essential for the working of basic functionalities of the website. We also use third-party cookies that help us analyze and understand how you use this website. These cookies will be stored in your browser only with your consent. You also have the option to opt-out of these cookies. But opting out of some of these cookies may affect your browsing experience.
Necessary cookies are absolutely essential for the website to function properly. These cookies ensure basic functionalities and security features of the website, anonymously.
Cookie
Duration
Description
cookielawinfo-checkbox-analytics
11 months
This cookie is set by GDPR Cookie Consent plugin. The cookie is used to store the user consent for the cookies in the category "Analytics".
cookielawinfo-checkbox-functional
11 months
The cookie is set by GDPR cookie consent to record the user consent for the cookies in the category "Functional".
cookielawinfo-checkbox-necessary
11 months
This cookie is set by GDPR Cookie Consent plugin. The cookies is used to store the user consent for the cookies in the category "Necessary".
cookielawinfo-checkbox-others
11 months
This cookie is set by GDPR Cookie Consent plugin. The cookie is used to store the user consent for the cookies in the category "Other.
cookielawinfo-checkbox-performance
11 months
This cookie is set by GDPR Cookie Consent plugin. The cookie is used to store the user consent for the cookies in the category "Performance".
viewed_cookie_policy
11 months
The cookie is set by the GDPR Cookie Consent plugin and is used to store whether or not user has consented to the use of cookies. It does not store any personal data.
Functional cookies help to perform certain functionalities like sharing the content of the website on social media platforms, collect feedbacks, and other third-party features.
Performance cookies are used to understand and analyze the key performance indexes of the website which helps in delivering a better user experience for the visitors.
Analytical cookies are used to understand how visitors interact with the website. These cookies help provide information on metrics the number of visitors, bounce rate, traffic source, etc.
Advertisement cookies are used to provide visitors with relevant ads and marketing campaigns. These cookies track visitors across websites and collect information to provide customized ads.