
Table of Contents
Have you ever wondered how to setup a CDN for your WordPress website?
Well, you’re in luck!
In this tutorial, we are going to cover exactly how to use the free Cloudflare CDN to do just this.
What is a CDN and is it important?
If you haven’t heard of a CDN (content distribution network) like Cloudflare before, it essentially lets you quickly distribute content throughout the internet using a group of servers.
In a nutshell, having a CDN allows your website to load faster, gives you protection against malicious attacks, and reduces CPU usage, bandwidth, and more.
Now, you might be wondering, why is having a CDN for your website important.
Ultimately, having a CDN is going to strengthen the performance of your WordPress website! It is important for every website!
Read more: Top 10 website builders for small businesses.
How to Setup a CDN for WordPress?
In this free Cloudflare CDN tutorial, we are going to walk you through the process of setting up a CDN for your WordPress website so you can improve and optimize your website.
Let’s go ahead and accelerate your WordPress website’s speed with Cloudflare!
1. Getting Started – Free Cloudflare CDN

If you want to optimize the performance of your WordPress website, you’ll first need to connect your WordPress website with Cloudflare’s free CDN.
Don’t have a WordPress website?
Check out our WordPress beginners guide hereto help you get started, then jump back into this tutorial once your website is up and running.
However, let’s continue this tutorial on how to use a CDN with Wordpress
To get started, follow these steps:
- Open up your browser to your WordPress website.
- Head up to the search bar (see screengrab).
- Simply right-click and click ‘Copy’ to copy your domain name.
- Head back to your browser and type in who.is or click here
You can read more about who.is and how it’s used here.
You can watch our beginner’s tutorial on How to choose a domain name for your small business.
2. Head Over To Who.is
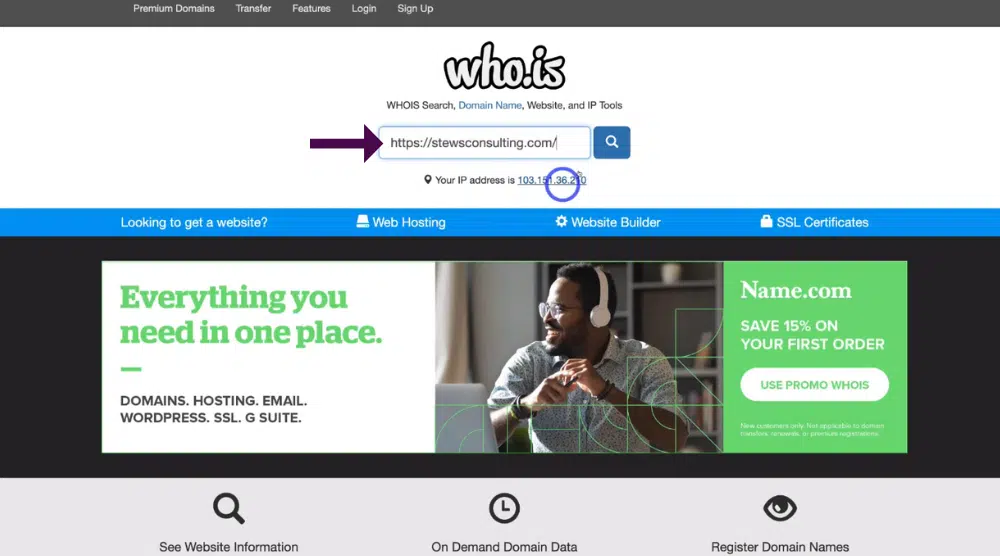
You’ll then be redirected to the who.is the homepage (see screengrab).
Once you’ve arrived at who.is:
- Head down to the search bar within the who.is homepage.
- Paste in the domain name you copied earlier.
- Click ‘Search’ next to your copied domain name.

Once the page is loaded:
- Click on ‘DNS records’.
- That’s going to then generate the DNS records for your domain.
For the purpose of this free Cloudflare CDN tutorial, who.is has generated all our DNS information here for our website ‘stewsconsulting.com’ (see screengrab).
Next, you want to identify the ‘NS’ (which is your nameserver)
You’ll find that you have two name servers
On this same page, you can head over to your domain provider.
This is the provider which you bought your domain from.
You’ll also be able to view these name servers i.e ns2.hostpapa.com & ns1.hostpapa.com
3. Sign Up For Cloudflare For Free

Next, we’re going to show you how to take your current name servers and change them to the name servers within Cloudflare!
Follow these steps to find out how:
- Simply head over to your browser and type in Cloudflare.com or click here to take you to Cloudflare’s homepage.
If you currently don’t have a free Cloudflare account, follow these steps to create one:
- Navigate over to ‘Sign up’ on the Cloudflare homepage.
- Add your email address and create a password.
- Simply click on ‘Create account’.
You’ll then arrive inside your free Cloudflare account!

Once you’re inside your account:
- Head up to the top of your left-hand sidebar and select ‘Websites’.
- Click on ‘Add site’.

- Simply paste in your site domain here (see screengrab).
- Click ‘Add site’.
Cloudflare will then prompt you to upgrade to a paid plan, however for the purpose of this free Cloudflare CDN tutorial, we’re going to stick with the free plan.
To select the free plan:
- Scroll down and click on the ‘Get started for free’ plan option.
- Here you can also view all the core features the free plan offers on the right side.
- Click ‘Continue’.
Want to learn more about the benefits of using a CDN like Cloudflare? You can read more here.
However, let’s continue with this tutorial on how to setup and use a CDN for WordPress.
4. Updating Your Nameservers

This is where you can actually make changes to your DNS record
- Scroll down and click on ‘Continue’.

Cloudflare then simply walks you through the process of changing your current nameservers to Cloudflare!
Follow the easy steps below to find out how you can do this:
- Come down to ‘4. Add Cloudflare’s nameservers’.
- Select ‘Click to copy’ the first DNS name server.

Next, to change your nameservers:
- Log into the provider that you bought your domain from.
We’re going to log into our domain provider, HostPapa.
*The link above is an affiliate link, which means we will get a commission if you sign up to HostPapa (at no extra cost to you). This helps support our education-based website and we thank you in advance!
If you don’t use HostPapa, your interface will look different from ours, although finding your nameservers on any provider is quite easy to do.
However, if you can’t find your nameservers, we suggest contacting your domain provider directly to find out where you can find it!
Again, as we use Hostpapa as our domain provider, for the purpose of this free Cloudflare CDN tutorial, we will be using and referring to them throughout the rest of this tutorial.
If you don’t have a domain provider and would like to get started with HostPapa, you can check out our beginner’s guide to HostPapa here.
Once you’ve logged into HostPapa:
- Navigate up to ‘My domains’.
- Select the domain that you want to manage.
We’re going to click on our domain ‘stewsconsulting.com’.
- Select ‘Manage’.

- Find the heading ‘Nameservers’.
Next, you’ll want to change these nameservers (see screengrab).
To do that:
- Select ‘Use custom nameservers’.
- Paste in the first name server we copied earlier from Cloudflare next to ‘DNS1’.

- Head back to Cloudflare and select ‘Click to copy’ the second name server

- Head back to your domain provider.
- Simply paste the second nameserver next to ‘DNS2’.
As you can see, we’ve now added the two nameservers from Cloudflare! (see screengrab).
Once you’ve pasted in both nameservers to your domain provider:
- Select ‘Update DNS servers’.
You should then see the message ‘Name server information successfully updated’
However, changing name servers can take a little while to make that change (up to 48 hours), so it’s important to take that into consideration when following this process.

Once you’ve done this:
- Head back to Cloudflare.
- Navigate down and click on ‘Done, check nameservers’.
- Select ‘Get started’.

This is where you can configure your domain name to enhance and optimize your website’s performance
To do this:
- Make sure that ‘Automatic HTTPS rewrites’ is turned on and has a green tick.
- Click ‘Save’.
- Turn on ‘Always use HTTPS’.
- Click ‘Save’.

- Under ‘Auto Minify’, click to turn on these three options i.e Javascript, CSS, and HTML.
- Click ‘Save’.

- Turn on ‘Brotli’.
- Come down and click ‘Save’.
- Click ‘Finish’.
And just like that, you’ve completed configuring your domain name.
Remember, registers can take up to 24 hours to process nameserver updates.
Whilst different hosting providers and domain providers are different, Cloudflare will email you to let you know when your configuration status is active.
And it’s as simple as that to setup a free Cloudflare CDN for your WordPress website.
By completing this, you will ultimately increase the performance of your website!
Read more: Best Web Hosting for Small Business
How To Use a CDN For WordPress (Video guide)
We have now come to the end of this brief free Cloudflare CDN tutorial for WordPress.
We hope you are now confident in this process and gained immense value.
It really is such a simple yet effective process that will boost your website’s performance.
Make sure you check out our full video on How to setup a CDN for WordPress below!
