Importance of URL Shorteners
This brief article talks about two of the best URL shortener available today, i.e., TinyURL and Bitly.
A shorter URL, undoubtedly, looks far more professional and legitimate than its longer predecessors.
You can see an example of a longer unattractive URL vs that same URL that has been shorted down below.
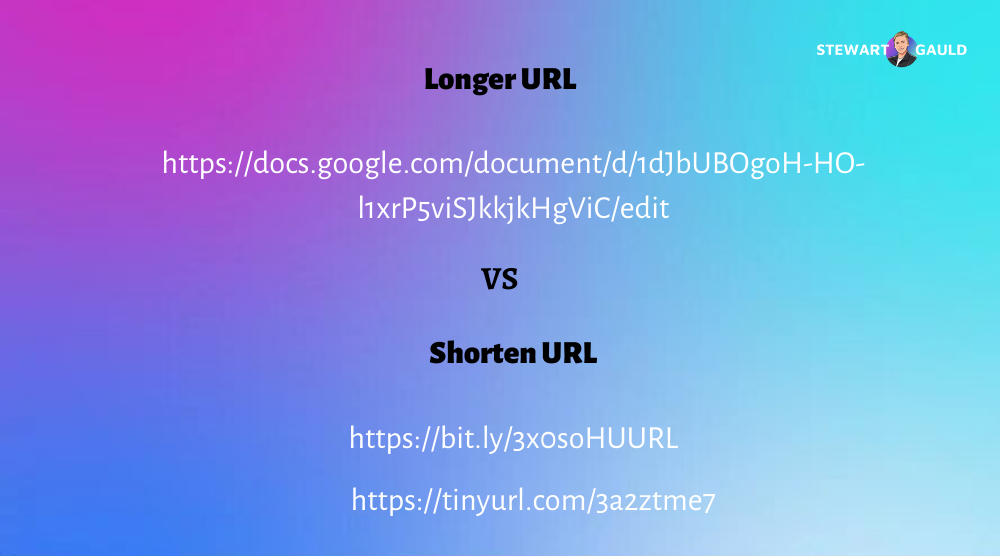
URLs are used across various digital marketing materials to be seen by potentially millions of users.
A long URL most certainly does not leave a good impression. However, before we go ahead and explain how to shorten URLs using Bitly and TinyURL, we will cover the basics first.
What is a URL Shortener?
It’s a software tool that allows people to convert messy, long URLs into cleaner and shorter versions. Using a custom link shortener, anyone can shorten URLs within seconds. It is also sometimes known as a URL condenser, URL shrinker, vanity URL creator, and link compressor.
Why Should You Use A URL Shortener?
There are several reasons why using a free link shortener is a wise move.
- It makes your URL branding more prominent and clean
- People trust a shorter link over a long messy link
- Shorter website links, specifically, are necessary for better SERP rankings
- Users find them easier to click, share, or copy if needed
- The performance of a shorter link can be tracked and measured
Now that you understand what a URL shortener is and why it’s important to utilize it, it’s time to begin our free link shortener tutorial for beginners:
How do you Find and Use URL Shorteners?
There are several URL Shortener tools available online today.
We have found two tools that are in our opinion the best for shortening and managing URLs.
Bitly URL Shortener and TinyURL Link Shortener.
Below is a step-by-step guide for each of these two tools, explained thoroughly to help you get up and running with URL shorteners.
Bitly URL Shortener Tutorial
The first free link shortener that we want to introduce is Bitly.
Follow these steps below to learn how to shorten URLs using Bitly:
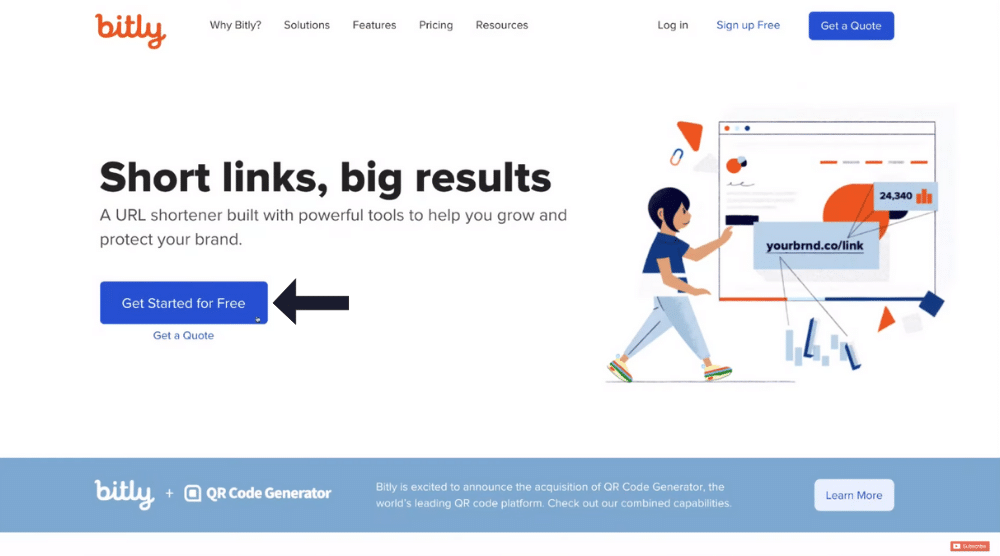
- Head over to Bitly
- Hit ‘Get Started for Free’ on its homepage
In this tutorial, we’ll cover the free plan offered by Bitly URL shortener, which is sufficient for small businesses and individuals.
Under its free plan, you get:
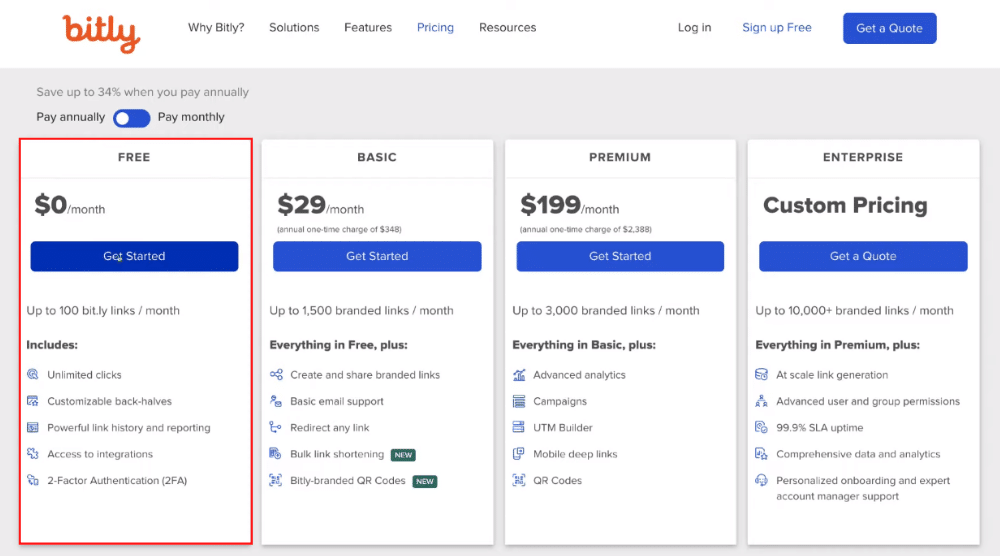
- Unlimited clicks
- Customizable back-halves
- Powerful link history
- Access to integrations
- Two-factor authentication
- 100 short links per month
Since you have access to unlimited clicks under Bitly’s free plan, you’d never have to worry about replacing your URLs across different channels. Under its free plan, click on ‘Get Started’.
After completing the Bitly sign up, you’ll arrive at its dashboard.
Now, take the following actions:
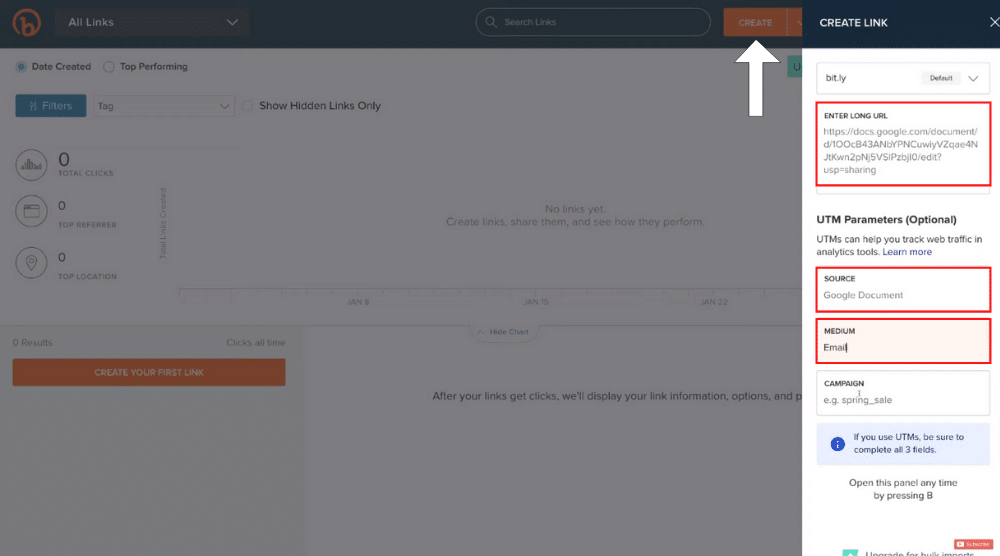
- Click on ‘Create’ to create your first link (refer to the screengrab).
- Enter the long URL in the given field. We’re using a Google doc link for this free link shortener After the link is shortened, it can be sent to the prospects via email.
- Add a source, which is a Google document in our case.
- Add a medium, which for us is email
- Next, name your campaign. We’ll name it ‘Website Requirements’ for this tutorial
- Hit ‘Create’
- For your own reference, add a title for the link, which is again going to be ‘Website Requirements’
- Customize the back half of your URL according to what you want it to look like. We recommend adding your branding in the back-half. Just highlight the back half and replace it with your branding. We’re just going to use ‘website requirement’ again.
- Add a tag for the URL. This allows you to manage all the different URLs, especially if you’re closer to the 100-URL limit offered by the Bitly link shortener. For now, we’ll skip it since we’re only creating one URL.
- Click ‘Save’
Remember, the custom link you decide might already be taken by another user.
Thus, it may take a few attempts before you finally customize the back half of your URL.
Since our choice was also already taken, we tried again with the company name this time.
And the URL was successfully shortened (refer to the screengrab).
To test the newly created Bitly custom link:
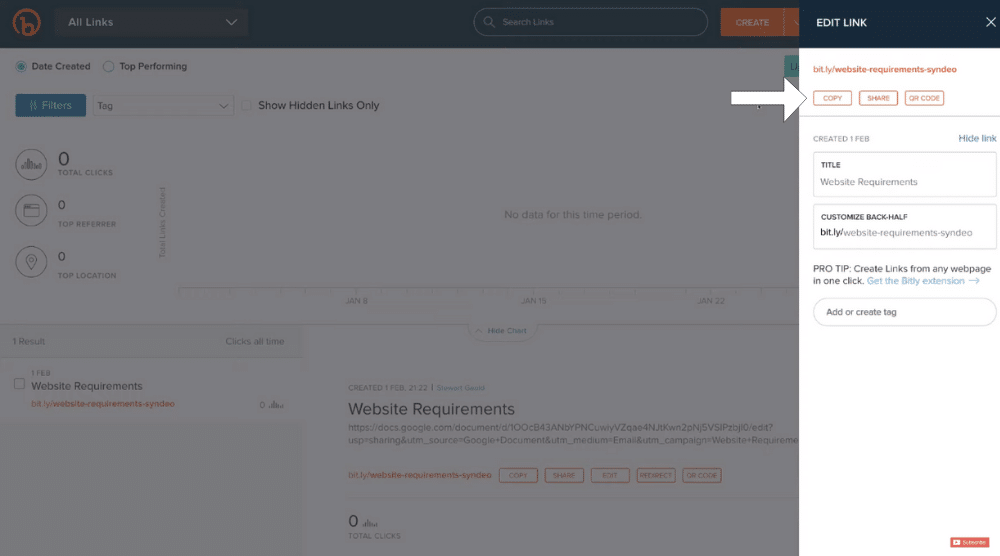
- Select ‘Copy’
- Exit out of the current window and observe your dashboard. You’ll find the original long URL and the shortened link right at the bottom. By selecting ‘Edit’, you can also edit the link if you want. If you didn’t copy the URL before, you can do it now by clicking ‘Copy’.
- Paste this link onto your browser to test it and hit ‘Enter’ on your keyboard
- Your destination page (the Google doc link in this case) will be opened by the browser.
We’ve now confirmed that the link works. It’s now ready to be sent to potential customers or clients.
Back on your Bitly dashboard, you will see basic analytics regarding the performance of the new link, such as total link clicks, top referrer, and top location.
This brings us to our second custom URL shortener called TinyURL.
TinyURL Link Shortener Tutorial
Compared to the Bitly URL shortener, TinyURL is a more basic link shortener.
To learn how to use it:
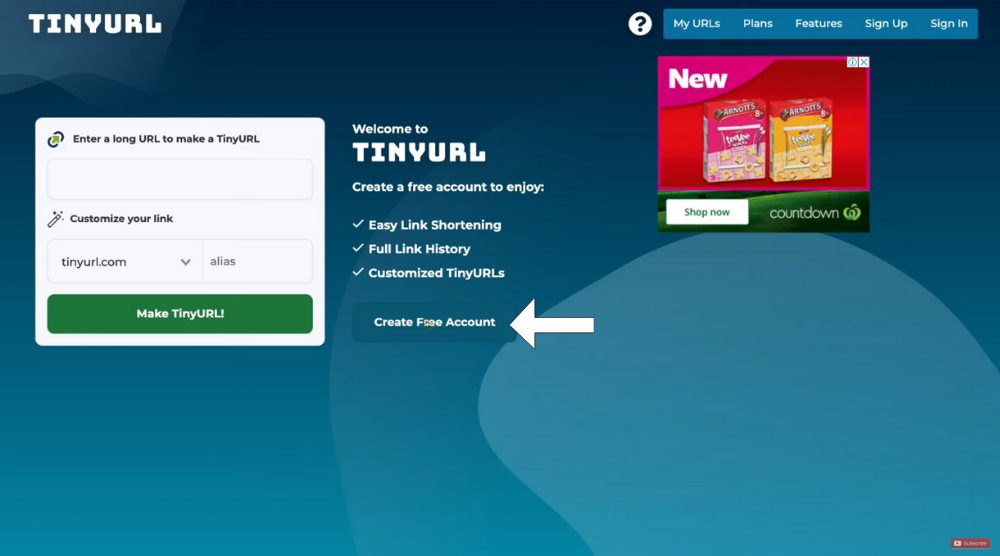
- Head over to TinyURL
- Select ‘Create Free Account’
- Add your name, password, and e-mail address in the fields that pop up
- Click on ‘Create An Account’
- Tap on ‘Select’ under the free plan
After verifying your email:
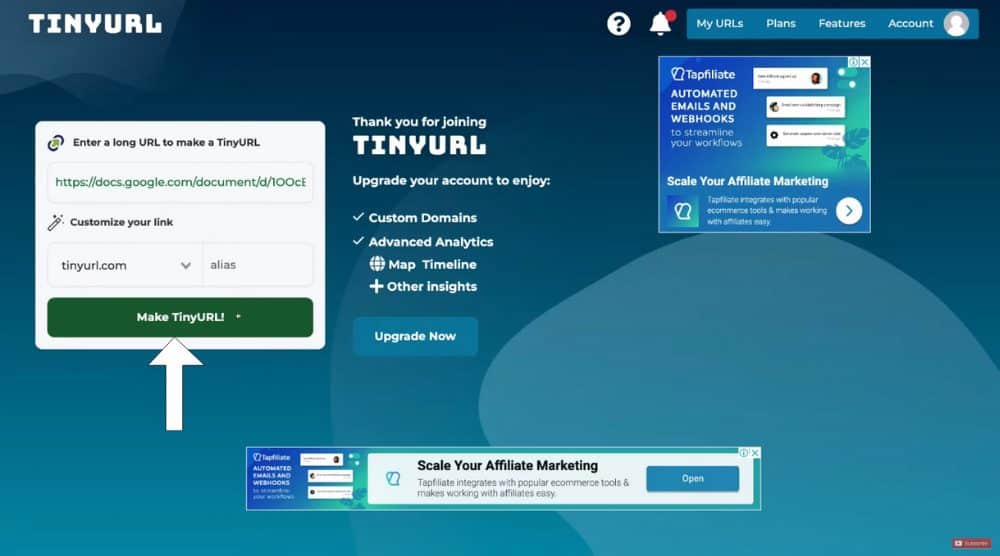
- Copy the long URL and paste it into the given field (refer to the screengrab)
- Select ‘Make TinyURL’.
And just like that, your shortened URL is generated.
Now, copy the URL and paste it across different channels or share it with your prospects.
Click on ‘My URLs’ to see the basic information about your new link.
TinyURL shows the total link clicks under its basic analytics.
From the right-hand side, you can also rename your URL, visit it or share it.
This brings our tutorial to the end.
Read More: How To Make A FREE Website With Wix
Best 5 FREE Productivity Apps for Small Businesses | Maximize Business Productivity
Finishing Up
There are many reasons why you should shorten URLs.
Since your links are displayed on print material, emails, social media, and other places, the shorter URLs look cleaner and more professional.
There are many free link shorteners on the market.
This brief guide describes how to use Bitly and TinyURL, the two leading link shorteners.
Choose the one based on whether you want an advanced, feature-packed tool (Bitly) or a basic link shortener (TinyURL)
If you want a more bare-bone link shortener, TinyURL is an excellent option.
However, to access the many advanced features offered by Bitly, as explained in the tutorial, you are better off using this tool.
You can add your own branding, access advanced analytics, and create up to 100 links using Bitly.
Check out our full video guide down below.

