Table of Contents
What is Zoho CRM?
Zoho is an all-in-one office suite that provides nearly every tool that businesses require to optimize online performance.
Within this suite, Zoho also offers free CRM software which is perfect for small businesses.
If you have a small team of up to 3 people and you’re looking to enhance your customer relationship, streamline your sales process, and manage all your leads, customers, deals, and vendors in one place, then this tutorial is for you.
In this Zoho tutorial for beginners, we’re going to shed light on how to use Zoho CRM and explain key Zoho CRM features offered under the free plan.
Get started with Zoho’s CRM for FREE here
*The link above is an affiliate link, which means we will get a commission if you upgrade to a paid plan (with no extra cost to you). This helps support our education based website and we thank you in advance!
Why Use Zoho’s Free CRM Software?
The world of business revolves around customers.
Companies spend a lot of time and money to nurture their prospects and manage their existing clients.
Manually, it becomes virtually impossible to accomplish this task as the business grows.
But thanks to modern CRM software such as the Zoho CRM, companies of all sizes can win at customer relationship management (CRM) effortlessly and even free of cost (for small teams).
This cloud-based free CRM software allows you to increase conversion rates, improve customer engagements, and store valuable customer/vendor data.
The one feature that makes Zoho stand out from its competitors is its user-friendly interface.
You don’t need to hire an IT expert to monitor, utilize, and customize it.
With just a few steps, you can migrate data from other CRMs and spreadsheets to Zoho CRM.
It also provides numerous extensions and third-party plugins (a majority of them are free and don’t need any coding experience).
Other prominent features worth mentioning are reports & analytics, automation of tasks, and omnichannel communication.
How to Use Zoho CRM Software?
Let’s understand how to use Zoho CRM:
Step 1: Sign In to Zoho CRM

You can either enter your details and sign up or use Google to sign in.
Select the Google account that you prefer signing up with and then the country.
Read the privacy policy and terms & conditions if you need to, check the box, and hit ‘Continue’.
Since this is a beginner’s tutorial, we’re going to skip the next step that prompts us to either take the tour or migrate the data.
Congratulations! You’ve completed the Zoho CRM sign-in.
You’ll now be able to access the dashboard which is covered in the next section.
Step 2: Customize with Zoho CRM Dashboard

The Zoho CRM dashboard is where you can customize snapshots of activities.
You can see:
- Open Tasks – everything happening within your CRM
- Closing This Month – deals about to close this month
- Today’s Leads
Each of the above elements will be explained later in this Zoho CRM tutorial.
If you need for more extensive features, you can upgrade to a premium plan at any time.
On the search bar, you can locate anything within this popular CRM software for small businesses.
The bell icon is where you’ll receive the notifications to keep you updated with everything that’s happening within your CRM and your team.
Next to that Click ‘+’; we have shortcuts to lead, contact, account, deal, campaign, call, task, and meeting.
To the right of shortcuts, we have our calendar, profile (this is where you can add/edit information related to your profile).
On the far right, you’ll find Zoho apps related to sales & marketing, finance, emails & collaboration, and other tools that you can integrate with Zoho CRM.
Now, by clicking on the three dots (on the right-hand side) and then ‘Add Component’, you can add more components or elements to the dashboard.
Just select the module (Activities, for example), custom view (All Activities), and enter the component name (All Activities) – and you’re good to go.
Hit ‘Save’.
As you can see, a new component called ‘All Activities’ has been added to the Zoho dashboard.
From the three dots again, you can reorder these components or view them on full screen.
It’s time to navigate through the Zoho CRM features now!
Step 3: Create Leads

Click on it. This is where you can create and track your leads.
You have two options here – to either import leads (a straightforward process) or create a new one.
For this Zoho tutorial for beginners, we’ll create a new lead.
Select ‘Create a Lead’ and start entering the information such as lead owner, first name, title, phone, mobile, lead source, industry, etc.
You don’t have to add every piece of information – just what’s critical for your business.
Remember to save the information (top-right corner).
As you can see, you’ve just created a lead within our Zoho CRM.
When needed, edit this information at any time, add notes (follow-up reminders, for instance), attachments, open activities (task, meeting, call), closed activities, emails, invited meetings, campaigns, and social information.
Everything that’s been happening with this particular lead can be seen under ‘Timeline’ on the left.
On the right, you’ll find the options to:
- Send an email
- Convert this lead into a customer (by clicking it, you can also create a new deal for this client)
- Edit information about this lead
If you see the three dots, this is where you can:
- Clone the lead (with minor changes made at your end)
- Delete the lead
- Print a preview, and other options
Step 4: Add Contacts
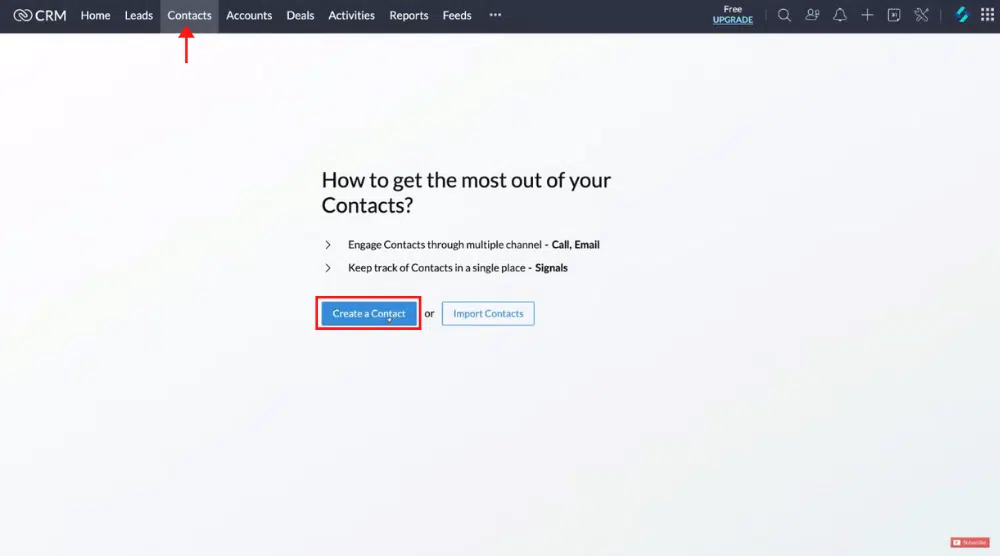
Again, you have two options here – to either import contacts or create new ones.
For this Zoho tutorial for beginners, we’ll create a new contact.
Similar to the process explained for creating a lead, you can create a contact within Zoho CRM.
Step 5: Create Accounts B2B (Business to Business)

Think about your contacts as B2C (Business to customers) and accounts as B2B. This is where we add organizations to our CRM.
To begin, click ‘Create an Account’.
Quickly add all the relevant information and hit ‘Save’.
Step 6: Manage Your Deals (Sales Pipeline)

Here, you can monitor your overall performance. Click ‘Create a Deal’ and enter important information like:
- Deal Owner
- Deal Name
- Account Name
- Amount
- Lead Source
…and so on.
Click ‘Save’. Now, you can edit each stage of the sales pipeline for this deal.
We also have other details if you scroll down, which are very similar to ‘Contacts’ and ‘Leads’.
Within your deals, you can also see ‘STAGEVIEW’ where you’ll see a visual representation of your sales pipeline.
For a particular deal, you can move it to the next stage of the sales pipeline by simply dragging and dropping them.
Step 7: Track Your Activities (Interactions)

This is an important Zoho CRM feature that allows you to track your customer’s interactions.
We have three options here:
- Schedule a call
- Create a meeting (and send it to the participants)
- Create a Task
- Integrate Telephony – unavailable with the free Zoho CRM
You can also filter the activities by clicking the drop-down on your left.
Step 8: Create Custom Reports

Zoho is one of the best free CRM software that allows you to create custom reports and leverage analytics.
For example, you can create a report based on your key accounts, leads by ownership, pipeline by probability, and others.
Step 9: Check Feeds (Activity Feeds)

Here you’ll find interactions with your team, progress on deals, and progress on leads or customers.
It helps you stay updated with what’s going on within your CRM and the organization overall.
Step 10: Create Campaigns

This is where you can create campaigns on Zoho.
However, the free plan has certain limitations. You and your team can also upload your documents to Zoho CRM by selecting ‘Documents’ from the three bars.
You can also connect Zoho Campaigns, which is a free email marketing tool that Zoho offers if you would like to start engaging in email marketing.
We have a complete tutorial on Zoho campaigns 👉 here.
If you navigate over to the three bars again and click ‘Visits’, this is where you can track visitors and leads on your website.
This is, however, a premium feature.
Also, read: Top 5 Free CRM Software for Small Business
Zoho CRM Tutorial for Beginners (Video Guide)
This Zoho tutorial for beginners will help you get started with one of the best free CRM in the market. It’s perfect for small businesses looking to get started with a CRM.
However, if you need more advanced features, you can always upgrade to a paid plan.
Check out our full video here to help you get started with the Zoho CRM.
