Do you want to learn how to create a checklist table in Google Sheets?
Attention all Google Sheets users!
Creating a checklist table in Google Sheets is one of the best ways for a small business to stay organized, track progress, and ensure nothing is overlooked.
Whether managing tasks, planning events, or tracking project milestones, a well-structured checklist can help you skyrocket your business to success!
So, how can you create a checklist table in Google Sheets?
How To Create A Checklist Table In Google Sheets

Fortunately, there are three easy and efficient ways to create a powerful checklist table in Google Sheets to track your essential business tasks, projects, customers, and more:
- Build a checklist table from scratch.
- Select a pre-designed Google Sheets checklist template (or let Gemini AI generate one for you).
- Use the Sheetify CRM Google Sheets template for an all-in-one solution.
These methods allow you to quickly create a tailored, flexible, and effective checklist that meets your needs and helps you stay organized.
So, are you ready to streamline your business workflows and easily manage your to-do lists?
Let’s walk through the exact steps of each method so you can curate beautiful and practical checklist tables.
Read more: How To Add Checked Boxes In Google Sheets?
Why Use Google Sheets For Checklists?
As I mentioned earlier, Google Sheets is a powerful tool for creating and managing checklists. And I’ll tell you why!
Google Sheets is flexible and customizable, offers real-time collaboration tools, is easily accessible, and integrates seamlessly with other Google Workspace Apps.
Additionally, Google Sheets is affordable and easy to use.
Google Sheets also allows you to insert checkboxes, add conditional formatting, and create data validation rules, making your checklists effective, interactive, and visually organized.
Plus, with the ability to automate tasks and share your lists seamlessly with team members, Google Sheets is the ideal tool for personal and professional checklist management!
Read more: How To Create a Table In Google Sheets?
How to Create a Checklist Table in Google Sheets (Manual Method)
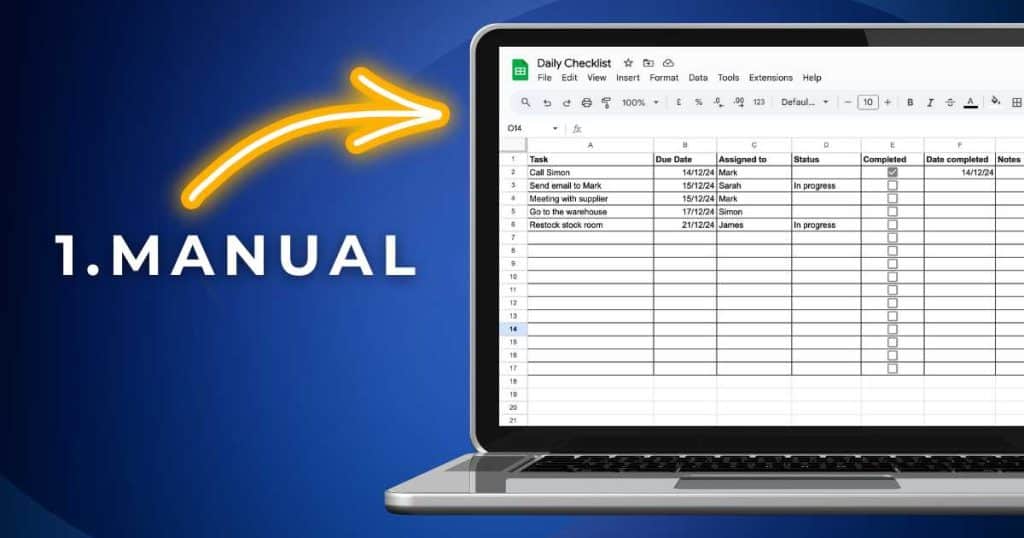
Did you know you can easily curate a customizable checklist table in Google Sheets, thanks to the built-in ‘tickbox’ feature?
Here’s a step-by-step guide to help you create your own customized checklist manually:
- Open Google Sheets and start a new spreadsheet.
- In the first row, enter the headers for your checklist. These could be ‘Task,’ ‘Due Date,’ ‘Assigned To,’ ‘Status, ’ etc. Place each header in a separate row.
- Select the cell where you want your first checkbox to appear (this could be under the header ‘Completed,’ ‘Invoice sent,’ etc.
- From the top menu, click ‘Insert > Tickbox.’ A checkbox will appear in the selected cell.
- Drag the small square at the bottom-right corner of the cell with the checkbox downward to quickly add checkboxes to all the cells below.
- Customize your checklist table by adjusting text fonts, sizes, and colors.
- Enhance readability by adding cell borders and background colors or adjusting text alignment.
- Use conditional formatting to change the look of cells based on whether the checkbox is ticked (completely optional).
- Adjust the column widths and row heights to ensure your content is easily readable.
- Sort or filter your checklist tasks and notes to stay organized.
- @mention team members to assign specific tasks to them.
- Add comments and links or attach additional notes for any further details.
By following these easy steps, you’ll have a fully functional checklist table in Google Sheets in no time, ready for you and your team to track progress effectively!
And the best part is that you can easily share your checklist with your team by selecting ‘Share’ at the top right corner of your Google Sheets spreadsheet.
Read more: Google Sheets Sales Pipeline Template.
How to Create a Checklist Table in Google Sheets (Pre-Built Table & Gemini AI)
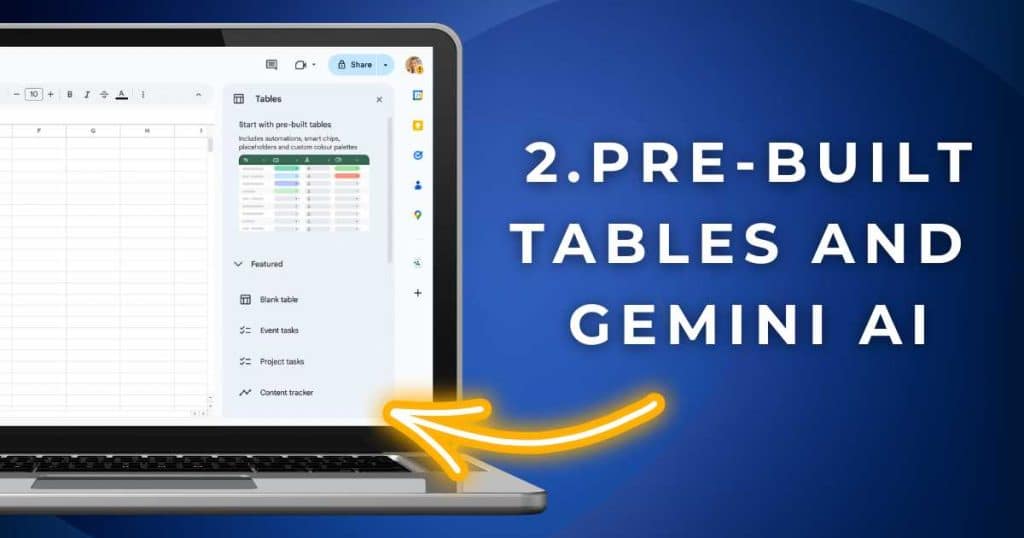
If you don’t have the time or technical expertise to create and customize a checklist table from scratch in Google Sheets, don’t worry!
Google Sheets’s new ‘Pre-built Tables’ feature makes creating a visually appealing and customized checklist easier than ever.
Here’s how to create a checklist table with the pre-built table feature:
- Open a fresh Google Sheets spreadsheet.
- On the right side, look for the ‘Pre-built table’ sidebar.
- Choose either a ‘Blank Table’ or select one of the pre-built tables that best fits your checklist needs.
These pre-designed tables offer a hassle-free way for you to organize everything from projects and events to inventory tasks and more.
Better yet, some of these tables even come with built-in checklist columns, so you don’t have to muck around with adding the tickbox feature yourself.
However, if you choose one that doesn’t, all pre-built tables are customizable! This means it is possible to add the Tickbox feature, as shown below:
- Click the ‘+’ icon next to the last top row in your spreadsheet.
- Select the cell where you’d like the first checkbox to appear.
- From the top menu, click ‘Insert > Tickbox.’
- A checkbox will automatically populate in each cell below the first one you added.
From here, you can customize your table further if it’s not quite what you’re after by changing the colors, adjusting fonts, aligning text, and more.
And for paid Google Workspace users, can you believe that creating a checklist table in Google Sheets is even faster?
Thanks to Gemini AI, Google’s innovative AI-powered assistant, you can streamline your business operations (including creating a dynamic checklist table) in seconds.
To create a checklist table in Google Sheets using Gemini AI:
- Open a new Google Sheet.
- Click ‘Insert > Help me organize’ from the top menu and drop-down list.
- Within the ‘Create a custom template’ sidebar, describe your ideal checklist table through text prompts.
- Make sure you detail the specific headers, information, and tasks you want to include within your checklist table.
- Also, mentioning that you want checkboxes in the table is imperative!
- Once you’ve entered your details, click ‘Create’.
Gemini AI will instantly generate a checklist table with your specified tasks, information, visuals, and placeholder text.
You can then personalize it by adjusting visual elements like colors, borders, and fonts.
And if the table isn’t exactly what you had in mind? No problem!
Simply refine your prompt and click ‘Create’ again. In seconds, Gemini will create another checklist table for you.
Remember, the more detailed you are in your text prompt, the better!
And that’s it! That’s how easy it is to build a customized, fully functional checklist table in Google Sheets using the pre-built table feature and Gemini AI.
Read more about what you can do in Gemini AI and Google Sheets here.
How To Create A Checklist Table In Google Sheets With Sheetify CRM
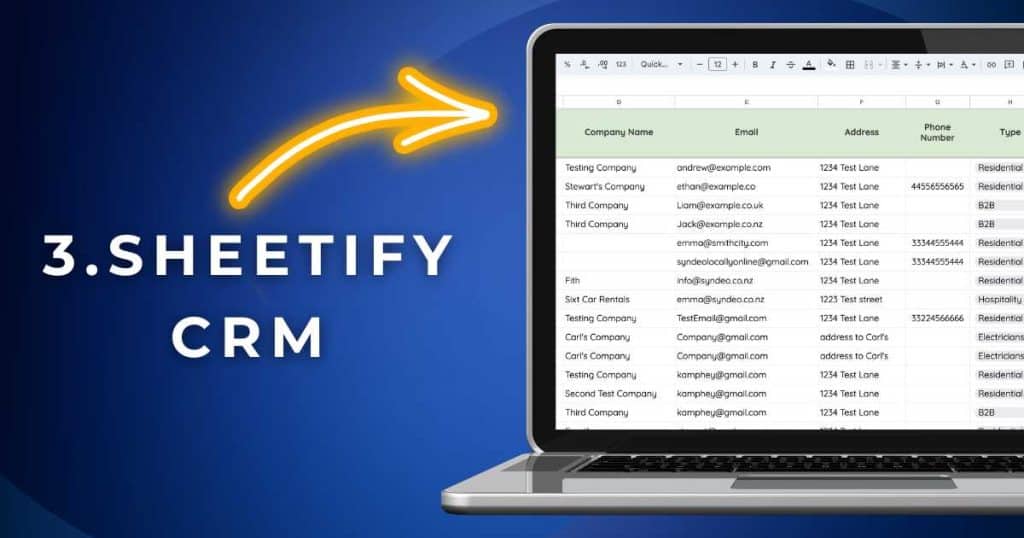
Sheetify CRM is an all-in-one, powerful small business toolkit that helps you manage customer-related activities on one Google Sheets spreadsheet.
Technically, Sheetify CRM is one big checklist table, meticulously organized across multiple sheets to help you manage all aspects of your business operations!
For example, in the ‘Contact & Leads’ sheet of Sheetify CRM, you can easily input key details about your customers, such as:
- Contact information.
- Due dates.
- Priority levels.
- Sales pipeline status.
- Notes.
You can also track whether an invoice has been sent to a client (and whether it has been paid) all in one place.
Plus, simply add specific notes to keep track of important customer interactions.
This is essentially a large checklist table for keeping tabs on your contacts and leads!
In addition, Sheetify CRM’s pre-built checklist tables allow you to manage sales and client tasks directly within Google Sheets.
Sales tasks are tracked in the ‘Contacts & Leads’ sheet, while client-related tasks are organized in the dedicated ‘Client Task’ sheet.
What makes Sheetify CRM even better is that it has built-in data validation rules, conditional formatting, and Apps Scripts—meaning there’s zero manual setup required!
And better yet, thanks to the integrated Apps Script, you can sync customer-related tasks with Google Tasks!
This means you can quickly check off your tasks on the go, whether in Google Tasks or Google Sheets.
For a comprehensive guide on managing your sales and client tasks with Sheetify CRM, check out this detailed video tutorial.
Read more: Best Free CRM For Google Sheets.
What Is Sheetify CRM?
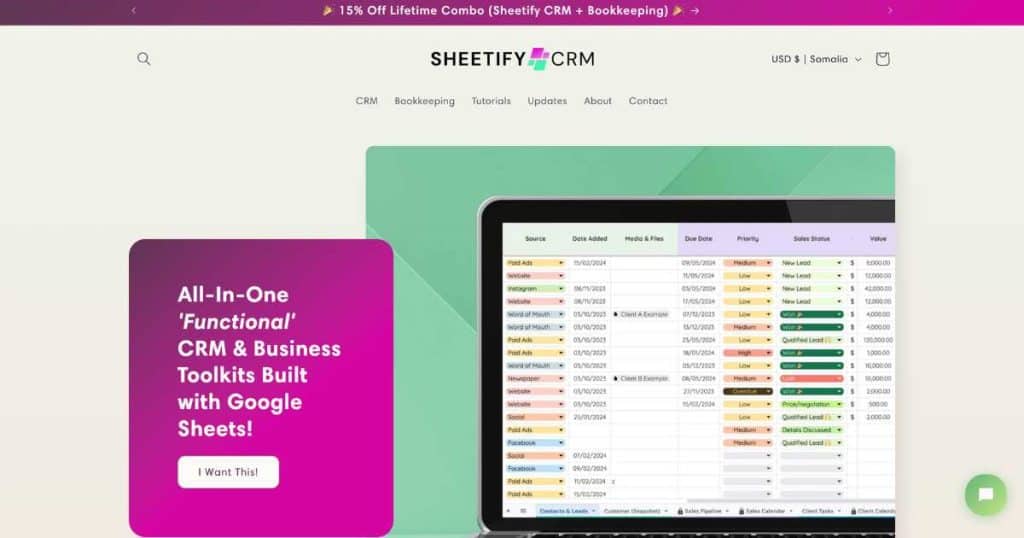
Did you know that Sheetify CRM is so much more than a simple checklist table?
Sheetify CRM is a fully functional Google Sheets template that serves as a complete CRM tool for small and micro business owners.
Basically, Sheetify CRM provides everything small business owners need to efficiently run their operations from one easy-to-use Google Sheets spreadsheet.
With Sheetify CRM, you can effortlessly manage tasks, contacts, sales, leads, customer issues, transactions, and inventory—all within Google Sheets.
But that’s not all! Sheetify CRM also enables you to send email marketing campaigns, track invoices, communicate with clients, and log customer interactions.
The platform even includes a performance dashboard overview highlighting key metrics for your best-selling items, monthly sales, and team performance.
But the best thing about Sheetify CRM? The affordable and full-featured price point.
For a one-time payment of just $67, you’ll gain lifetime access to all of Sheetify CRM’s current and future features and updates!
That’s right, there are no monthly fees, hidden costs, or expensive add-ons.
Sheetify CRM truly is the best cost-effective solution for small and micro businesses looking to centralize their customer management and marketing efforts in Google Sheets.
If you’re ready to optimize your business processes and take your operations to the next level, I highly recommend trying Sheetify CRM—you won’t be disappointed!
Learn more about this versatile Google CRM template here.
Stews Final Thoughts
And that brings me to the end of this guide on how to create a checklist table in Google Sheets!
As you can see, creating a checklist table in Google Sheets is a straightforward and efficient way to stay on top of any task, project, or business venture.
And by using one of the three methods outlined, you can create a flexible checklist that suits your workflow, budget, technical expertise, and business needs.
By customizing your checklist with features like checkboxes, conditional formatting, and more, you can easily track and stay on top of your daily tasks and business operations.
Okay, so now that you have the tools to create the perfect checklist table using Google Sheets, what are you waiting for?
It’s time to streamline your tasks and boost productivity now!

