Table of Contents
In this Slack tutorial for Beginners, we’ll explain how to use Slack completely for free.
After this tutorial, if you do want to opt-in for a premium plan, its Pro plan starts at only $6.67 a month per user. How cool is that?
If there’s free team chat software that strikes a perfect balance between simplicity and functionality it’s Slack.
You can connect with your team members using video calls, voice calls, messages, and organized channels – all in real-time.
The dedicated spaces in Slack where these conversations occur are called channels.
Conversation threading, searchable message history, file sharing, integrations, and intuitive interfaces are some features that your remote and dynamic teams will appreciate.
How to Use Slack?
1. Creating the Slack Workspace
However, for this tutorial, we’re going to focus on the web version of Slack.
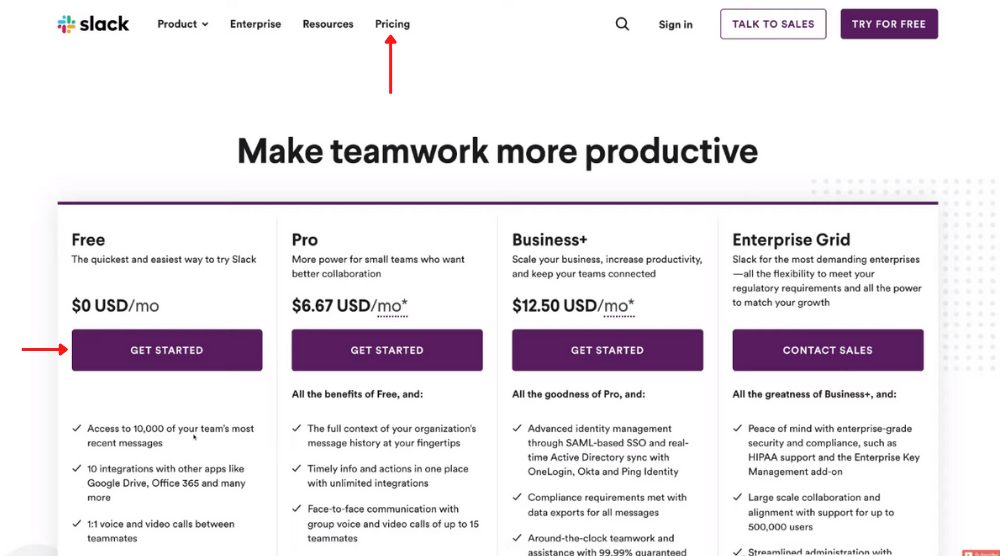
To get going with Slack’s unlimited free plan, head over to Slacks home pages and click on ‘Pricing’.
Under its free plan, you can:
- Access 10,000 recent messages of your teams
- Integrate up to ten apps, including Office 365 and Google Drive
- 1:1 video and voice calls
- Invite unlimited users to engage with you on Slack
These features are sufficient for SMEs.
Click ‘Get Started’.
Enter your work email and hit continue.
Check your inbox for a six-digital code and paste it in the next step.
- In step 1 of 3, enter your company’s name or whatever you want to name your Slack workspace. For this Slack tutorial, we’re going to name it – Stewart Gauld Consulting. If you keep the check box below selected, then anyone within your organization can sign up with their business email and access this workspace. Hit Next.
- In step 2 of 3, add a project that your team is currently working on. In this Slack tutorial for beginners, we’re going to name it – Marketing Plan (Client A). Hit Next.
- In step 3 of 3, you’ll be asked to invite your team members. However, we’re going to cover this in the next section of this tutorial. For now, you can skip it.
Your initial setup is now complete!
Read more : How to use Asana & Manage your Business
2. Adding Teammates to Slack Workspace
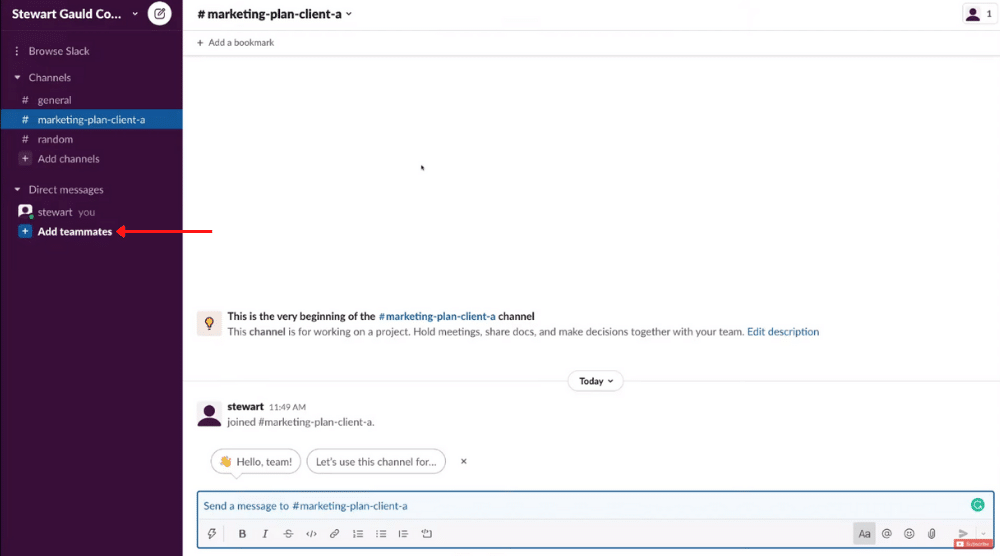
On your left, you’ll locate ‘Add teammates’ – click on it.
Add the email addresses of your team members in the subsequent step.
Alternatively, you may just copy the invite link and send that directly to your teammates.
On the left side of your screen, you’ll be able to see the team members you’ve just added.
Now we want to understand a bit more about how to use Slack and make the most out of it.
Read more : Top 5 Team Communication Software for Small Business
3. Exploring the Features of Workspace (Digital HQ)
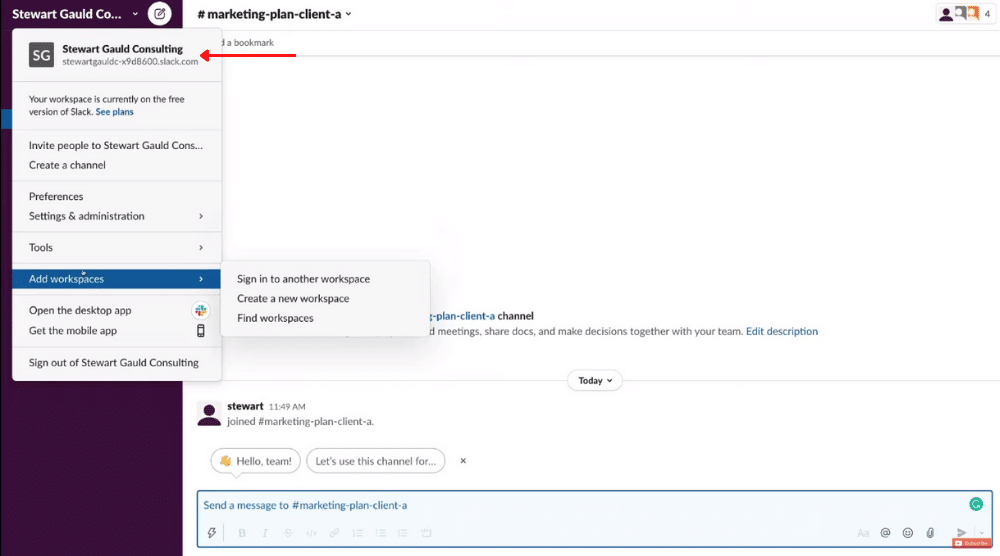
Now small businesses will usually only need one workspace within Slack.
However, if you’re a medium or large enterprise, you may require more workspaces (refer to the screengrab).
Let’s walk you through some of the elements that you see on your Slack workspace.
4. Channels (Chat Groups)
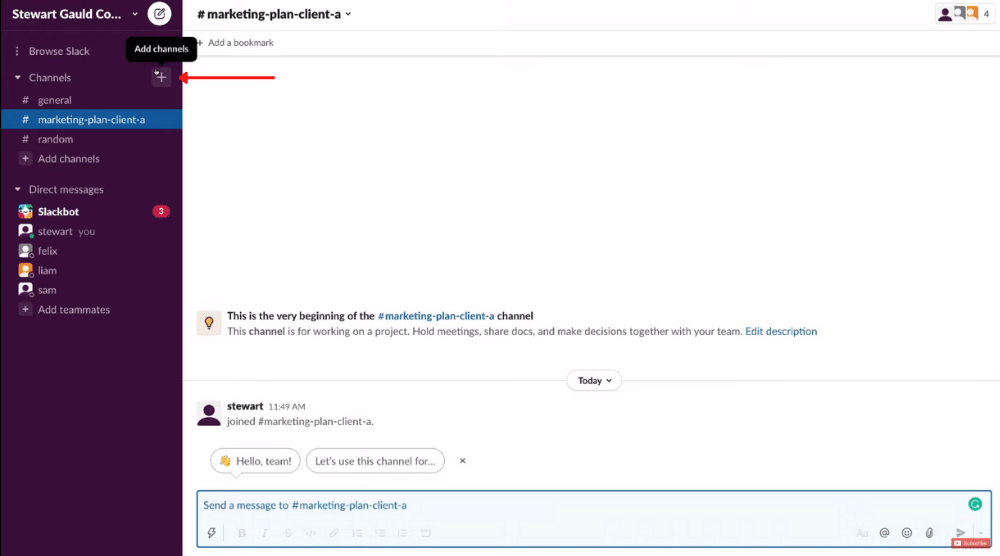
Think of them as groups used to organize and manage the communication for specific activities.
Rather than back-and-forth messy emails, this is a more streamlined communication process.
Below that, you can also see the project created earlier.
To create new Slack channels, simply click on ‘Add channels’.
If you’re a large enterprise, you can create multiple channels for sales, customer support, marketing, product development, design, and any team for that matter.
Apart from that, you can choose to make each Slack channel public or private by using the toggle.
In the private mode, only the teammates who’ve been invited to this channel can see and engage with it.
However, if you leave it public, then everyone within your workspace can see and engage with this channel.
For this Slack tutorial for beginners, we’ll set the channel to private.
Once you’ve added all the details, come down and click ‘Create’.
Since you’ve made this channel private, you’ll need to add team members who can access it, in the next step.
On your Slack workspace, if you see a lock icon next to a channel, that means it’s private.
If you see the # sign, then anyone within the workspace can access it.
5. Messages & Chat
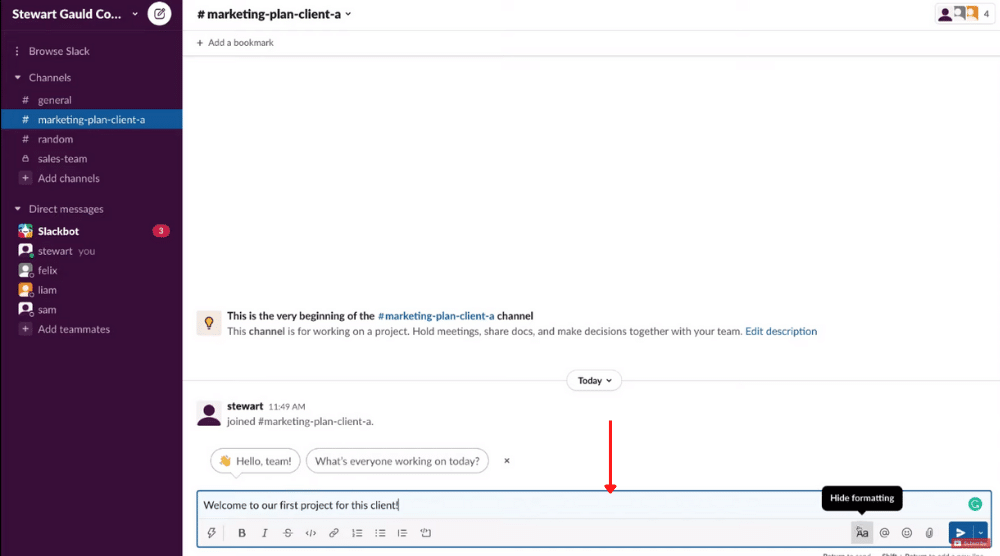
Select a channel to begin and enter your first message in the chatbox.
Below your message, you’ll notice the many formatting options.
On the right-hand side, you can hide formatting, mention someone, play around with emojis, and attach files.
You can either send this message now or schedule it for later.
Since this is a public channel, everyone in your Slack workspace can see this message.
When you hover your cursor over the message, you’ll see a few actions on the right-hand side.
Those are:
- Completed
- Taking a look
- React (with emojis)
- Reply in thread
Similar to email threads, Slack threads are useful if you have many people in a single channel.
If they’re all talking about different things, then you can start specific threads with each message to stay organized and relevant on specific subtopics.
To notify a team member, all you need to do is type in ‘@’ in the chatbox and select the one you wish to notify.
Remember, you can also notify everyone at once if needed.
By typing the forward-slash (/), you can generate shortcuts to use in your message.
These shortcuts can also be accessed by clicking the lightning bolt.
Now that we understand the chat capabilities within Slack, we can now move on to the third area that makes up Slack.
This brings us to the next important feature of this free team chat software, that is, direct messages.
6. Direct (Private) Messages
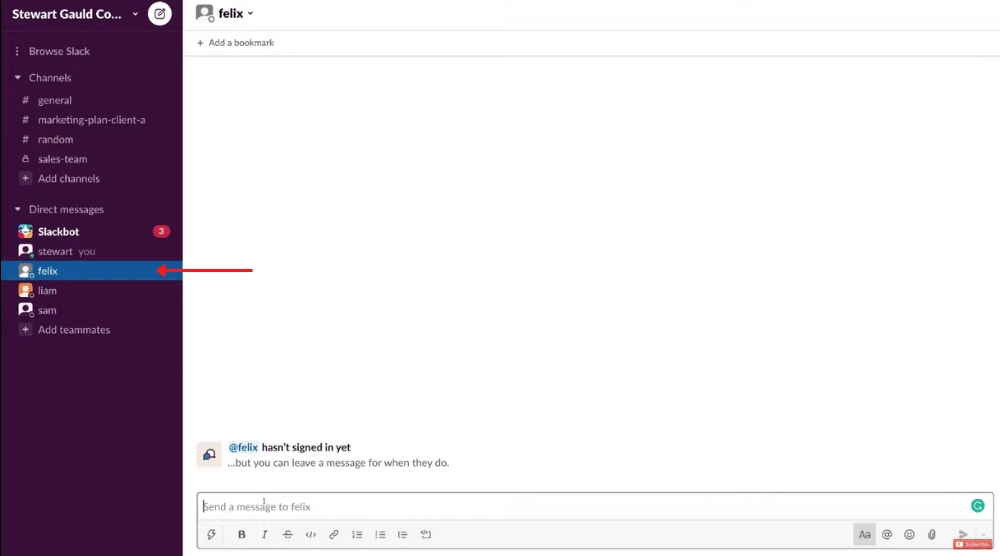
Similar to group messages, you’ll find the formatting and other options in direct messages as well.
7. Slack Search Feature
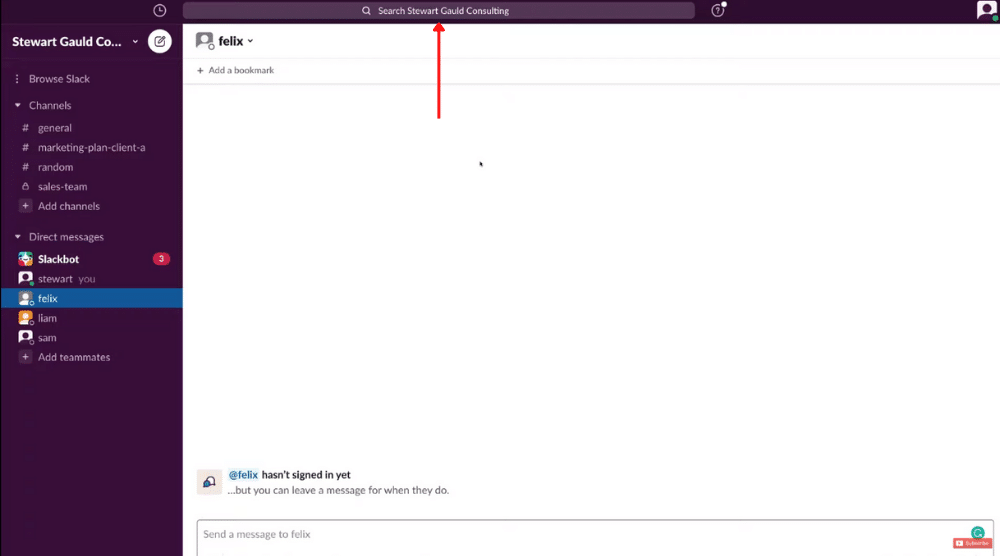
At the top, you’ll find the search bar, navigate to it and enter the information you’re trying to locate. It’s that easy!
8. App Integrations
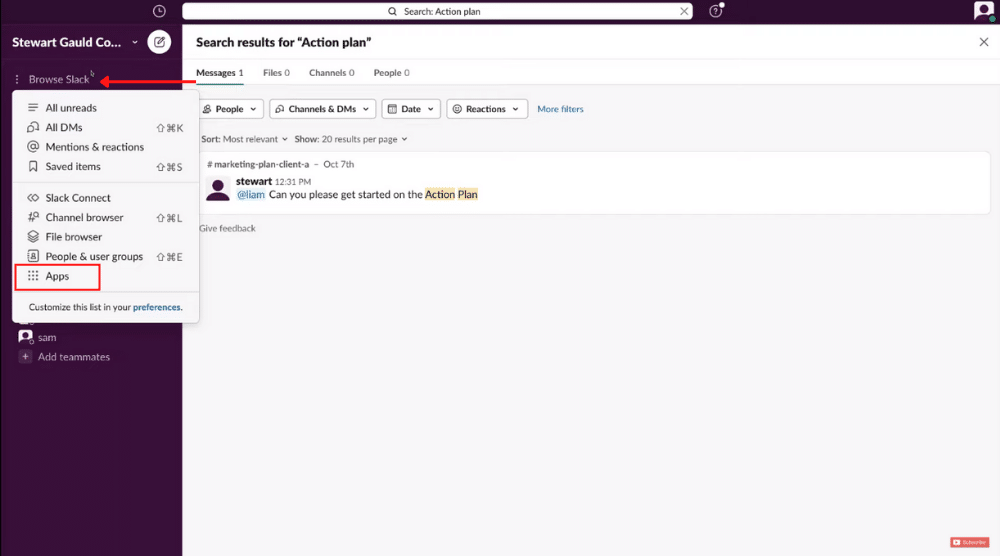
Click ‘Browse Slack’ on your left and select ‘Apps’.
This is where you can start streamlining your business communication further.
Select the apps that you use in day-to-day business.
For example, you could integrate Google Drive with Slack.
When you’re communicating with team members in channels or direct messages, you can select files stored in Google Drive.
9. Preferences & Settings
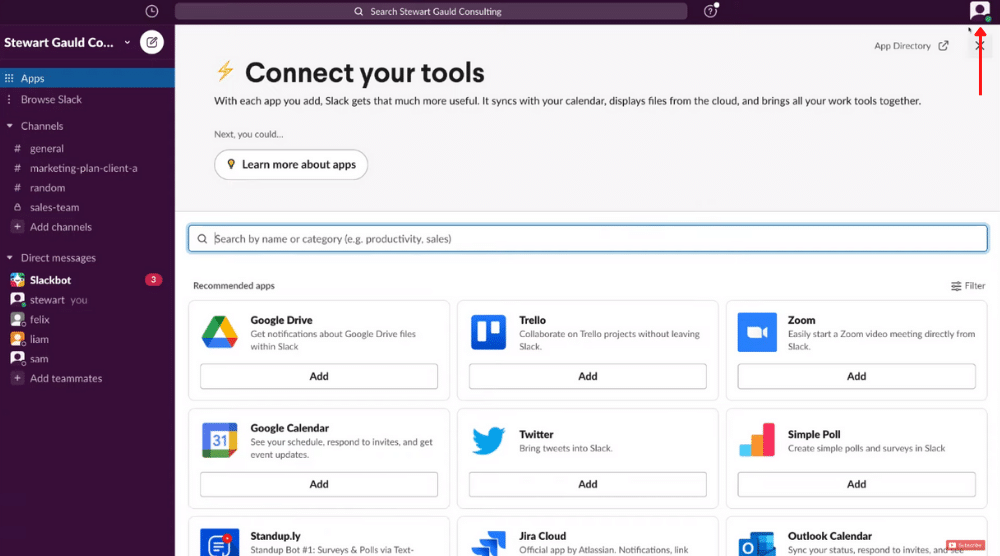
To do that, select your profile (top-right corner).
Here you can:
- Update your status
- Pause notifications for a specific time period
- Customize your profile
- Set your preferences – this is where you want to take your time to understand each option and configure your notifications.
Ready to Streamline Your Business Communication with Slack Tutorial? (Video Guide)
Slack has transformed the communication game.
Rather than dealing with messy emails, different channels, and tools to collaborate and engage with your teams, Slack offers an all-in-one digital HQ where you manage multiple workspaces and communication channels through an easy-to-use interface.
This makes Slack an ideal communication tool for remote teams.
Its unlimited free plan is ideal for SMEs looking to further streamline their communication.
We hope that this Slack tutorial helps you get the most out of this free team chat software.
If you’re interested in watching our full video Slack tutorial for beginners, you can find this down below!
Enjoy!

