
Table of Contents
What Is StreamYard?
This StreamYard tutorial is a powerful and free live stream software that allows you to simultaneously live stream across multiple channels.
Now, in this StreamYard tutorial, we’re going to reveal how to live stream for free!
How to Live Stream for FREE with StreamYard?
StreamYard is one of the best live streaming platforms on the market, allowing you to simply stream directly to LinkedIn, YouTube, Facebook, Twitch, and other platforms.
With just a few clicks, you can go live with guests without any hassle.
Not just that, you can live stream on multiple platforms at once using StreamYard.
Not surprisingly, it has become a go-to live video streaming software for many professionals and businesses.
What’s more is, you can brand your broadcasts using your own overlays, colors, logo, videos, GIFs, and images – without needing any prior experience.
Step 1: Create Your StreamYard Account

*The link above is an affiliate link, which means we will get a commission if you upgrade to a paid plan (with no extra cost to you). This helps support our education-based website and we thank you in advance!
Head over to StreamYard here if you haven’t done so already.
You’ll find the free plan under ‘Pricing’. Notice the features and limitations of the free plan offered by StreamYard.
One of the major limitations is that there will be a StreamYard logo in the corner of your live streams.
Apart from that, you have a streaming limit of 20 hours per month.
To remove the StreamYard logo, you’ll need to upgrade to the Basic plan, which is $20 per month.
The paid plan also gives you unlimited streaming along with other features like pre-recorded streams, custom RTMP destinations, etc.
However, to get started with the free plan:
- Click ‘Sign up’ under it
- Enter your email ID
- Click ‘Get login code’
- Locate the 6-digit code in your inbox and add it in the next step
- Click ‘Login’
You’ve now successfully completed your StreamYard login.
Step 2: Connect your Facebook Group

- Select ‘Small business’ in the subsequent step since we’re creating a live streaming account for the purpose of engaging with our audience. Click ‘Onward’.
- Add destinations that you want to integrate with StreamYard. For this StreamYard tutorial, we’ll select ‘Facebook Group’.
- Proceed with the steps that StreamYard guides you through to connect with your Facebook group.
- Open Facebook Group Settings and search for StreamYard.
- Select the StreamYard app and click ‘Add’. Your StreamYard app is now connected with Facebook
Head back to StreamYard and you’ll be able to see the Facebook group under ‘Your destinations’.
You can now stream directly into your Facebook group. Simply click ‘Add a destination’ to integrate another channel with this live streaming platform.
Step 3: Create Broadcasts (Live Streams)
Before we create our first live stream, you can see that we have five hours of recording storage in the bottom left corner.
But you can leverage this feature only for the first seven days. If you need this feature after that period, you will need to upgrade to a premium plan.
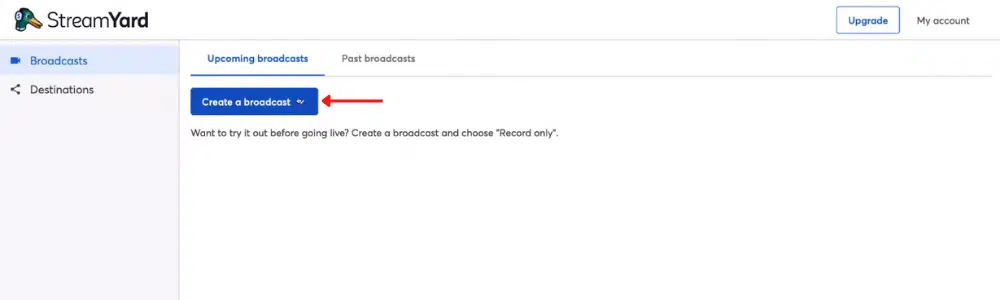
Click ‘Create a broadcast’ and select ‘New broadcast’ from the drop-down menu. Now, make sure that your channels are selected (Facebook group in this case).
You also have the option to choose ‘Record only’, which is great if it’s your first time live streaming.
Now, go ahead and:
- Create a title for your new broadcast
- Write a description
- Make sure that the option called “Add comment instructions to my post” is selected
- You can also check the box in front of ‘Schedule for later’ if you like
- Upload a thumbnail image for your livestream
- Schedule a start time – this is especially great for Facebook since people in your Facebook group will receive a notification of the upcoming Livestream
- However, to start broadcasting right now, skip the scheduling step
- Click ‘Create broadcast’
Step 4: Confirm Audio & Video Settings

Here you can:
- Mute/unmute your audio
- Stop/start cam (if it’s stopped, your video feed will be replaced by your avatar). By clicking ‘Edit Avatar’, you can add an additional image that you want to use as your avatar
- Click ‘Cam/Mic’. Here you can select an external camera if you like or an external mic/computer mic.
- We recommend keeping ‘Echo cancellation’ turned on.
- Check the box in front of ‘Automatically adjust mic volume’.
You also have a green screen option with this live streaming platform.
Now, you may change the display name if needed. And, then select ‘Enter studio’.
Also Read: Best Video Editing Software for Beginners
Step 5: Navigate the Streaming Features

On the left side of your screen, you can see that you’re not part of the stream yet. To do that, you have to click ‘Add to stream’.
Below the screen, you can choose your preferred layout:
- One person on the screen
- Two-people screen
- Two-people screen but with background
- Three-people screen, with the main person on the left and everyone else on the right
Feel free to play around with different layouts depending on the number of people attending the live stream.
Apart from that, you’ll find other options at the bottom of your screen, including:
- Mute
- Stop cam
- Cam/Mic
- Share – use this to share screen or video file
- Invite – with the free plan, you can have six people on screen at once. If you wish to add more people, you can simply upgrade your plan anytime. Just copy the invite link and share it via Messenger, Email, or Gmail
- Leave studio
In the screen share option, you’ll find the options to share an entire screen, window, or chrome tab.
For this StreamYard tutorial, go ahead and select a chrome tab. Hit ‘Share’. Now, click ‘View tab streamyard.com’. And, as you can see, we’re now screen sharing the chrome tab.
Simply navigate up to the ‘View tab’ again to view it in full screen.
Again, check out the different layouts to see what best works for you. In the bottom-left corner, you can also remove yourself – the other screen will now take up the entire space of the broadcast.
Therefore, on StreamYard, you can add additional screens that you can switch in and out of during your broadcast. By clicking ‘Add to Stream’, you can add yourself to the broadcast again.
Step 6: Turn on Comments

You want to keep this option turned on since this allows you to see your ‘viewers’ comments.
Click on those comments if you want to display them on the screen for everyone to see.
Step 7: Create a Banner

Here you can create any kind of banner you like. For instance, you can add a call-to-action (CTA). Check the box that says “Scroll across the bottom (ticker)”, and then click ‘Add banner’. Navigate up to your banner and click ‘Show’.
You’ll now see a moving banner at the bottom of your screen. By clicking ‘Hide’ you can hide this banner from your live video streaming.
Step 8: Explore Branding Options

You can do that by selecting ‘Brand’ below ‘Banners’ on your right. Here you can change the theme to minimal, bubble, or block.
Unfortunately, you cannot upload your logo, add an overlay or a custom background unless you decide to upgrade your StreamYard plan.
You can, however, upload video clips before your Livestream begins (a countdown, for example).
Even though there are quite a few limitations with the free plan, learning how to use StreamYard is important to start live streaming to various platforms simultaneously.
Also, you can choose to enable or disable the option called ‘Show display names’.
Also Read : Canva Free Logo Maker
Step 9: Try Private Chat

This is where you can chat privately with the guests that you have on your broadcast.
Step 10: Go Live

Next to that, you can ensure that you’re ready to go live on the right channel. Simply click ‘Go Live’ to start live streaming.
StreamYard Tutorial for Beginners (Video Guide)
With this, we wrap up our StreamYard tutorial for beginners. This tutorial will help you start live streaming simultaneously across platforms, completely for free!
Check out our full StreamYard video tutorial down below to help you get up and running with StreamYard! Now go share your ideas, business, projects, or services with the world!
