Webflow is an all-in-one website building platform that allows anyone to build a professional website with a unique and easy visual building experience.
It is a popular website builder due to its modern approach to web design as well as providing affordable plans to businesses, small and large, looking to expand and scale without encountering design, traffic, or feature limitations.
How to Use Webflow?
In this Webflow tutorial for beginners, we’ll explain how to use Webflow to build your own professional website.
By the end of this tutorial, you’ll be fully equipped with the information you need to determine if Webflow is the right website builder for your website and business requirements.
1. Getting Started
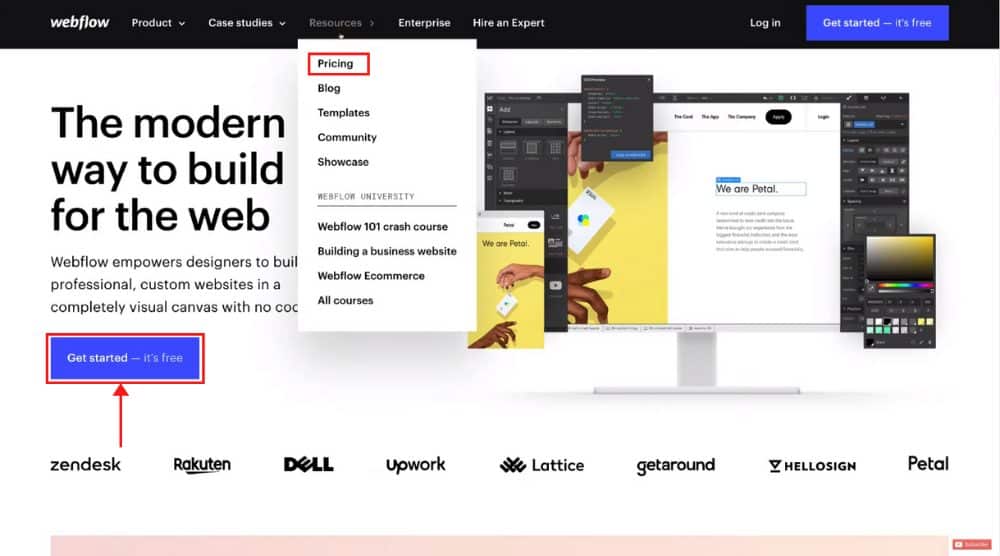
Before getting started, navigate over to ‘Resources’ at the top and then select ‘Pricing’.
If you navigate down the page, you can see ‘Site plans’.
Here, you will see:
- Basic plan: $12 per month
- CMS: $16 per month
- Business: $36 per month
- Enterprise: tailored to your requirements
If you navigate back to the top, you’ll see the option ‘Get started – it’s free’. Click on it.
Go ahead and create your account. Now we’ll dive right in and get started with this Webflow tutorial.
2. Webflow Dashboard
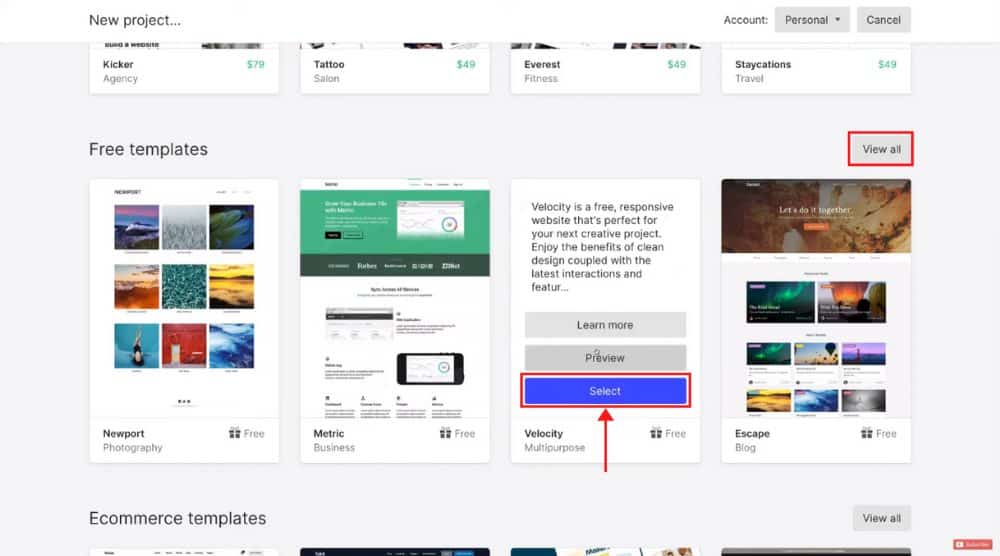
As a beginner, it’s better to choose a premade professionally-designed template rather than building from scratch. Now, scroll down to see ‘Free templates’.
These give you a good starting point by giving you access to professional blueprints that you can customize the way you want.
Click ‘View all’ to see all the free templates. However, what we’re going to do is select one of these to get started right away.
You can also preview each of these templates if you like.
To get started with a template, hit ‘Select’ on that template and then name your new website project.
After that, click ‘Create project’. Give Webflow a moment to load and once it does – this is where we can start designing website pages from this template structure.
3. Visual Block Builder
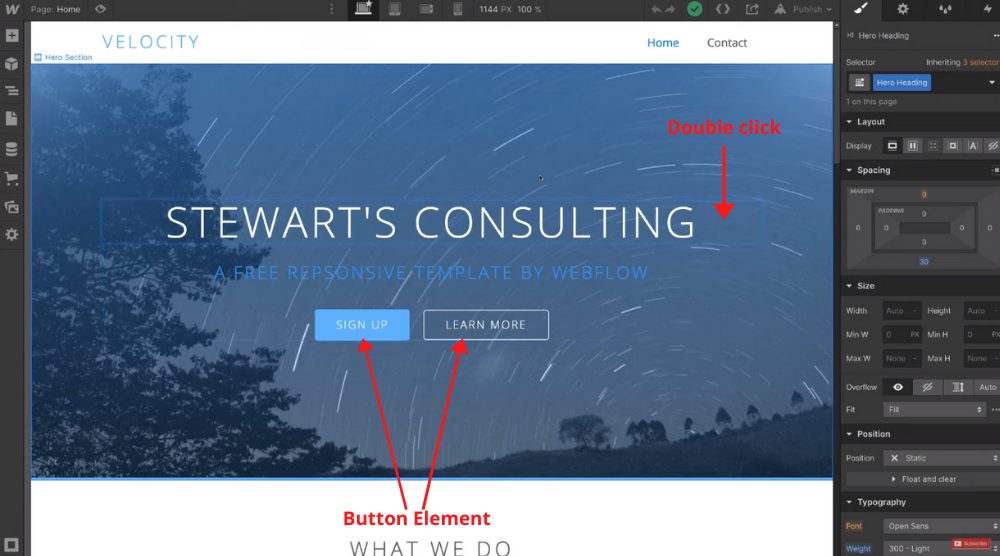
However, what Webflow has done is package the frontend code into a user-friendly visual building interface.
This means that you do not need to play around with any complicated coding.
Now, Webflow pages are made up of boxes and this is called The Box Model.
Let’s go ahead and break down the structure of Webflow pages in this Webflow tutorial for beginners.
Your Webflow pages are made up of sections. And within those sections we have containers. And within the containers, we have columns and then elements.
Elements are the building blocks of your website.
They could be text elements, title elements, button elements, videos, forms, and images.
Once you understand the box structure of Webflow, it’s a lot easier to build your website.
To edit each of these elements, all you need to do is double click, then simply highlight and type anything to replace the default text.
To stop editing the specific element, click out of the element.
Similarly, if you want to edit the button element, you need to double click, delete the text that’s already there and then type in the new text.
4. Style Options
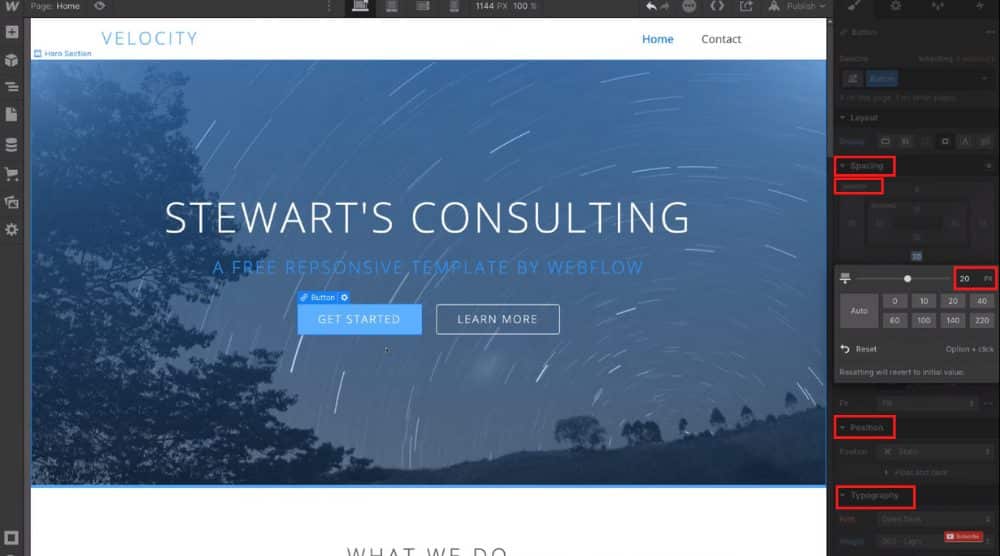
Every time we select one of these elements, the style options appear on the right-hand side.
For example, we have a button selected here, what you can do is change the spacing, margin, or padding on the right.
Think about the margin as the space around the button and then the padding as space within the button.
For this Webflow tutorial, if you change the margin down below the button, you can simply select ‘20’ and that’s going to create space below the button.
Now, if you click outside of the margin settings, you can do the same with the margin above.
If you navigate down, you’ll find the sizing options for the button.
We also have ‘Position’ and ‘Typography’. Under typography, you can change the font, weight, size, color, alignment, style, and more.
You can do this for any button, text element, or title element.
5. Create Elements
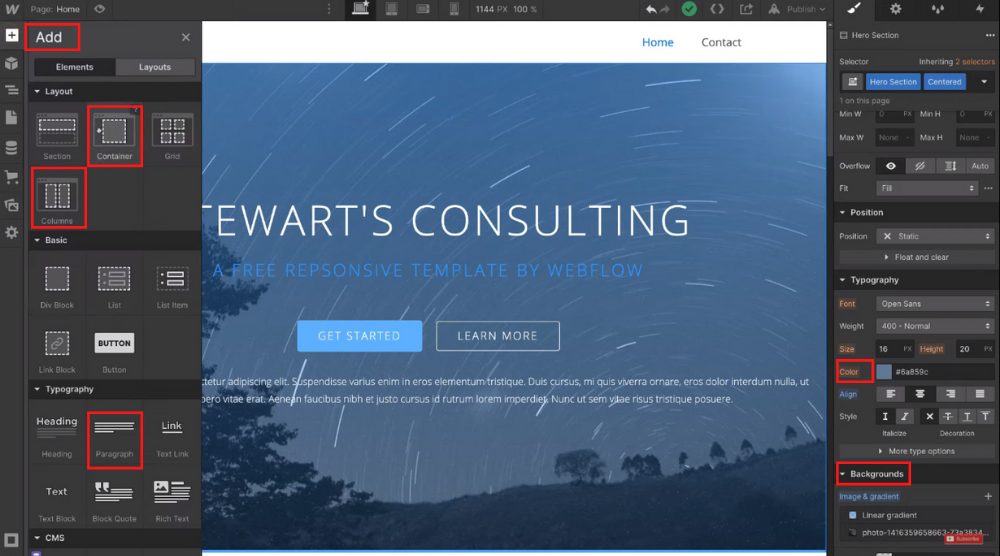
For example, if you want to add a paragraph, then simply select a paragraph element, and then drag and drop that block below the button or wherever you like on your website page.
You can navigate over to ‘Color’ and change the font color, for example, we will change the color to white.
Now, back to our website, you can see that this paragraph is the full length of this website page.
To tidy this up, we can add columns. Click ‘Add’ again and then select a ‘Container’.
Drag this below the paragraph as a comparison and then if you navigate back over to ‘Add’, drag and drop a paragraph element again within the container.
You can see that this structure is a lot better. You can also drag and drop a button element within the container and below the paragraph.
Over here you also have some options. For example, you can add an internal link that takes people to another page of this website.
But for this Webflow tutorial for beginners, we’ll exit out of that now.
To delete an element, all you do is select a specific element, right-click, come down, and hit ‘Delete’.
You can quickly change the color of this text to white. Now, we can also change the background of this section or container.
For example, if you click a container, navigate down to ‘Background’ on the right, and change the background color if you like.
If you exit out of that, you can also add a gradient or an image. The same goes with the section background.
You can remove the existing background image and click on ‘+’. Navigate over to ‘Choose image’ and then select an image from the left-hand side or you can upload your own background image and add an overlay.
So basically, you can scroll down the page and select any of these elements, containers, or sections and start editing them with the formatting options available on the right-hand side.
6. Pages
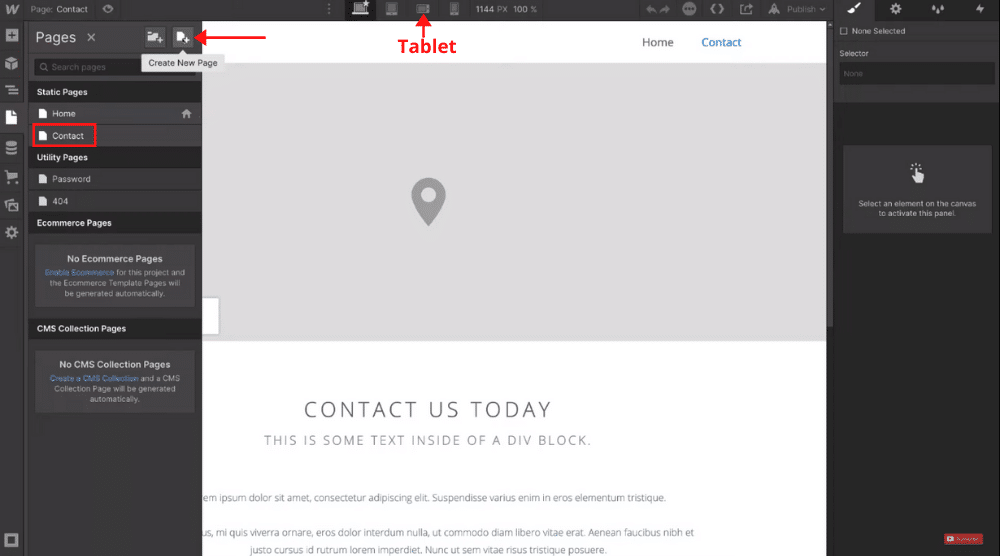
For example, you can click the ‘Contact’ page, you’ll be taken to the Contact Us page. You can also add new pages by simply clicking ‘Create New Page’.
We will head back to our Home Page. In Webflow, we can also preview and customize how our website pages will look across devices.
For example, if you select the tablet icon, you can see what your website page would look like on a tablet.
If you like, you can change some of these elements for tablet and mobile. For example, you can reduce the size of this title text by coming down to ‘Typography’ and then selecting a smaller size.
If you navigate up to mobile, you can do the same for mobile because the title text looks too big for mobile.
From the styling options on the right, you can change the text size to 30, for example.
You want to make sure each website page is responsive across devices. Once you have completed each website page, simply navigate up to ‘Preview’ on the top-left corner. And that’s going to show you a preview of what your website is going to look like across devices.
That’s a brief overview of how you can get started with Webflow’s visual builder. From the top-left corner, you can head back to the dashboard.
You will also find another option called ‘Editor’. When your website is live, simply click on ‘Editor’ to edit your elements when the website is live.
To publish your website, hit ‘Publish’ on the top-right.
You can either select the free branded domain that you get with Webflow or you can choose a custom domain.
So, if you already have a custom domain with a different provider, you can link that with Webflow or you can purchase a custom domain through Webflow.
We’ll keep the free domain selected for this Webflow tutorial.
Come down and click ‘Publish to Selected domains’. However, since this is just a test website, we will unpublish it for now.
7. Collaborate / Add Users
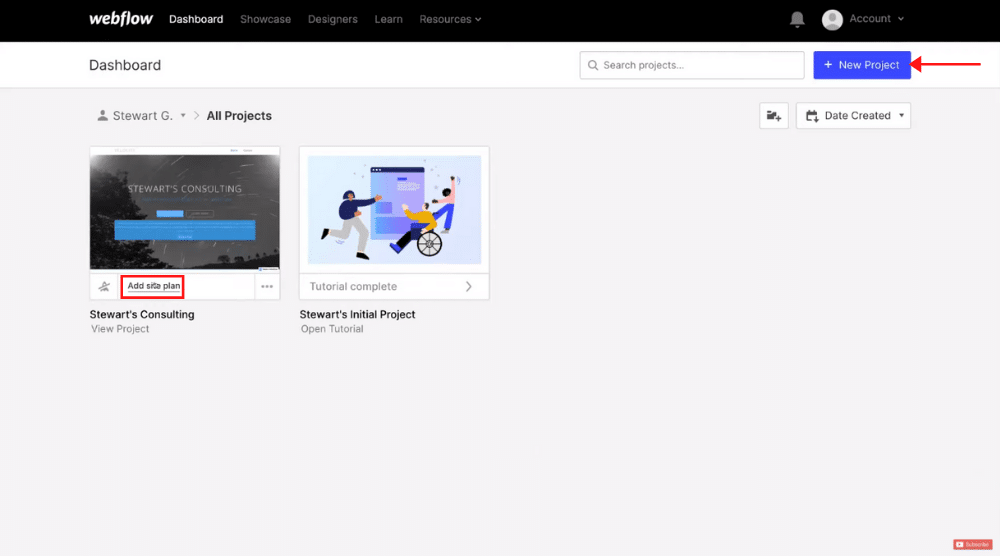
If you’re ready to go live with your website and ready to add a custom domain, what you can do is click ‘Add site plan’.
Or if you want to further customize your website, then just click ‘Open Designer’.
You can click ‘Add site plan’ and then select the plan that works best for your business and website requirements. Then you can also click on ‘Editor’ and this is where you can collaborate on Webflow with your team.
Also, read: Weebly Tutorial for Beginners
Webflow Tutorial for Beginners [Video Guide]
Add other people that you want to collaborate with on Webflow.
That is everything we wanted to cover in this Webflow tutorial for beginners.
This should be enough to help you decide if Webflow is the right website builder for you.
If you’re still looking to learn more about Webflow, you can watch our video tutorial below where we have explained everything steps by step in a visual and easy-to-follow guide.
