Table of Contents
A popular, easy-to-use website builder, Shopify offers its users custom and automatic discounts.
You can easily generate discount codes to stimulate your online store and gain more customers for your business.
How to use Shopify Discount Codes?
In this tutorial, we’re going to share everything you need to know about using Shopify discount codes in 2023
You’ll also learn how to use these offers in your marketing activities.
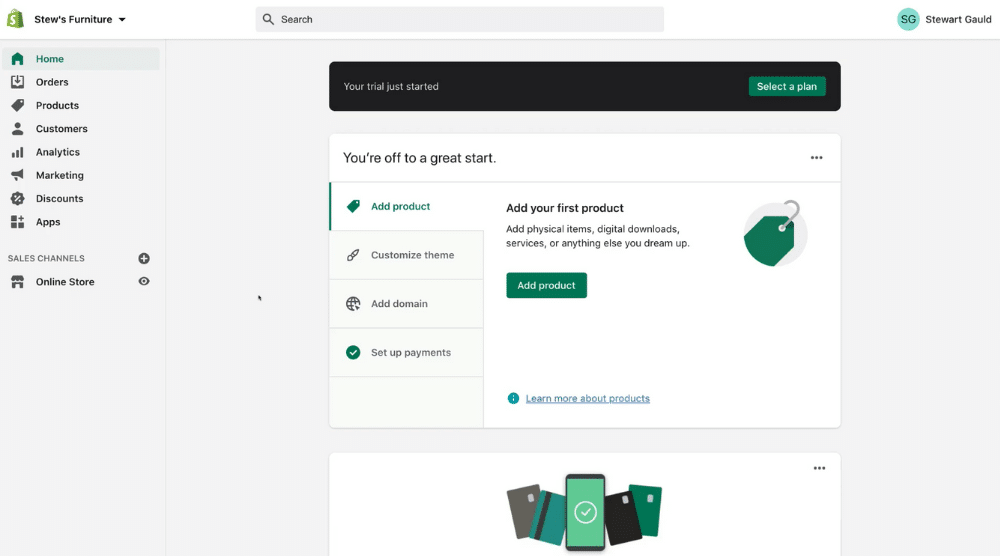
Step 1: Shopify Dashboard

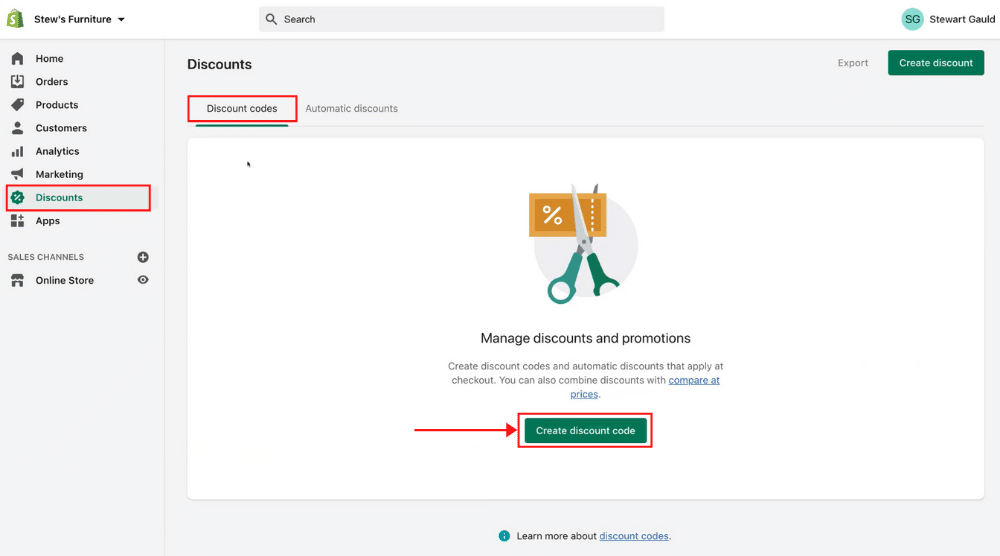
Next, you can simply navigate over to ‘Discounts’ on your left. Under ‘Discounts’, we have ‘Discount codes’ and ‘Automatic discounts’.
In this tutorial, we’ll learn how to use Shopify discount codes and automatic discounts.
Read more: How to Install Facebook Pixel on Shopify
Step 2: Discount Codes

On Shopify, you can create and send discount codes to your audience.
How you want to market these discount codes is completely up to you.
However, once a customer or a potential customer reaches the checkout on your Shopify store, those individuals can apply the voucher here. And depending on how you set up your discount codes, those individuals will see a discounted price.
To create a unique discount code that you can use in your promotions, click on ‘Create discount code’.
Now, you can either generate a code or create your own unique code. We recommend creating your own unique code depending on the type of promotion you want to create.

Now, come down and select the type of discount that you want to create amongst the following options:
- Percentage
- Fixed amount
- Free shipping
- Buy X get Y
We want to give 30% off when someone uses this Shopify discount code, so we’ll select ‘Percentage’.
Next, under ‘Discount value’, we’ll type in ‘30’ as this is the value of our discount code in percentage.
Below ‘Value’, you can choose which products your discount code applies to.
For this Shopify discount code tutorial, we’re going to select ‘All products’. Apart from that, you can select ‘Minimum requirements’ (quantity of items or purchase amount).
We’ll keep it ‘None’ for now.
You can also select the minimum quantity of items and see the preview on your right.
Under ‘Customer eligibility’, you can select a specific group of customers or specific customers if you already have an established customer base.
Let’s say you have a specific customer that buys a lot of products from you monthly, what you can do is find that customer by typing in their name or email.
Then your particular discount code will only apply to that customer. However, for this tutorial, we want everyone to be eligible to use this discount code because we want to use it in our marketing promotions.
Next, you can also limit the number of times your Shopify discount codes can be used or limit to one use per customer. Below ‘Usage limits’, we have ‘Active dates’.
Here, you can set a start date and an end date. However, if you want to activate the code right away, you can leave everything as it is.
As soon as you save these changes, your discount code will be activated immediately. Before you save the code, ensure that your summary is correct.
Hit ‘Save discount code’ when you’re ready for it to go live. You can see that the code is now active.
Down below you can see the number of times this code has been used. To share the discount code via email or social media channels, click on the ‘Get shareable link’.
Another method is to copy your discount code and then integrate this code into your marketing material.
For example, if you engage in email marketing, you can add this discount code to your email marketing campaigns. Moreover, you can use this discount code during product (or new service) launch activities.
Read more : How To Connect Shopify to Facebook Shop
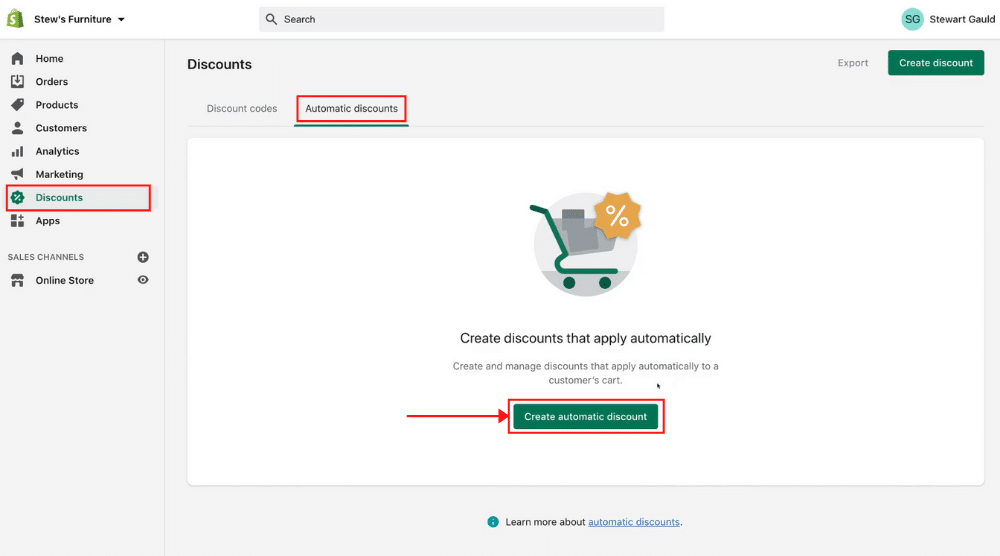
Step 3: Automatic Discounts

These are codes that are automatically applied to the customer’s cart.
For that, we’ll click on ‘Create automatic discount’ on the dashboard. Now, you need to enter the name of your Shopify discount. We’ll name it ‘30% Off Summer Sale’.
Here we have discount types again. Select ‘Percentage’.
Similarly, add value (30%), select which products it applies to (all products), and select minimum requirements (a minimum purchase amount of $1).
We want this automatic discount to be active as soon as we save changes so we’re not going to select any start date or end date. Make sure your overall summary is correct before you come down and hit ‘Save discount code’.
Similar to Shopify discount codes, you want to actively promote the automatic discount in your marketing materials.
You can also select your discount, navigate up to ‘Actions’ and delete it if you like. Other options are disabling or enabling your discount code. You can perform these actions for both discount codes and automatic discounts.
If you didn’t select an end date for your discount code, you can disable it from your dashboard.
Apart from that, you can also see your Active, Scheduled, and Expired discount codes on your dashboard.
Read more: How To Install TikTok Pixel on Shopify
Video Tutorial on Shopify Discount Codes
That is everything we wanted to cover in this brief tutorial to help you understand how to use Shopify discount codes and automatic discounts.
If you are a beginner and want to learn how to generate Shopify discount codes, automatic discounts and how to effectively use these discount codes, then I have a video tutorial to walk you through the above process step by step.
Enjoy!

