
Table of Contents
Do you have a Google Sites website and want to learn how to add Google Analytics so you can track how well your website is performing, but don’t know where to start?
You’ve come to the right place!
In this Google Analytics tutorial, we are going to walk you through how to set this up so you can easily measure and track your Google Sites website performance.
Google Sites is one of the easiest free website builders available that you can easily access and set up right inside your Google workspace account.
We love Google Sites for beginners, as it’s convenient, easy to set up and straight-forward to use.
Additionally, they provide a range of stunning and sleek pre-made templates, or you can choose to make your own website from scratch.
We recommend using Google sites if you’re a small business with a smaller budget wanting to launch your website online.
Google Analytics is another powerful product within the Google umbrella where you can measure your website’s performance, traffic, visitor behavior, and more.
This Google Analytics tutorial will focus on how you can add Google Analytics to your Google Sites website, enabling you to start tracking your website’s analytics and online performance!
Read more: How to use Google Workspace for beginners.
How To Add Google Analytics To Google Sites?
By connecting Google Analytics to your Google site’s website, you’ll be able to gain a deeper understanding of where your business is thriving, as well as identify areas where you can improve.
Let’s launch into this Google sites and Google analytics tutorial, and show you how you can connect the two platforms to start measuring your website’s performance!
1. How To Get Started With Google Sites

To connect Google Analytics to Google Sites, the first step is to access your Google sites (and your website):
- Simply head over to your browser.
- Type in sites.google.com.
If you currently don’t have a Google Sites website and want to create one for your small business, check out our beginners tutorial where we walk you through how to create a website with Google Sites here.
Once you’re inside your Google Sites account:
- Head over to the back end of your website.
This is where you can make customizations to your Google site (see screengrab).
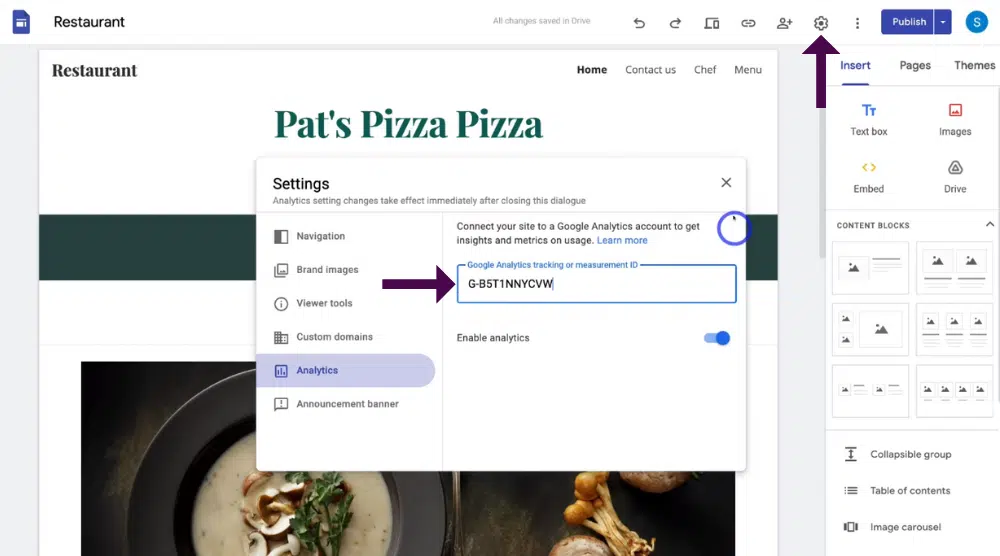
- Navigate up to the ‘Settings’ icon in the top right-hand corner.
- Select ‘Analytics’.
- Click ‘Enable Analytics’.
- Head back over to your browser.
- Type in analytics.google.com.
2. How To Setup Google Analytics
That’s going to take you to your Google Analytics account.
If you already have a Google Analytics account, you’ll then get redirected to your dashboard
If not from there, you’ll simply need to sign up for Google Analytics.
You can read our beginner’s guide on How to use Google Analytics.
If you’re signing up for the first time, follow these easy steps:
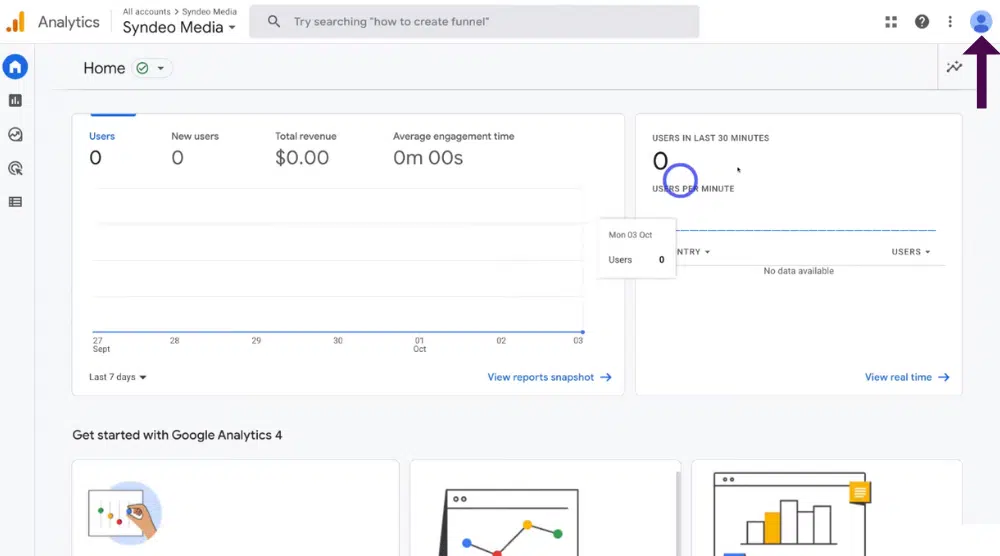
- Head over to the right-hand side and hover over your profile icon in the corner to make sure your Google account is connected (see screengrab).
Ideally, you want to make sure the Google account that you used to create your Google site is connected to your Google Analytics account.
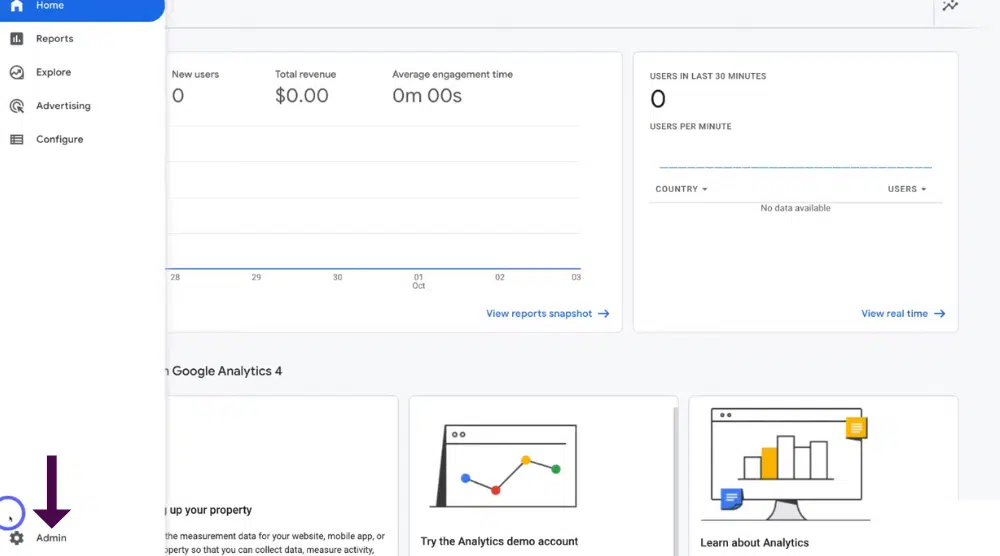
- Scroll down to the left-hand said bar in the corner and click on ‘Admin’.
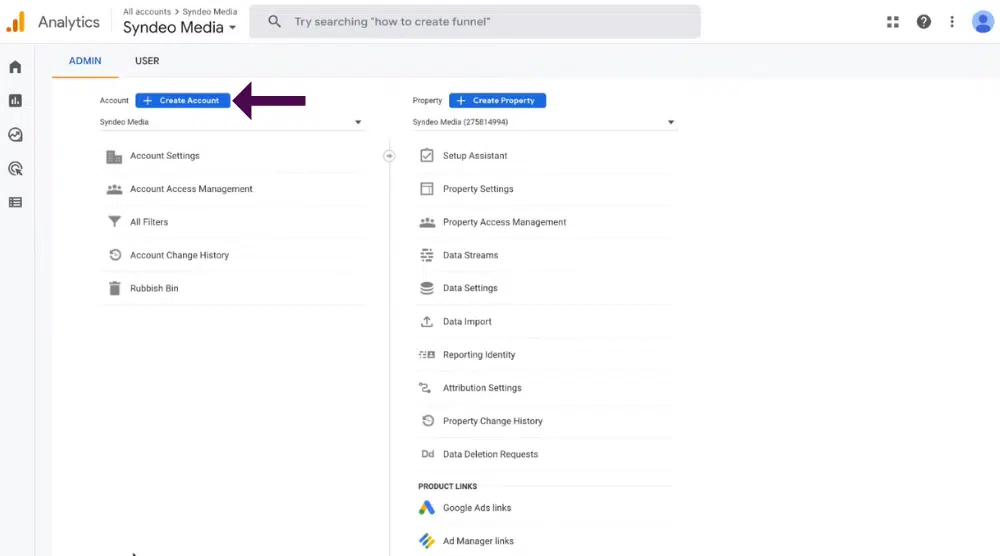
- Select ‘Create account’.
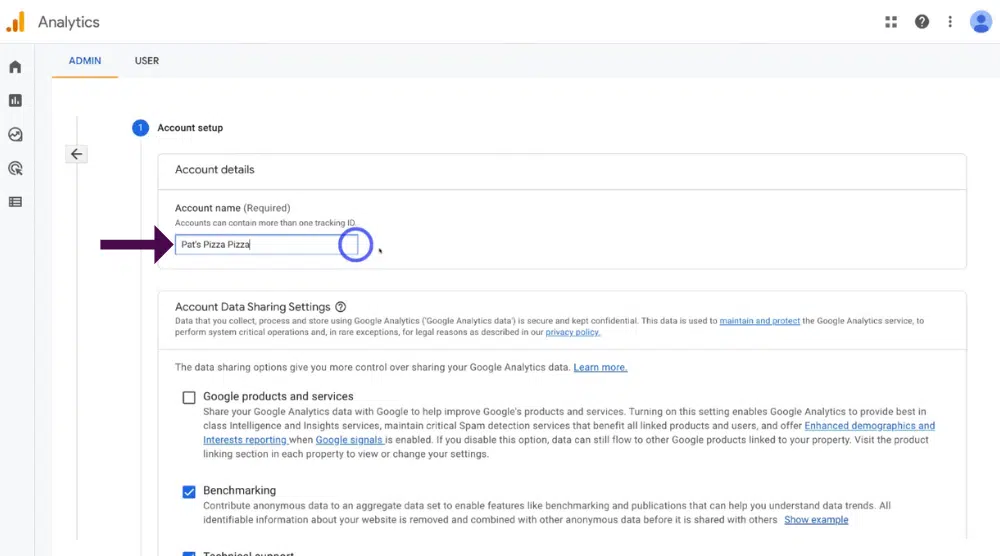
- Simply type in the name of your website (or the name of your business) under ‘Account name’.
For the purpose of this tutorial on how to add Google Analytics to Google Sites, we’re going to create an account for the business ‘Pat’s Pizza Pizza’.
Once you’ve added your website name:
- Scroll down to the bottom of the page and click ‘Next’.
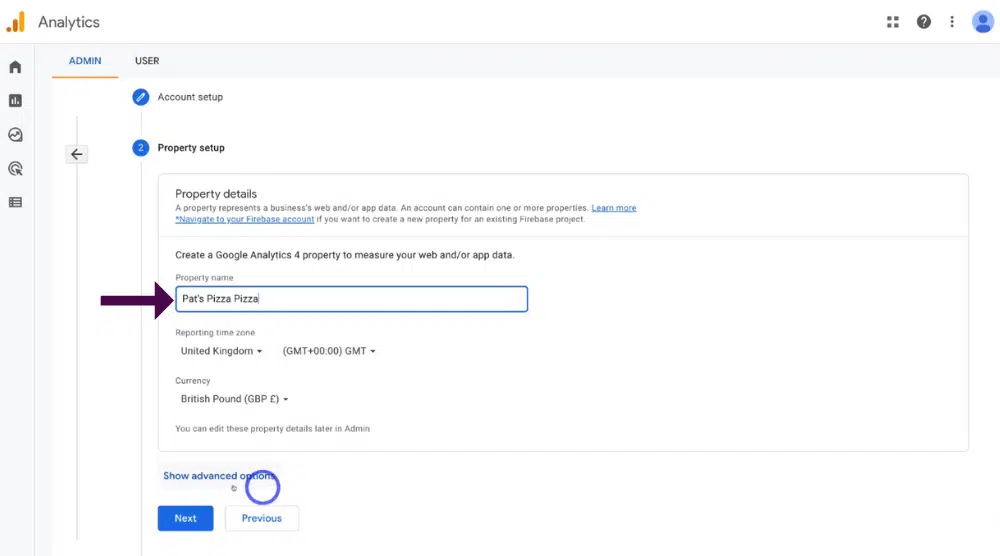
- Type your property name below ‘Property name’.
Again we’re going to add ‘Pat’s Pizza Pizza’.
It’s important to note that you can have one account and multiple properties within that account, however, we’re just going to create one account with one property for this particular business.
- Navigate down to ‘Reporting time zone’.
- Click on the drop-down menu to change the reporting time zone (depending on where your business is based).
- Under ‘Currency’, click the drop-down menu to change the currency to the country that your website operates in.
For example, our business ‘Pat’s Pizza Pizza’ could be a local restaurant that is in a city within the UK, so we would select the British pound.
Once you’ve added your property name, your reporting time zone, and your currency:
- Come down and click ‘Next’.
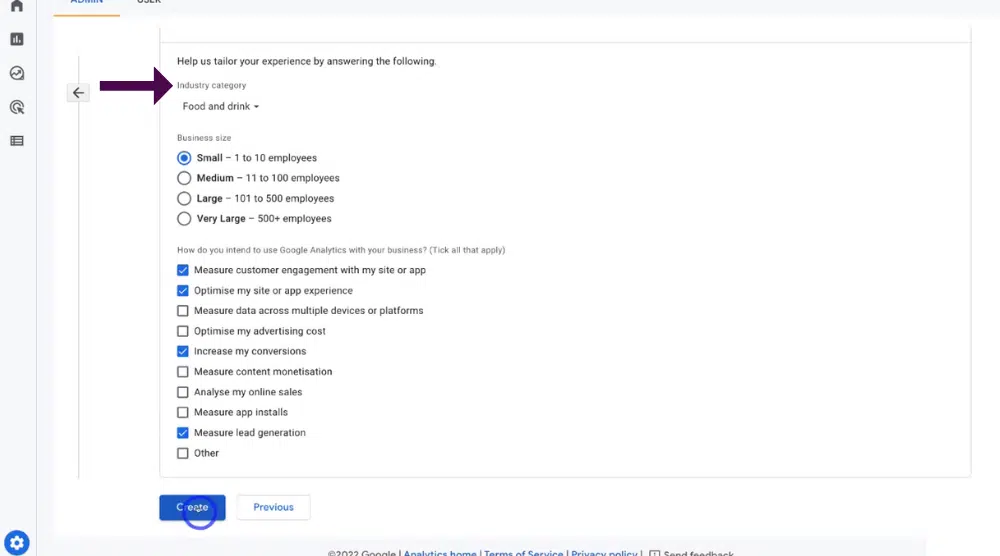
- Next to ‘Industry category’, click the drop-down menu.
- Select the category that your business operates in.
As our business is a pizza bar, we’re going to select ‘Food and drink’.
- Navigate down the page.
- Select the size of your business below ‘Business size’.
We’re going to select ‘Small’ as our business is a small business with one to ten employees.
- Below ‘How do you intend to use Google analytics with your business’, tick all that apply
We’re going to click on ‘Measure customer engagement with my site or app’,Optimize my site or app experience’, ‘Increase my conversions’, and ‘Measure lead generation’.
If you’re not too sure which options to apply, don’t worry! You can click ‘Other’.
Once you’ve selected the appropriate categories:
- Click ‘Create’ at the bottom of the page.
- Navigate up to the region
- Select the appropriate region.
- Tick the ‘I also accept the data processing terms as required by the GDPR’.
- Select ‘I accept’.
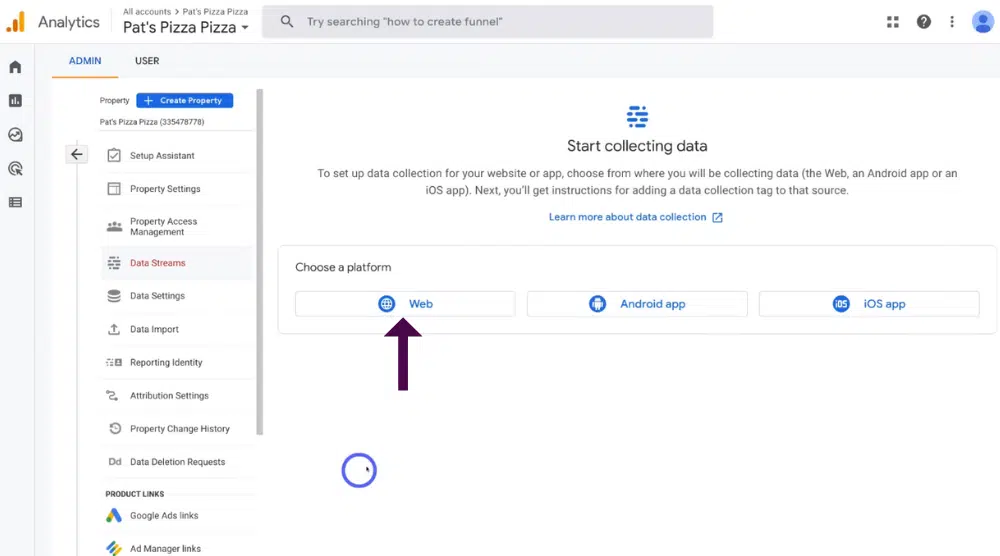
Next, because you want to track the performance of your website:
- Click ‘Web’.

- Head back to your Google site website.
- Navigate up to this copy published site link icon (see screengrab).
- Click on ‘Copy link’.
For the purpose of this Google Analytics & Google Sites tutorial, we’re just going to use this free Google sites domain name.

- Navigate back to Google Analytics
- Navigate up to ‘Website URL’.
- Here you’ll need to paste in your Google site’s domain name (see screengrab).
This is your website domain name (website URL).
- Delete the ‘HTTPS’ section because you already have that over here (see screengrab).
- Delete ‘/home’ at the end of your website URL as you don’t need it.
All you need is ‘sites.google.com\view\your business name’.
You can watch our beginner’s guide on How to buy a domain name.
- Below ‘Stream name’, type in your website name again (your business name).
- Under ‘Measuring’, you can see what you’ll be measuring within Google Analytics.
- Click ‘Create stream’.
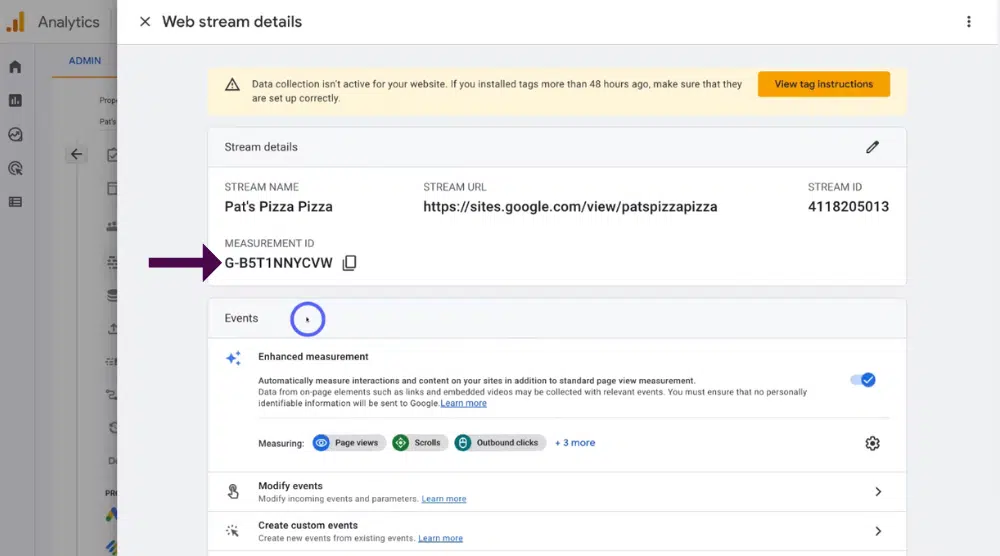
- Below ‘Measurement ID’, click ‘Copy’ to copy this ID (see screengrab).
- Head back to your Google site.
Once you’re inside Google sites:
- Navigate back up to the ‘Settings’ icon.
- Select ‘Analytics’ again.
- Click ‘Google Analytics tracking or measurement ID’.
- Paste in your ID (that you just copied from Google Analytics).
- Click exit.
And just like that, you should see this little tag down the bottom notifying you that Google Analytics and your Google site are connected!

Next, make sure that your website is ‘Published’ (see screengrab) then view your published site.
You can do this by:
- Clicking the drop-down next to ‘Publish’.
- Click on ‘View published site’.
- Navigate through your website.
By doing that, it will generate data within Google Analytics, allowing you to identify if Google Analytics is now tracking your website’s performance with live visitors.
Once you’ve navigated through your website:
- Head back to Google Analytics.
- Exit out of ‘Web stream details’.
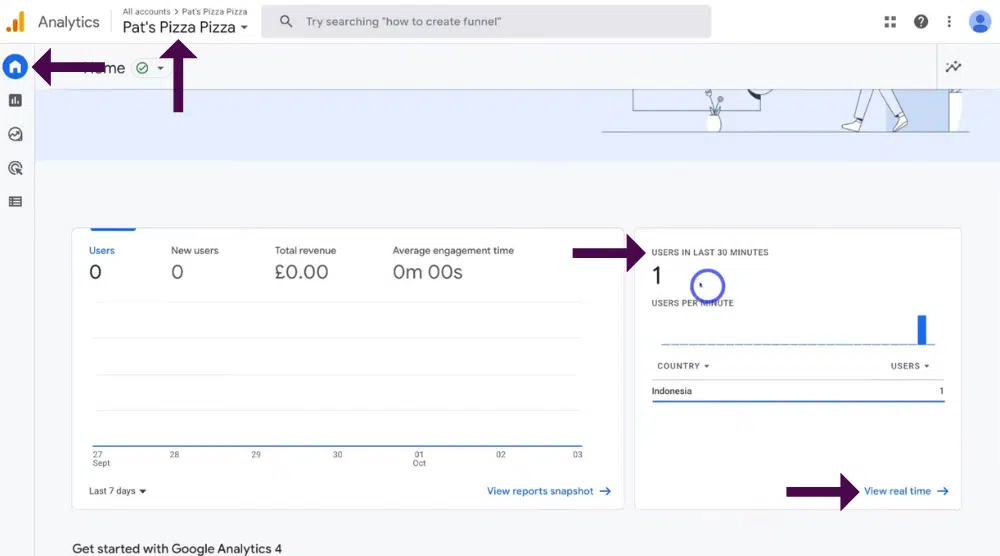
- Click ‘Home’ on the left-hand sidebar.
You should then see the ‘Your website’s data collection is active’ text.
However, it’s important to note that this may take up to 24 hours to show in your Analytics account.
As you can see, we have our ‘Pat’s Pizza Pizza’ account selected (see screengrab).
- Scroll down the page.
- Below ‘Users in the last 30 minutes’ you should have ‘1’ (yourself) as you just navigated through your own website.
- Click ‘View real time’ to preview real-time information.
This is where you can see basic Analytics about the users in real-time.
3. How To Connect Google Search Console With Google Sites
And we’re almost done!
To finish up, you’ll now just quickly need to connect the Google search console with your website.
This free additional analytical tool by Google easily allows you to identify how your website is performing in Google search results.
To quickly connect the Google search console with your website:
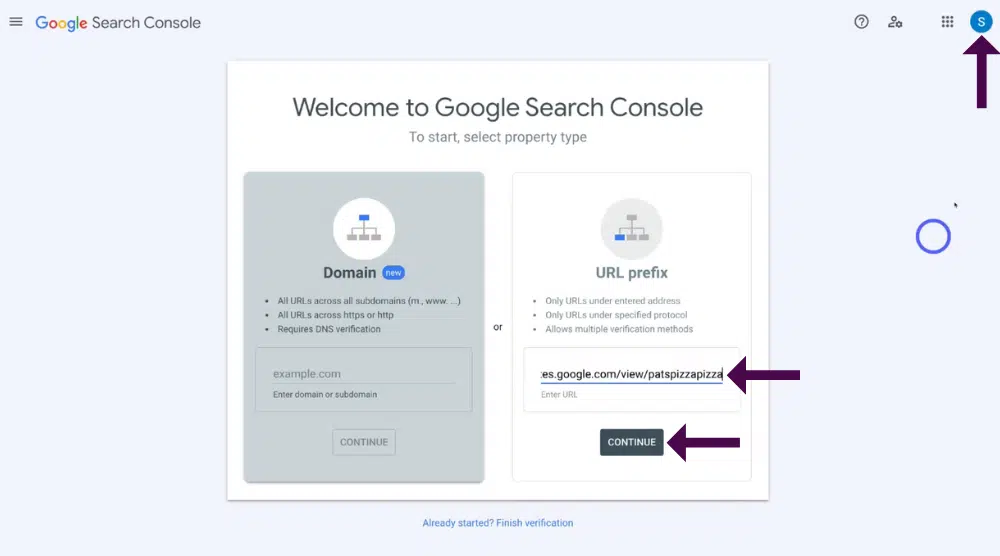
- Simply head over to your browser.
- Type in google.com/search-console
That’s going to take you the dashboard.
If you’re using a free domain from Google Sites:
- Paste in your website URL below ‘URL prefix’.
If you have a custom domain:
- Paste your custom domain below ‘Domain’.
You can watch our beginner’s tutorial on How to choose a Domain name for your small business.
Before you continue, make sure that you’re logged into your Google search console with the account that you used to set up Google analytics.
- Simply hover over your user account icon in the upper right-hand corner (see screengrab).
Once you’ve done this:
- Click ‘Continue’.
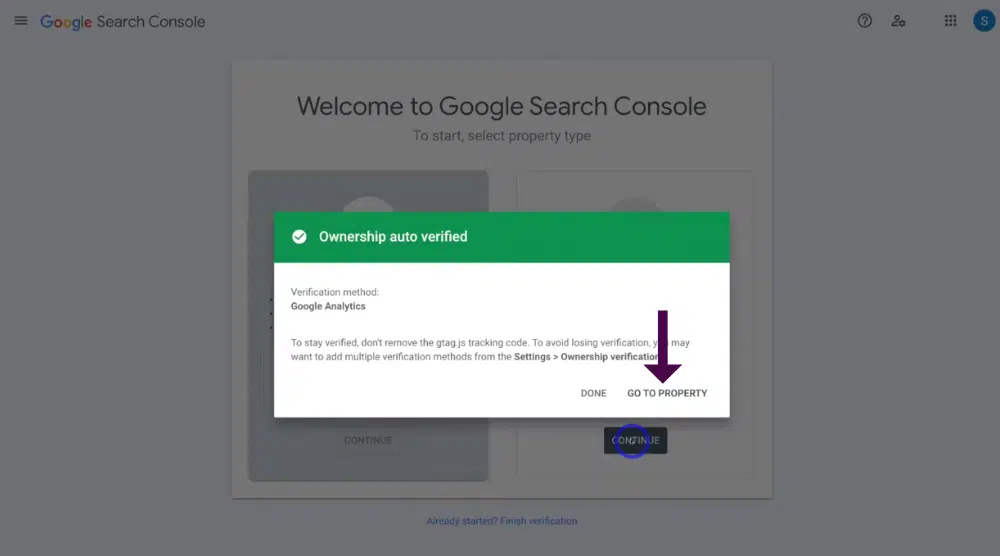
- Give the Google search console a moment to verify.
You can see now that the ownership of our domain was automatically verified through Google analytics because we already went through that process of connecting Google Analytics.
- Click ‘Go to property’.
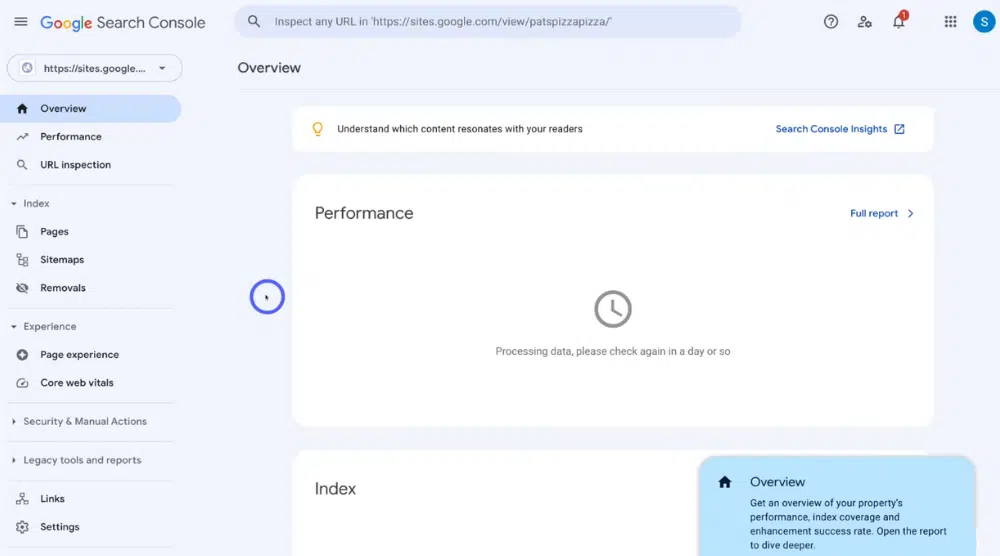
This is where you can preview your website’s performance on Google Search!
If you want to learn more about the Google search console and how to leverage this free tool by Google, check out our beginner’s tutorial here.
Google Analytics Tutorial For Google Sites (Video Tutorial).
That is everything that we wanted to cover in this beginner’s step-by-step Google Analytics tutorial showing you how to add Google Analytics to Google Sites!
If you’re still unsure of this process or simply prefer learning by video, make sure to check out our video tutorial below to help you get started with adding Google Analytics to your Google Sites website.
We hope you enjoy watching it!
