
Table of Contents
The aim of this tutorial is to show you how to use Buffer, a social media management software for small businesses to help you better manage your social media activities, all from one platform.
Are you finding that you’re wasting valuable time and resources by having to constantly switch between all your different social media channels to create and post the same content?
We’ve all been there!
What if we told you there was a simple and much more efficient way to manage your social media content?
How to use Buffer for social media management and marketing?
You can leverage an all-in-one social media management software like Buffer to easily streamline your online content marketing activities and ultimately grow your audience (and your business) organically and effortlessly.
Once you get started with Buffer, your only regret will be that you didn’t start using it earlier!
In our opinion, Buffer is the best social media management software for small businesses, and we are here to explain why.
Let’s get stuck in this tutorial on how to use Buffer to effectively manage your social media marketing activities!
1. Getting Started With Buffer For Social Media Management

To get started with Buffer:
- Simply head over to your browser and type in buffer.com.
That’s going to then take you to Buffer’s homepage (see screengrab).
2. What Is Buffer?
We believe Buffer is the best social media management solution for small businesses to naturally grow their audience across different social media channels.
Buffer lets you seamlessly integrate all your core social media channels into one platform, letting you post content across these channels at the same time through Buffer, ultimately reducing the amount of time spent manually jumping between and posting content on each individual social media channel.
You can additionally analyze the performance of your social media, as well as engage with your audience across different social media channels – that’s right, all within Buffer!
Finally, you can also create a ‘Start page’ (landing page).
A start page is where you can display your social media channels, events, and product listings (if you’re an eCommerce business that sells products online).
You can then link all your social media channels to this landing page.
We’ll go into more detail about start pages later in this How to use Buffer guide.
Read more: Top 5 FREE Landing page builders for small businesses.
3. Buffer Channels
Within the ‘Channels’ heading on the Buffer website, you’ll find all the different channels you can connect to Buffer.
Buffer stands out from the crowd when it comes to small businesses! In addition to being able to manage your social media platforms, you can manage your Google business profile.
Google business profile is a business citation and is extremely important for small, local businesses.
You can read our beginner’s guide on Google My Business Tutorial for Maximum Results.
We love the fact that Buffer really caters to small businesses, as other popular social media management platforms like Zoho Social, HootSuite, and Later don’t offer Google business profiles for content scheduling.
Read more: How To Use Later
4. Buffer Pricing
Buffer offers both a free plan as well as paid tier plans.
The main difference between Buffer’s free plan and their first-tier paid plan is that you’re only able to connect up to three channels on the free plan.
For example, you can only connect your Facebook business page, Instagram business account, and LinkedIn company page (or three other channels).
Additionally, you’re only able to schedule up to 10 posts per channel per month and are unable to use the analytics feature.
For the purpose of this tutorial on how to use Buffer, we’re going to take a look at the ‘Essentials’ plan, where you can connect unlimited social media channels!
However, it’s important to note that this plan costs $5 per channel per month, meaning that it will cost you $5 for every channel you connect to Buffer.
Other features include 2000 scheduled posts per month per channel limit, access to essential features like analytics, as well as the ability to engage with other collaborators on Buffer.
Again with the free plan, you’re only able to have one user, and you won’t be able to collaborate with a team.
5. How To Signup With Buffer
We recommend either getting started with the completely ‘Free’ plan or the ‘Essentials’ plan (which is ideal for small businesses).
If you opt for the ‘Essentials’ plan, you’re able to get started for 14 days completely for free.
After the 14-day trial period is up you can either downgrade to the free plan at any time or pay the ‘Essentials’ plan price to continue.
Again, we’re going to focus on the ‘Essentials’ plan and the features they offer for the remainder of this best social media management software tutorial with Buffer.
Before we get started, it’s important to note that you’re given the option to connect your social media accounts during the signup process, however, we’re going to walk you through how to do this within your Buffer account.
Let’s dive in and meet you inside Buffer!
6. How To Connect Social Media Channels With Buffer
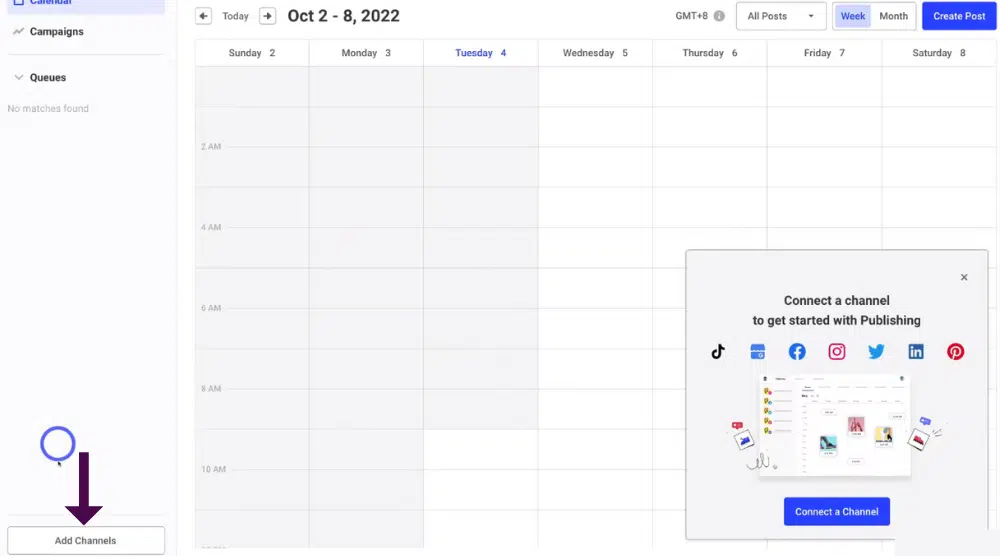
Once you’ve signed up for free and arrived at your Buffer dashboard, you’re ready to connect all the social media channels you use for content.
- Simply navigate down the left-hand sidebar and click ‘Add channels’.

- Click ‘Connect’ on each social media platform you want to connect.
As you can see, the process is super straightforward and easy to do!
For example, we’ll show you how to connect your Facebook business page.
- Click ‘Connect’ on Facebook.
- Select either ‘Facebook page’ or
- ‘Facebook group’, depending on what option you want to connect.
- Click ‘Start connecting’.
- Click ‘Continue as (your profile that’s associated with your business page)’
Next, Buffer will request access to a variety of different things \
- Click ‘Choose what you allow’ to change what you allow Buffer to access.
- Select ‘Continue’.
- Simply select the correct Facebook business page that you want to manage within Buffer.
- Click ‘Add to Buffer’.
As you can see, it’s as simple as that to connect your different profiles!

We’ve now successfully connected our Facebook business page
- Next, select ‘Connect channel’ to connect to another channel.

For the purpose of this Buffer social media management tutorial and review, we’re going to connect our LinkedIn profile and our Instagram business account (see screengrab).
We recommend taking the time to connect all the different channels that you want to manage within Buffer.
7. How To Use Buffers Publishing Calendar

Once you’ve connected all the social media channels that you want to manage within Buffer:
- Click ‘Publishing’ in the upper left-hand corner.

- Below ‘Queues’ on the left-hand sidebar, you can see the three social media channels that we just connected with Buffer (see screengrab).
Now the main purpose of Buffer is to ultimately reduce the time friction and the manual time-consuming activity of switching between all your different social media channels to create and post content.
Follow the steps below to do that:
- Navigate over to your calendar.
When you hover over the boxes within your calendar, little time slots will appear.
This is where you can create a new post.
Just like a normal calendar, you’ll see the days per week at the top and then the time over on the left-hand side.
For example, let’s show you how to create a post on Thursday at 12pm to share on all your social media channels:
- Simply hover over the Thursday 12 pm time slot.
- Select ‘Add a post’.
Once you’ve scheduled your posts, you can view all your different scheduled posts for all the channels and types of posts you selected on your calendar.
- Navigate up to and click on ‘All channels’ (see screengrab).
- Here you can tick or untick specific channels if you like.
- Next to ‘All channels’, click on ‘All posts’.
- You can tick or untick particular different ‘types’ of posts, categorized as either ‘Scheduled’, ‘Sent posts’, ‘Pending approval’ and ‘Draft posts’.
To schedule content for another specific month:
- Click on ‘Month’ next to ‘All channels’.
However, we’re going to keep ‘All posts selected’, ‘All channels selected’ and ‘Week’ selected for the purpose of this tutorial.
8. How To Schedule Posts With Buffer

We’re now going to show you how to schedule a post for this week by following the below steps:
- Select ‘Week’.
- Click ‘Create post’ or
- Come down to the day of the week.
We’re going to schedule content for this Thursday at 1 pm.
To do that:
- Click on this time slot, which is Thursday at 1 pm.

We can then create a post and schedule that post across the three different channels that we’ve connected with Buffer.
If you don’t want to schedule a post to one of the channels you added:
- Simply select that channel.
That’s going to deselect the channel and only schedule and post the content on the two selected profiles.
However, for the purpose of this scheduled post and this tutorial on how to use Buffer, we’re going to keep all three channels selected.
- Create a caption for your post in the ‘What would you like to share’ box.
- Click the ‘Emoji’ icon to add an emoji to your caption if you like.
As you can see, we’ve quickly created a caption (see screengrab).
Additionally, you can add an image or video by:
- Clicking ‘Add image or video’.
- Click ‘Drag and drop or select a file’.
- Simply select your chosen image.
- Come down and click ‘Open’.
- Navigate over here and upload another image or video.
Alternatively, you can connect all these different platforms.
For example, you can create a post with Canva, connect Dropbox and select content from Dropbox or Google Drive and more.
*The Canva link above is an affiliate link, which means we will get a commission if you upgrade to a paid plan (with no extra cost to you). This helps support our education-based website and we thank you in advance!
You can read our beginner’s tutorial on the Top 5 ways to create business videos.
This is one of the reasons why we believe Buffer is the best social media management software as they make it easy to seamlessly integrate other popular tools that you use every day.
- Head down to ‘Schedule date’.
You can see that on October the 6th at 12pm, this post will be scheduled across our chosen different channels.
However, we want to change our scheduled date to 1 pm.
- Simply click ‘Edit’.
- This will bring up a smaller version of the calendar.
- Click on the date you want to change your scheduled date to (in our case, this is the same day).
- Simply click on your preferred scheduled date time.
We’re going to change this to 1 pm.
- Click ‘Done’.
9. Modify Each Channel’s Posts

Once you’ve added your caption, image and schedule day and time:
- Click ‘Customize for each network’.

Buffer is unique as it allows you to slightly modify your post with each of your different channels.
This is an integral feature as some platforms have post limitations.
Let’s look at Instagram as an example:
If you add a link in your post, that link is not clickable, meaning you won’t be redirected to that specific link if you click on the link.
So, if you had a link in your post, you’d simply remove that link from the Instagram post only here.
Twitter is another example with different limitations:
With Twitter, you’re only able to have a certain amount of characters within your caption, meaning that if your post was longer than that amount of characters, you’d have to reduce your caption length in order to post on Twitter.
The ‘Customize for each network’ feature is also helpful if you want to completely change a post for one platform.
For example, let’s say instead of a post on Instagram, you wanted to create a vertical format for an Instagram video reel:
- Simply select ‘Reel’ under ‘Instagram’ instead of ‘Post’ (see screengrab)
- Delete the current image.
- Upload the video you want to use for your reel.
- Change the caption.
However, we’re going to leave our posts the same for all our channels.
We recommend taking the time to go through each of your different posts within each of the different channels, to make sure that you’re happy with each of the posts before publishing.

You can also add hashtags to your posts through Buffer:
- Click the ‘Hashtag’ icon under each channel
This will open up the ‘Hashtag manager’.
- Click ‘Create a hashtag group’.
- Type in your hashtag group name under ‘Hashtag Group Name’.
We’re going to add ‘Small business’.
This is going to be a hashtag group that manages all the hashtags related to small businesses.
- Simply add in all individual and relevant hashtags for your post under ‘Hashtag Group Content’ .
Once you’ve added in and are happy with your hashtag groups:
- Click ‘Save Hashtag Group’.

- Head back to your post caption on the left side of the screen.
- Click enter a couple of times so there is a bit of space between your caption and your hashtags.
- Click ‘Insert’.
That’s going to add those hashtags below your caption (see screengrab).
We’re going to do the same thing with our Instagram post and insert the same Hashtag Group.
These hashtags help your post to get discovered across these different channels.
Instagram additionally gives you other options to add to your post.
You can add a ‘First comment’,‘Shop grid link’ and a ‘Location’.
What is a shop grid link?
Buffer allows you to create a Shopify shop grid landing page showing your products (if you’re an eCommerce business).
Basically, under ‘Shop grid link’, you can add that landing page or you can actually add your own link that directs people to your website.

We’re happy with our third channel’s caption and post on our LinkedIn profile.
When you’re happy with your scheduled posts, you have two options:
1. Schedule draft.
This is if you want to schedule your post later but still want to make changes to your post before going live.
2. Schedule posts.
This is for if you’re happy with your posts, want to make no changes, and want to schedule your post.

And just like that you can see we have three posts that are scheduled across these three different platforms for 1 pm this Thursday (see screengrab).
It really is as simple as that to create, post, and schedule content within Buffer!
10. How To View Analytics Within Buffer

Another handy tool that Buffer offers is their analytics tool. This definitely drives Buffer to the top of our list when it comes to the best social media management software!
In other words, this is where you can find out how well your content is performing as a whole as well as on each individual social media platform.
To preview analytics across your different channels:
- Click the ‘Analytics’ heading on your Buffer account.
This will then take you here (see screengrab) where you’ll see a full overview of all your different channels and their performance.
To view individual channel analytics:
- Simply click on the channel in the left-hand sidebar that you want to view analytics information on.
For example, we’re going to select ‘Facebook’ to see how well our posts are doing on Facebook.
If you connected multiple Facebook pages or a Facebook group, you can also select those to view at the top (see same screengrab).
Read more: How to use Google Analytics for beginners.
11. Manage Engagement Within Buffer

In addition to analytics, you’re also able to view any comments you receive on your content, as well as be able to engage with those comments.
The engagement feature ultimately lets you build a personal relationship with your audience across all your different social media channels.
We love that you can do this all from within Buffer!
To do this:
- Click ‘Engagement’ next to ‘Analytics’.
- Select the channel that you want to view comments for.
We have our Facebook business page selected, and as you can see we have seven unanswered comments (see screengrab).
To reply to your comments:
- Make sure you have the correct channel selected.
- Simply start typing your reply below the unanswered comments on the right side of the page.
Again as we’ve previously mentioned, Buffer lets you create, post, and schedule content across different channels, as well as being able to engage with your audience directly from inside Buffer.
This is another reason why we believe Buffer is the best social media management software online!
12. How To Create a Landing Page (Start Page) Within Buffer

As briefly mentioned, you’re additionally able to create a landing page for your products, online services, and more right within Buffer.
Follow the steps below to find out how to create a start page within Buffer:
- Click ‘Start page’ next to the ‘Engagement’ header.
- Scroll down to simply choose a template that you like the look of and want to use to create a landing page.
- Click on your chosen template.
We like the look of this template (see screengrab).
- Type in your page name.
- Click ‘Next’.

On the left-hand side, you’ll see a preview of what your landing page (your start page) will look like (see screengrab).
Think of your start page as a single page where you can keep all your important links for your visitors and potential customers to easily access.
Once you’ve chosen your start page template, you can edit it to your liking:
- Head over to the right-hand side of the page.
- Click each different element (see screengrab).
- Simply change the label and the link within those individual elements to reflect your business and brand.
For example, let’s change our ‘Profile Image / Logo’ element.
- Select ‘Profile Image / Logo.
- Click on ‘Upload Image’ to upload either an image or logo (depending on what you want to use for your small business)
- Below this, you can add other options to customize this specific section of your page (see screengrab).
Additionally:
- Click ‘Appearance’ on the right-hand sidebar to change the overall appearance (see screengrab).
- Select ‘Add block’ on the right-hand sidebar to add an additional block element to your page.
This would be useful if you had another link, text, or image that you wanted to add to your page.
When you’ve made these changes and are happy with your start page:
- Click ‘Publish changes’
- Add your business name in the ‘Your business name’ field.
- Click ‘Publish start page’.
That then creates a link that you can then easily share on your social media channels!
It’s important to note that with TikTok and Instagram, you’re only able to add one link in your bio, so this could be the link that you add.
Now that you’ve added your start page link, this means that when a potential customer or a visitor clicks on that link, your start page will open with all your important links, products, events, or other information in relation to your business!
You can either use this tool and keep everything within Buffer or alternatively we recommend using standalone software like Linktree, which is an amazing Link-in-bio and landing page builder that we personally use.
If you’re interested in learning more about Linktree, check out our beginner’s guide here on how to use Linktree.
However, let’s jump back into this How to use Buffer tutorial.
Read more: How to create a landing page with HubSpot.
13. How To Invite Your Team To Buffer

This is where you can invite other people to collaborate with you on Buffer.
However remember, you won’t be able to collaborate with other people if you opt for the free plan.
This is only a feature available on both paid premium plans.
To invite your team members to Buffer:
- Simply click ‘Invite your team’ (see screengrab).
14. Buffer As An App

You can additionally use Buffer as an app as well as the web version.
- Click ‘Apps’ next to ‘Invite your team’.
- Select ‘Buffer for iOS’ or ‘Buffer for Android’ depending on what type of mobile you have.
This is a great feature, as it means you can actually directly manage your social media on the go and directly from your phone!
- Below this, click on ‘Integrations’.
This is where you can integrate other popular apps with Buffer.
15. How To Create Campaigns In Buffer

- Click ‘Publishing’ again (where you found your Buffer Calendar earlier).
- Below ‘Calendar’, click ‘Campaigns’.
This is where you’re able to create and manage an entire campaign across your different channels!
For example, you can see these different channels on the right-hand side. (see screengrab).
This feature lets you manage and keep track of your multi-channel approach when posting across your different channels.
You can create specific and targeted social media campaigns to reach any specific goals you might have for your social media activities.
However, that is everything covered in this complete guide on How to use Buffer for small businesses.
How To Use Buffer For Social Media Management (Video Tutorial)
That concludes this how-to tutorial on what we believe is one of the best social media management softwares, Buffer!
We hope you gained value and are ready to effortlessly and organically grow your audience with this incredible social media management and marketing tool.
If you’d like to know more, make sure to check out our video below where we run you through this process in detail.
