Table of Contents
If there’s a sure-fire way of increasing foot traffic, website traffic, leads, sales, and phone calls, it’s by adding your local business to Google My Business (now called Google Business Profile, but for this tutorial, we’ll stick with Google My Business).
In this updated Google My Business tutorial, we’ll show you how to use Google My Business for creating maximum results!
Google My Business Tutorial & Marketing Strategy
Using seven simple strategies explained in this tutorial, you can take your business to new heights.
In the first step, you’ll need to create a Google My Business account.
To do that, visit google.com/business.
If you need a tutorial on how to proceed with the Google My Business sign-in, watch this tutorial where we cover this process in detail.
Now, let’s begin with our first strategy:
1. Review Business Information
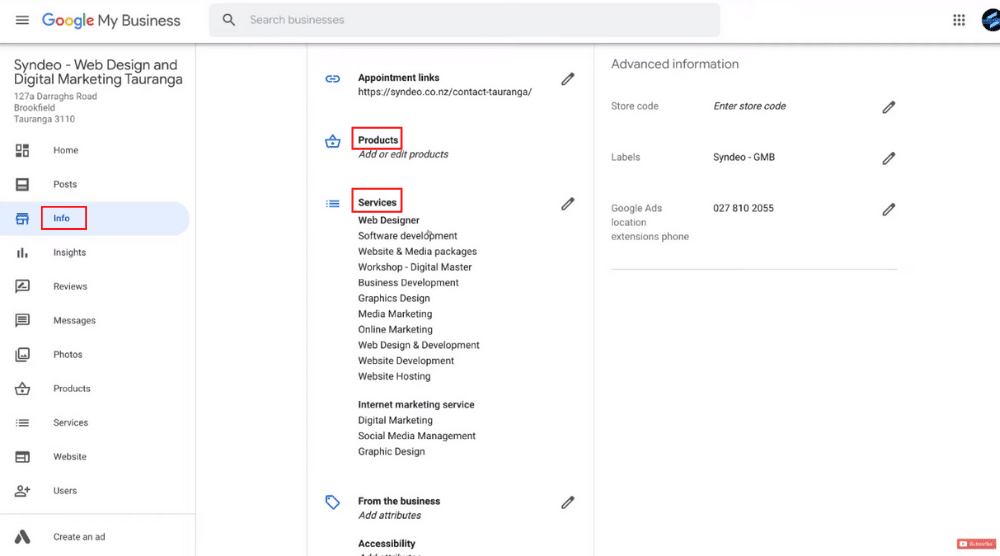
Inside your account, navigate over to ‘Info’ on the left.
Click on it to make sure that every piece of business information provided by you is accurate.
Just click the pencil icon to edit any information.
Most importantly, you need to check:
- Services and products offered
- Business description and that it has relevant keywords (refer to the screengrab)
Adding keywords throughout your Google My Business listing will send signals to Google (search engine) about what your business is all about – while also providing relevant business information to your visitors.
If you’re a product-based company, you should embed keywords in the ‘Products’ section as well.
When we audit businesses and help their online presence, we’ll often find that this initial set-up, the information tab, has largely been ignored or not completed fully.
It’s a great opportunity to send strong signals to Google about your business, and also ensure that when somebody finds your business, they find out all the things they need to know, quickly.
Read more: Google My Business SEO
2. Create a Free Website
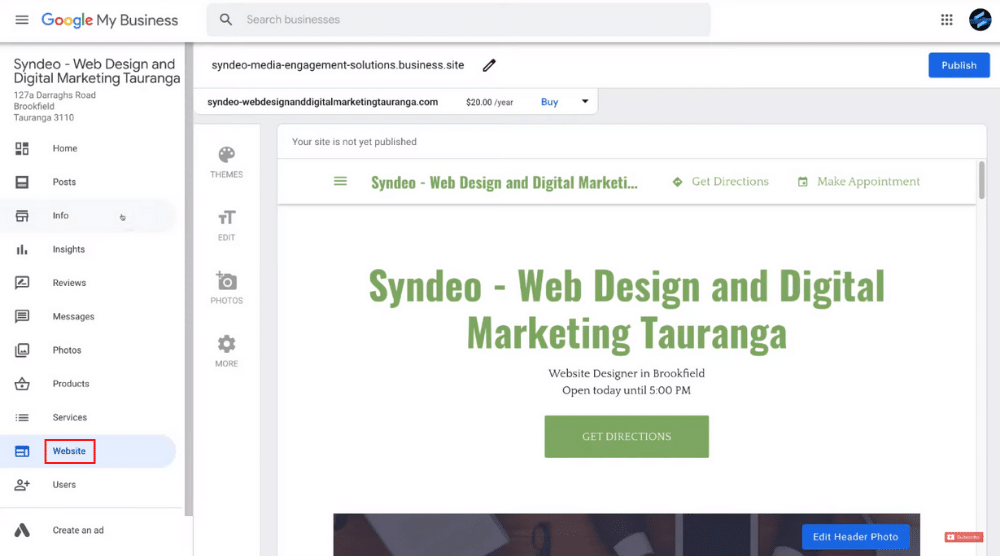
Navigate over to ‘Website’ on the left-hand side of your screen to start customizing your free business website.
As you can observe, Google My Business has already generated a free basic website based on the info you provided before (refer to the screengrab).
Using the customization options on the left, you can edit your website if you like.
Essentially, if you don’t have an online presence, this free website will help you get started. Having a website owned by Google, that provides links back to your website, is a very useful SEO advantage.
However, in this Google My Business tutorial, we’re not diving into the website creation process.
You can instead watch this GMB website tutorial to leverage this powerful free website feature.
Moreover, if you require a website and feel as though that this free website feature is too limited, you can use Google Sites, which is a more comprehensive free website builder offered by Google.
Unlike GMB, Google Sites allows you to build a multi-page website. Watch this tutorial for more details.
To find Google Sites:
- Locate your Google Drive from the top-right corner
- Click on ‘New’
- Navigate over to ‘More’
- Select ‘Google Sites’
Read More: Create Google My Business Website
3. Leverage GMB Posts
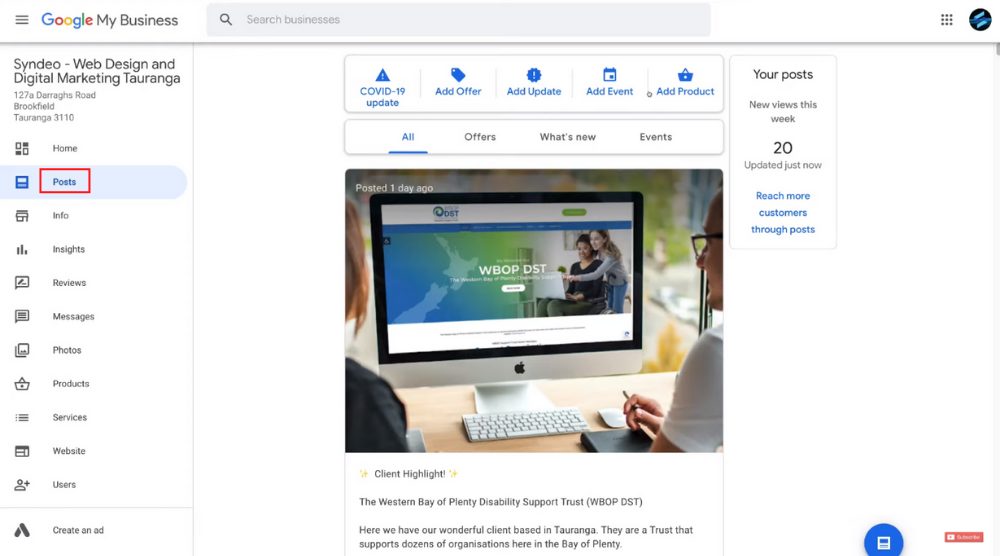
The posts appear on Google search and mobile search when people find your business.
Head over to ‘Posts’ on your left to leverage Google My Business posts.
You can then click one of these options:
- Add Offer
- Add Update
- Add Event
- Add Product
You can also find the ‘create post’ option in the bottom right corner.
Based on the information you want to share, you can select:
- COVID-19 update
- Offer
- What’s New
To make the post more attractive or insightful, add photos or videos.
Finally, add a suitable CTA (call-to-action) button (book, order online, buy, learn more, etc.).
For example, if you’re creating a new post about a product you offer, add a ‘Buy’ button to redirect the potential customers to the product page or the shopping cart.
Alternatively, you may add a ‘call now’ button so that your potential leads can directly contact your business via a phone call.
Once you’ve created your post, hit ‘Publish’. However, we recommend previewing your post before publishing it, so you can check for errors.
You should post at least once a week consistently to provide updated information to your audience and also to signal to Google that your business is still active!
Google rewards active accounts with higher rankings and better results for your business.
Alright, let’s discuss photos!
Read more : How To Add Local Business on Google Maps
4. Update Photos Consistently
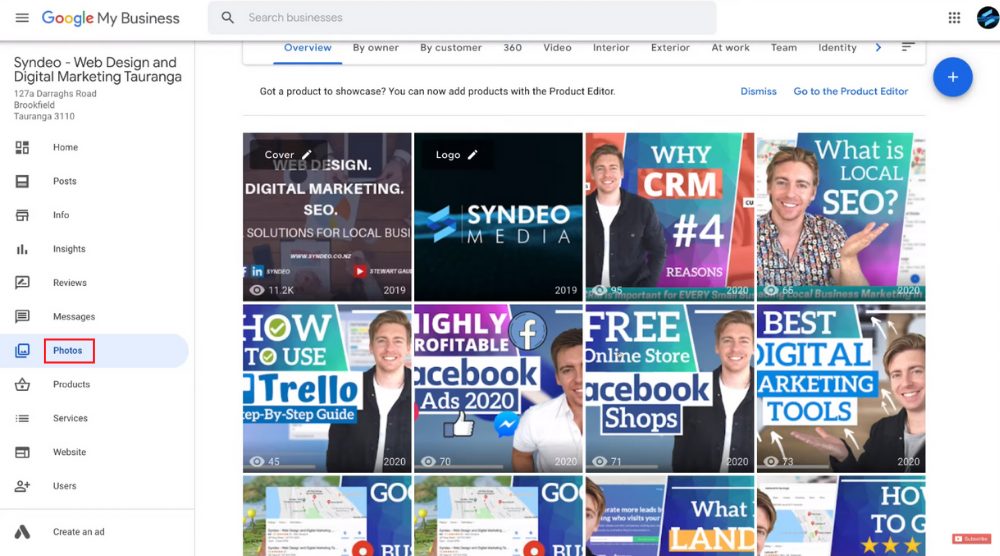
Here, you’ll find many sections, including:
- Overview
- By owner
- By customer
- 360
- Video
- Interior
- Exterior, and more
Make sure you’ve updated photos and videos about your products and services under each section.
This will ultimately help you gain more exposure on the first page of Google.
Customers can learn a lot about your business simply by looking through your business photos.
5. Respond & Capture Reviews
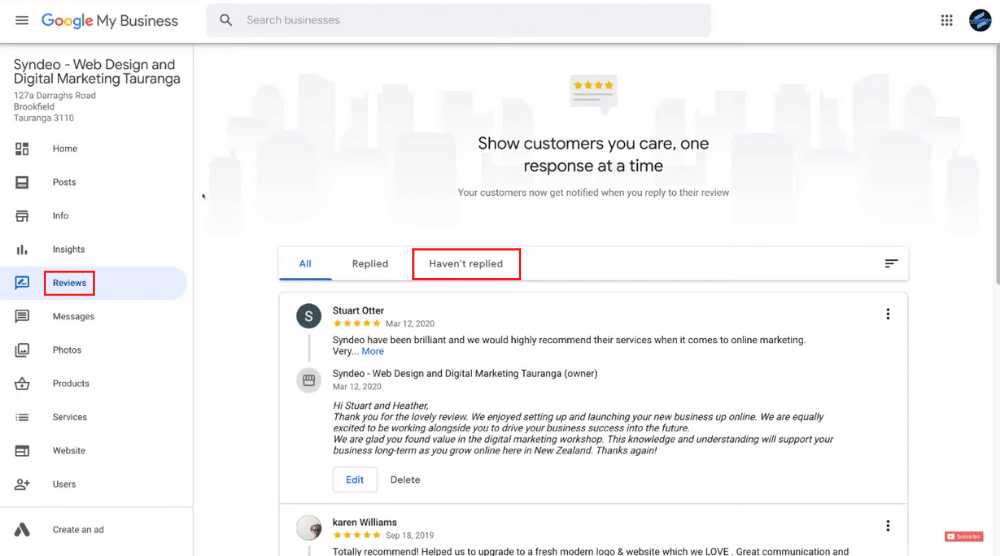
Select ‘Haven’t replied’ and this is where you can respond to your customers’ reviews.
You can also select ‘Home’ on the left and locate ‘Get more reviews’ on the right.
Then select ‘Share review form’ and copy the review form link.
Share this link with customers who haven’t left a review yet. You might like to email all previous customers, asking for feedback, and dropping your review link in seeking a review as well.
Also, you may share it across social media platforms. This is a quick and easy way to capture customer reviews.
6. Link & Leverage Google Ads
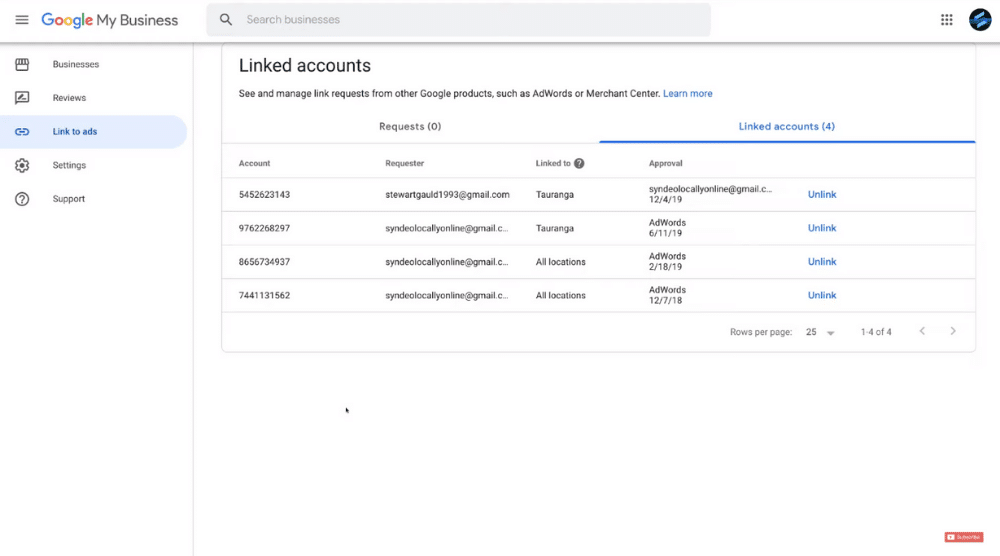
This is an extremely effective strategy for local businesses.
However, if you’re currently not using Google Ads, this strategy is not very useful to you at the moment.
But if you want to learn how to create location extensions and then link Google Ads and GMB together, watch this tutorial.
Now, it’s time to talk about the last strategy of our Google My Business tutorial.
Also Read: Google Ads for Small Business
7. Build Citations
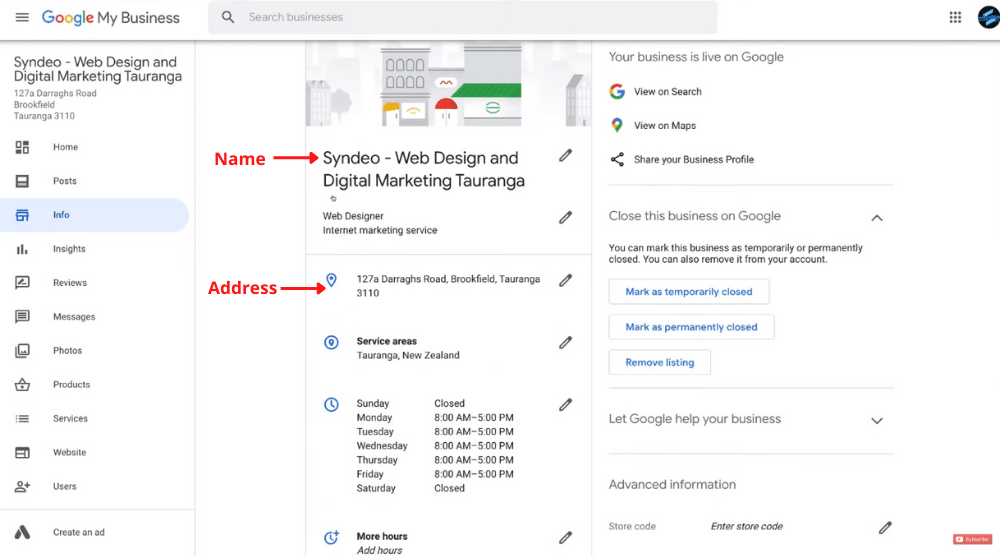
If you want to build more authority in the eyes of Google, building citations is an important strategy.
Citations are basically other important websites and directories online where you can list your business information.
The more ‘relevant’ citations you can build, the better your Google My Business listing is going to perform.
For that, you first need to identify your N.A.P. (Name, Address, Phone Number).
This information must be consistent across all the citations that you add your business information on.
To identify the top citations in your country, visit Whitespark.
Select your country and add your N.A.P. to each of the citations you find.
This is going to boost your GMB listing and ultimately drive more sales.
Go ahead and sign up for as many relevant citations as possible!
And with that, we end our seven Google My Business strategies!
Google My Business SEO Optimization (Video Tutorial)
If you need a more detailed overview of GMB Optimization and Marketing Strategies, we have a video tutorial just for you.
Check out our video below. Enjoy!
