Why Are Appointment Scheduling Forms Important?
Emails are messy.
Too much time is wasted on back-and-forth email conversations every single day.
If there is one critical aspect of business that you don’t need multiple email threads for is scheduling meetings.
Using free appointment scheduling software for small businesses, your clients/customers can quickly and conveniently book appointments with you.
For instance, HubSpot’s free appointment & meeting scheduler helps you streamline the entire process.
This is a great advantage over the numerous back-and-forth emails we talked about earlier.
How to Use HubSpot Scheduling Software?
In this tutorial, we’ll explain how to use the HubSpot meeting scheduler.
1. Get Started with HubSpot Meeting Scheduler
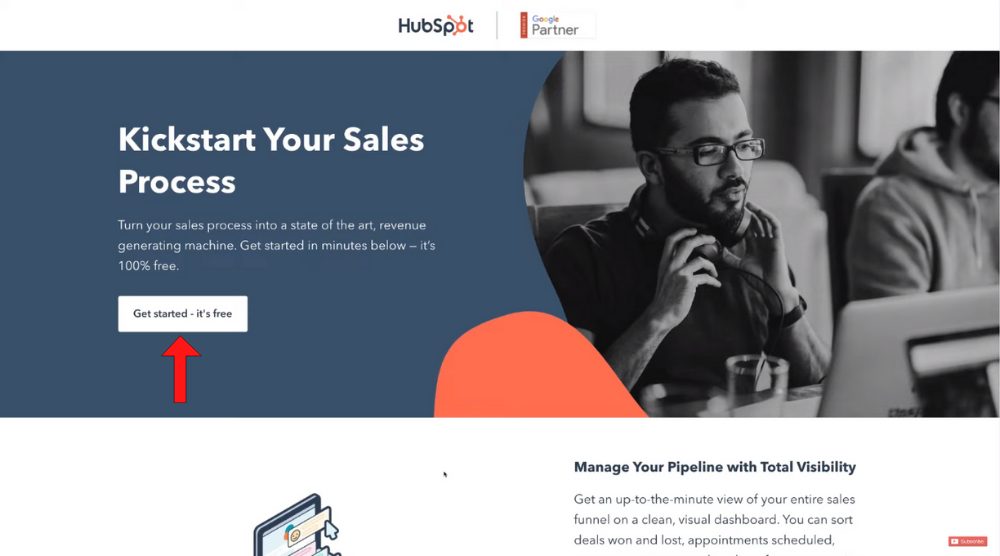
Get started with Hubspot for FREE here
*The link above is an affiliate link, which means we will get a commission if you upgrade to a paid plan (with no extra cost to you). This helps support our education-based website and we thank you in advance!
Let’s create a meeting scheduler within HubSpot CRM.
If you are completely unaware of HubSpot CRM, we advise watching this beginner’s tutorial first.
Assuming you are a beginner and don’t have an account yet, head over to this link and create one.
Read more: How To Use HubSpot CRM
2. Sign Up to HubSpot
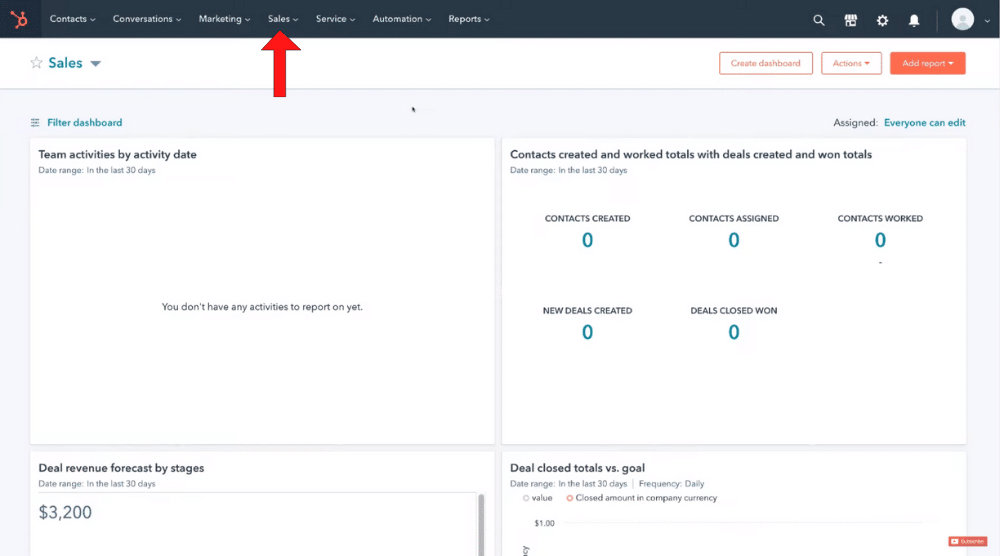
Inside your HubSpot CRM account, locate your meeting schedular.
To do that:
- Navigate up to ‘Sales’ on the top menu and click on it
- Select ‘Meetings’ from the drop-down.
You’ll be taken to HubSpot’s scheduling page.
This is where you can schedule meetings and then share them with your contacts, prospects, and customers.
Hit ‘Get Started’ to begin.
3. Connect a Calendar with HubSpot

This is where we’ll begin the first scheduling activity, which is connecting a calendar with the HubSpot meeting schedular.
- Click on ‘Connect calendar’
- Choose an appropriate calendar to link. In this HubSpot free meeting scheduler tutorial, we’ll opt for Google/Gmail
- Select ‘Connect your calendar’
- Click on ‘Accept and connect to Google’
- Choose a Google account in the next step
- Hit ‘Allow’
You’ve successfully connected Google Calendar with the HubSpot CRM.
Read more: How To Create A Landing Page with Hubspot
4. Explore Paid vs Free Features

The free plan lets you create only one scheduling page.
You can edit this page, copy the HubSpot meeting link, or embed it on your website.
However, to access more extensive features of the HubSpot meeting schedular, you’d need a premium account.
With the Sales Hub Starter plan, for instance, you can:
- Create multiple booking forms or scheduling pages
- Use your personal branding
- Schedule one-on-one meetings
- Leverage advanced features like Group Scheduling and Round Robin
Read more: How To Create a Sales Hubspot Pipeline
5. Customize the Appointment Page

In this section, we will customize the default scheduling page using the best appointment scheduling software for small businesses.
- Click ‘Edit’ next to the default scheduling page.
- Add an internal name for your meeting page. This is what you will see in your meetings dashboard.
- Under ‘Organizer’, you’ll need to enter the email address of the person responsible for these scheduled events.
- Enter the title, which for this tutorial is going to be ‘Strategy Session’
- Add the meeting’s location. For remote meetings, you can just enter Zoom, Google Meet, or any other web conferencing software. For physical meetings, you can just add “To be arranged” if the venue hasn’t been decided yet.
- Next, write a description of the meeting. Use the given formatting options to customize the description
- Include a cancel and reschedule link if you want by clicking on the toggle
- Hit ‘Save’
- Click on ‘Scheduling’ below ‘Overview’ on the left-hand side
- Add a title. For this HubSpot meeting scheduler tutorial, it’s going to be – ‘Strategy Session with Stewart’
- Below ‘Title’, you can set different time durations for the meeting. We will set an hour-long meeting duration for this tutorial.
- Choose an appropriate time zone
- Select the availability window, which means you need to pick weekday(s), start time, and end time of the meeting
- Under ‘Additional Settings’, choose an image. It can be an organizer avatar, company avatar, or a custom image
- Under ‘when a meeting can be scheduled’, choose ‘over a period of rolling weeks’
- Next, pick a minimum notice time. It’s the minimum time offered to book a meeting. For this HubSpot meeting scheduler tutorial, we’ll select ‘1 hour’.
- Choose a buffer time (padding around meetings individuals cannot be booked for). We’ll set it at 15 minutes.
- From the drop-down, pick the start time increment as 15 minutes.
- Under ‘Booking page language’, keep ‘Use visitor’s browser settings’ selected.
- Next, choose a date and time format. Through this HubSpot meeting tool, we’ll pick ‘Use visitor’s browser settings’ from the options.
- Hit ‘Save’
Next to the ‘Schedule’ tab, we have ‘Form’. Tap on it and follow the instructions below:
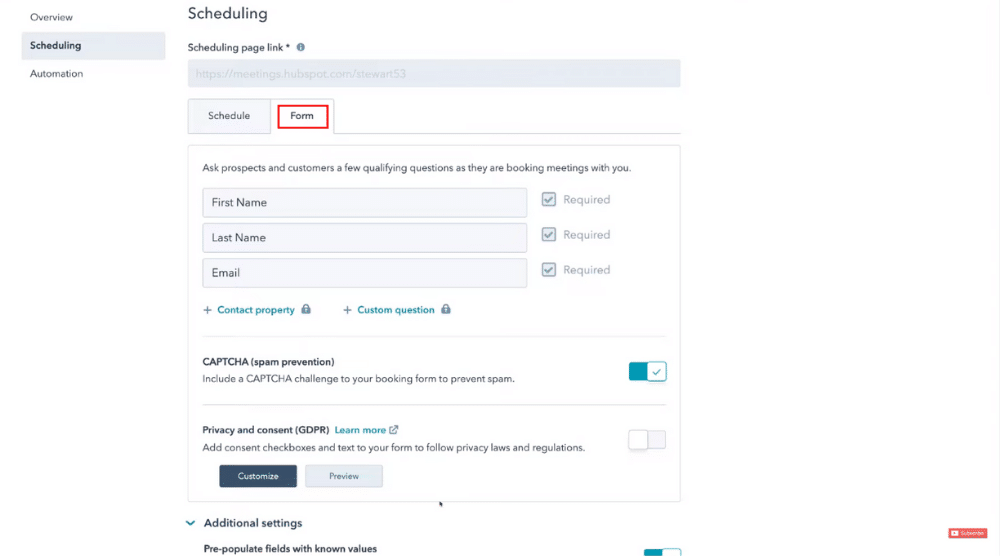
- Notice the fields (refer to the screengrab): First Name, Last Name, Email. Meeting attendees will need to fill in these details.
- Turn on the spam prevention option
- Turn on the privacy and consent option (GDPR). This will allow you to add consent checkboxes to the free booking form.
- Under ‘Additional settings’, turn on the ‘Pre-populate fields with known values’ toggle.
- Hit ‘Save’
Below ‘Scheduling’, we have ‘Automation’ on the left.
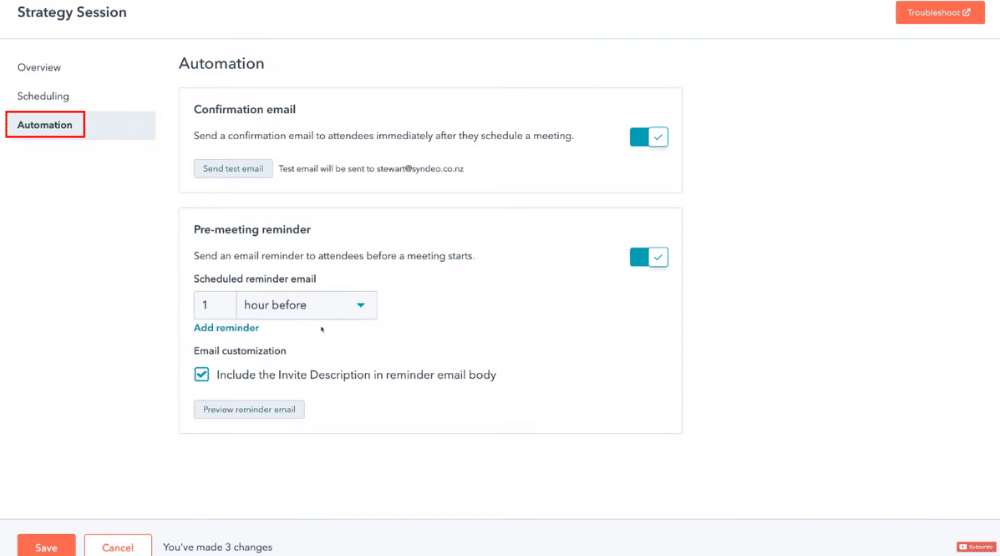
- In the ‘Automation’ section, we have ‘Confirmation email’
- Turn it on to automatically send a confirmation email after attendees schedule a meeting
- Click on ‘Send test email’ to check what the email would look like
- Turn on ‘Pre-meeting reminder’ to remind the attendees about the meeting.
- Under ‘Pre-meeting reminder’, choose the time when you want to remind the attendees
- Check the box that says “Include the Invite Description in reminder email body”
- Hit ‘Save’
The customization of your free booking form is now complete.
You can now head back to the Meetings dashboard.
Read more: HubSpot Tutorial for Beginners
6. Preview Form

- Click on the meeting link (refer to the screengrab)
- Notice what the scheduling form looks like to the user.
The attendee can select the available dates and times.
Back on the Meetings dashboard, you can also select ‘Copy link’ and share the meeting link with your contacts.
You can share it via email, social media, or include it as a button on your website/Facebook page.
That wraps up our HubSpot meeting scheduler tutorial for beginners.
HubSpot Meeting Scheduler Tutorial (Video Guide)
By learning how to book meetings online using the HubSpot meeting scheduler, you can not only streamline the process but also save a great amount of time that is otherwise wasted on back-and-forth emails.
Through this tutorial, you can leverage the HubSpot free appointment & meeting scheduler, at least the features available for free.
For advanced features, however, consider upgrading your plan.
