Do you currently have a WordPress website and a business logo, but don’t know how to add your business logo to your website?
There are a few different ways that you can add a logo to WordPress that will make a huge difference to the look of your website and the credibility of your brand.
You can simply add your logo directly to your WordPress website using the WordPress backend, as well as through using the popular Divi theme and Elementor page builder!
How To Add a Logo To WordPress Website?
In this tutorial, we’ll share three different easy methods on how to add a logo to WordPress.
1. How To Add a Logo To WordPress
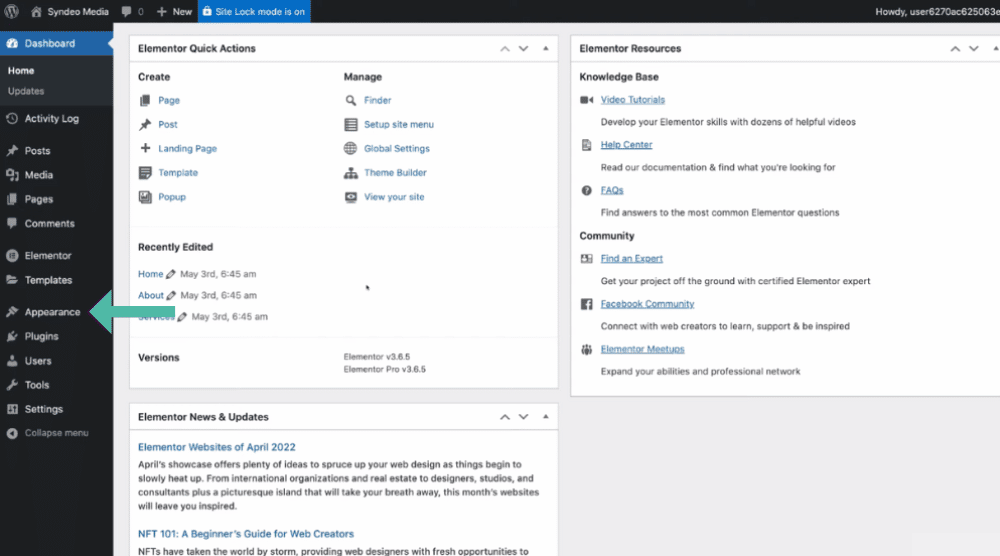
The first method that we want to cover so you can add a logo to your WordPress website is by logging into your WordPress backend and using appearances and customization.
Before we dive into this method, if you do not currently have a logo for your website, check out this beginner’s tutorial that will guide you through the process of creating your own logo completely for free using Canva!
*The link above is an affiliate link, which means we will get a commission if you upgrade to a paid plan (with no extra cost to you). This helps support our education-based website and we thank you in advance!
Once you’ve created a logo using Canvas easy to use free logo maker, head inside your WordPress dashboard.
If you don’t already have a WordPress website, we suggest checking out our step-by-step beginners’ tutorial guide on how to get started with WordPress here.
Let’s meet you inside your WordPress website.
Once you’re inside your WordPress website, follow these steps:
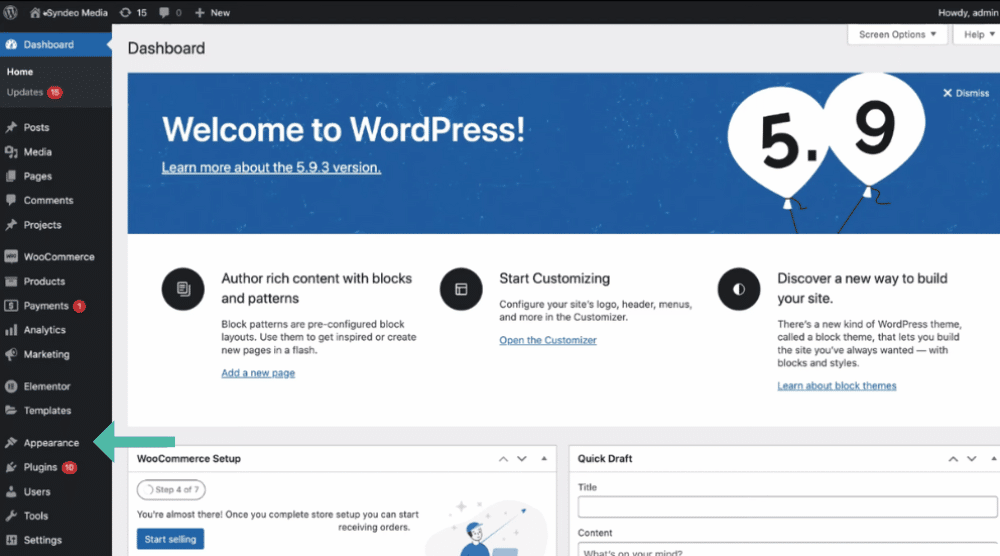
- Simply navigate over and click on ‘Appearance’ on the left-hand sidebar.
- Click on ‘Customize’ from the drop-down menu.
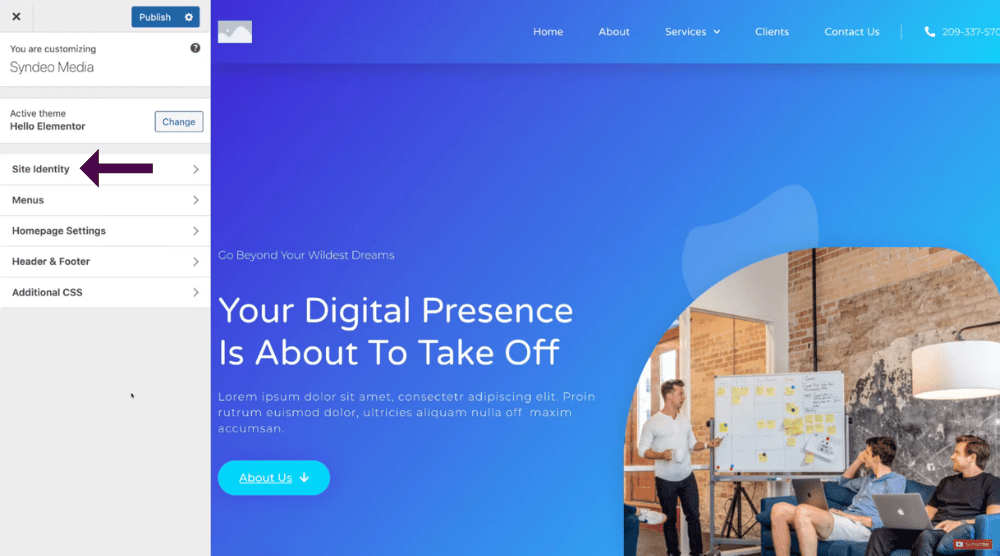
Under ‘Customize’, you can customize your website theme, including being able to add or change your logo to your primary menu on your website.
To do this:
- Simply select ‘Site identity’ heading on the left-hand sidebar.
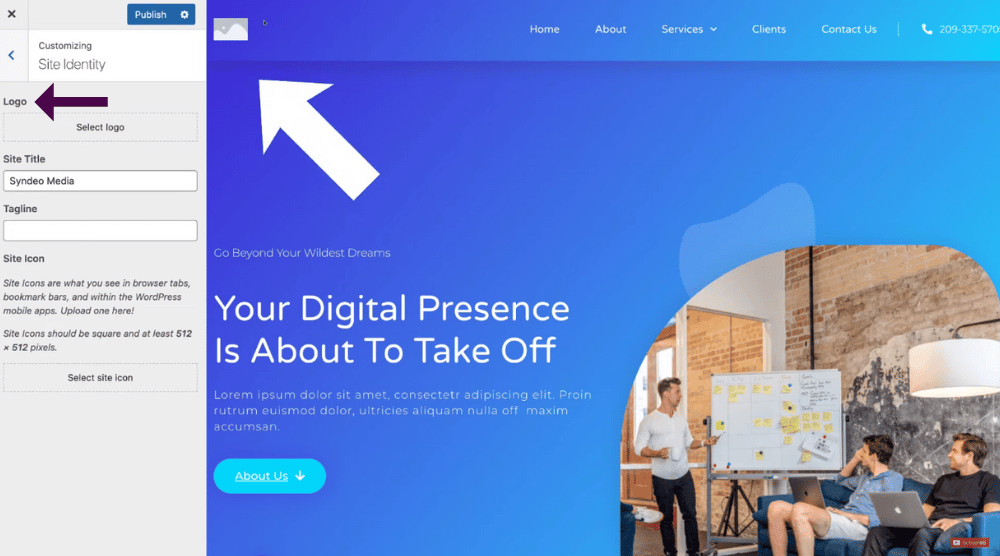
At the moment you can see we have a blank logo (see screengrab) as we currently do not have a logo for this website.
To add a logo:
- Simply navigate over to ‘Logo’ on the left-hand sidebar and click ‘Select logo’.
- Click ‘Upload files’.
- Navigate down to ‘Select files’ and simply locate the logo that you want to add to your primary menu on your website.
- Once you’ve chosen your logo, come down and click ‘Select’.
This will bring up the option to crop your logo.
- Simply crop your logo to what suits you then select ‘crop image’,
- Or select ‘skip cropping’ if you’re happy with it.
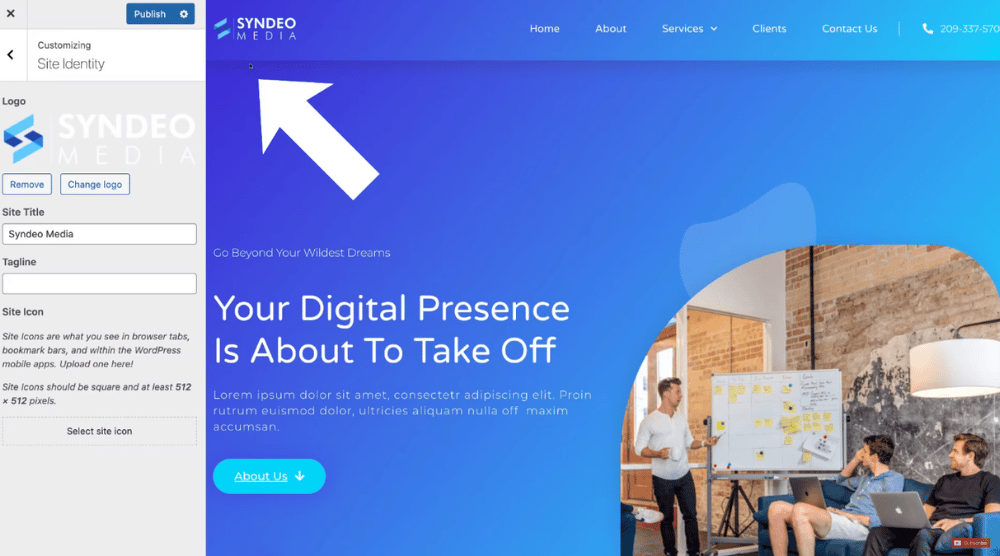
Congratulations!
Just like that, you’ve added your new logo.
You can now see we have added our logo to the top of our page (see screengrab).
Once you’ve added your new logo:
- Simply navigate up to ‘Publish’ at the top of your left-hand sidebar.
Now your new logo has been published onto your live website.
Let’s exit back to our dashboard.
Also read: How To Connect MailChimp to WordPress
2. How To Add And Change A Logo To WordPress Using Elementor

The second method for adding your logo to your WordPress website is by using the Elementor page builder plugin.
Elementor makes it extremely easy for you to build your website from the front end which is ideal for beginners that don’t have any technical experience or web designing experience.
You can simply use the Elementor page builder to drag-and-drop different elements to create your website!
Additionally, you can access pre-made professional page templates to use on your website, and can even change and customize these templates the way that you like.
You can read more about creating a WordPress website with Elementor in our beginner’s tutorial here.
To simply add a logo to your WordPress website using the Elementor page builder plugin, all you need to do is:
- Navigate to the front end of your website.
- Simply head up to the top left-hand corner and click on your website name. For us, it will be ‘Syndeo media’.
- Click ‘Visit site’.

This will take you to the front end of your website.
- Navigate over and click on ‘Edit with Elementor’ at the very top of the page.
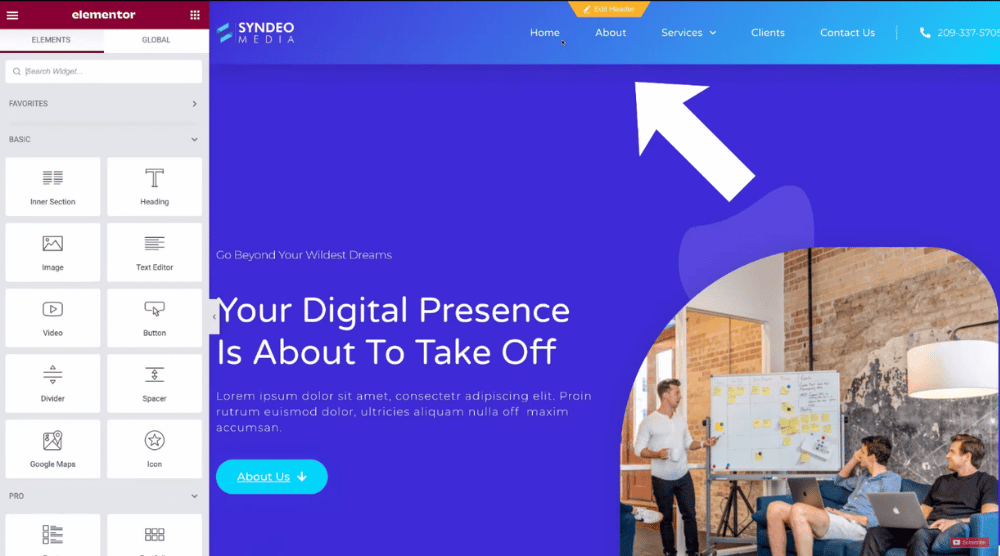
- Simply navigate up to and click on the ‘Edit header’ section (see screengrab).

- We already have a logo here, so we’ll head over and click on our logo on the upper left-hand side.
You can actually customize and change your logo with Elementor that you uploaded through the left-hand sidebar to how you want it to look.
For example, you can:
- Navigate down to ‘Alignment’ and change the alignment.
- You can also navigate up to ‘Style’ and change the width or the height.
Plus, additional customizable options such as opacity and border type.
And that’s how you can customize and change your logo with Elementor!
- Come down and click ‘Update’.

Once you’ve finished customizing your header logo:
- Scroll down to the bottom of your page. You can see we have a footer on our page
Let’s add a logo to our footer using Elementor by following the below steps:
- Click ‘Edit footer’.(see screengrab).

- Simply drag the ‘Site logo’ from the left-hand sidebar down onto this section here (if you want to add your logo down there)
Or you can go ahead and add an image using these steps:
- Click ‘Image’ then drag that and drop that down in your footer.
- Select ‘Choose image’ from the left-hand sidebar.
- Click ‘Select files’ to upload a variation of your logo.
We’re going to select our logo.
- Click ‘Insert media’ down the bottom right-hand side of the page.

We have now added our logo to our footer (see screengrab).
Once you’ve done this, you can make a couple of simple changes if you want.
- Navigate up to ‘Style’ and then change the sizing of your logo.
- Navigate to ‘Content’ next to ‘Style’ and change the alignment of your logo.
When you’ve made your changes and like the way things look:
- Simply come down to the bottom of the page and click ‘Update’.
And that is how you can simply add your logo to your footer, and how to change your logo in both the header and footer of your WordPress website with Elementor!
Now, remember, if you make any changes in your footer and header through Elementor, those changes will show on every page of your website.
Also read: How To Embed Calendly on WordPress
3. How To Add A Logo To WordPress Using Divi

Next, we’re going to log into another website where we have the Divi theme enabled to show you how to upload your logo to WordPress using the Divi theme.
Divi is a premium theme that you can install onto your WordPress website.
You can simply use the Divi visual drag-and-drop builder to build your website pages with absolute ease.
If you’re new to WordPress and Divi and are interested in creating a full-functioning and professional WordPress website using the Divi theme, check out our beginner’s step-by-step guide here.
To upload a logo to your WordPress website using Divi:
- Simply navigate down on the left-hand sidebar of your WordPress dashboard and locate then click on ‘Divi’.
- Simply navigate over to ‘Logo’.
- Click ‘Upload’ to upload your logo (see screengrab).
- Click on your logo.
- Come down and click ‘Set as logo’.
- Finally, click ‘Save changes’ near the upper left-hand side of the screen.
You can go ahead and check out your logo by heading back to the front end of your website.
- Head up to your website name on the upper-left-hand side of the page. For us, it will be ‘Syndeo media’
- Select ‘Visit site’.

You should be able to see your logo.
You can see the logo that we uploaded to the Divi theme (see screengrab).
Let’s head back to our dashboard.
From here, you can change the size of your logo with Divi through these simple steps:
- Navigate down the left-hand sidebar and click on ‘Appearance’.
- Click on ‘Customize’.

- Navigate up to ‘Header & navigation’ on the left-hand sidebar.
- Select ‘Primary menu bar’.
This is where you can customize the size and change your logo with Divi.
- Once you’ve made any changes, simply click ‘Publish’ above the left-hand sidebar.
Both Elementor and Divi are amazing ways to help you build both professional and stunning pages for your WordPress website.
If you want to use a page builder to help you with getting your WordPress website up and running. but you’re not sure which one to go with, check out our Divi vs Elementor comparison guide.
And just like that you now know how to simply add and change your logo to your WordPress website using the WordPress customizer, and how to add and change your logo with the Divi theme and the Elementor page builder plugin!
That is all we wanted to cover in this tutorial to help you add your logo to your WordPress website.
Also read: How To Add Anchor Links to WordPress
Add a logo to your WordPress website using DIVI & Elementor – Video Tutorial
If you’d like to learn how to add a logo to your WordPress website in a more visual way, you can watch our video tutorial below.

