We’ll use a free WordPress SMTP plugin called WP Mail SMTP to explain how to fix Gmail spam issues.
Do you own a WordPress website and use a free or paid Gmail account?
Are your emails ending up in your customers’ or prospects’ spam folders?
If yes, then this WP Mail SMTP tutorial is for you.
The situation can be a lot worse if your website forms aren’t performing as they’re supposed to.
This happens to be a common WordPress problem, and we’re going to help you solve it in this tutorial.
If you are emails are just not sending properly from your Gmail too, then this article will help you out!
How to Fix Gmail Spam Issues
Let’s begin with the following steps.
1. Install the Best SMTP Plugin for WordPress

It’s the best solution to ensure that you can send and receive emails properly.
Also, the process of setting up WordPress SMTP is the same for a free Gmail account and a paid Google Workspace account.
Read more: How To Create Email Templates in Gmail
2. How to Setup WP Mail SMTP
- Log in to WordPress
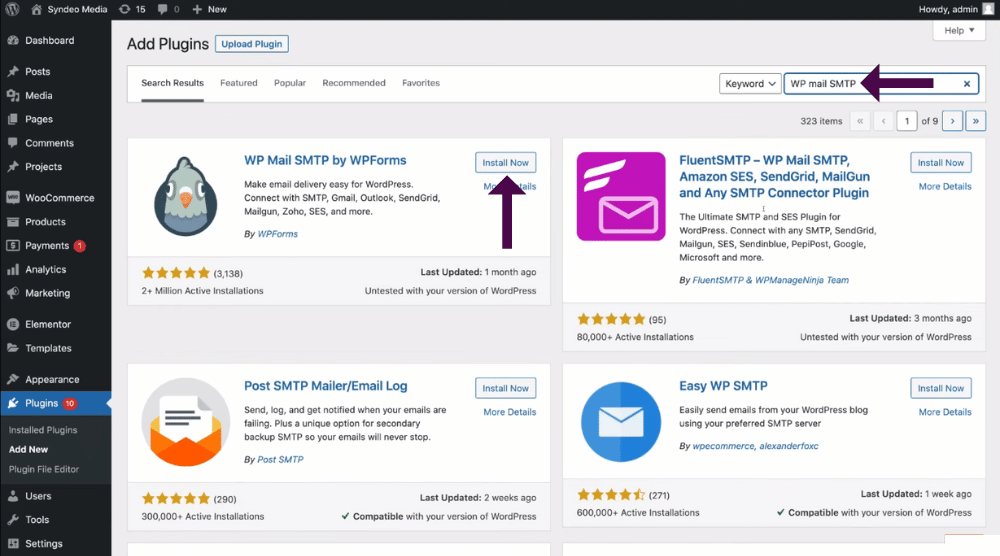
- Tap on Plugins > Add New
- Search for ‘WP Mail SMTP’
- Locate the WP Mail SMTP plugin by WPForms
- Install it
- Hit ‘Activate’
- Select ‘Let’s Get Started’
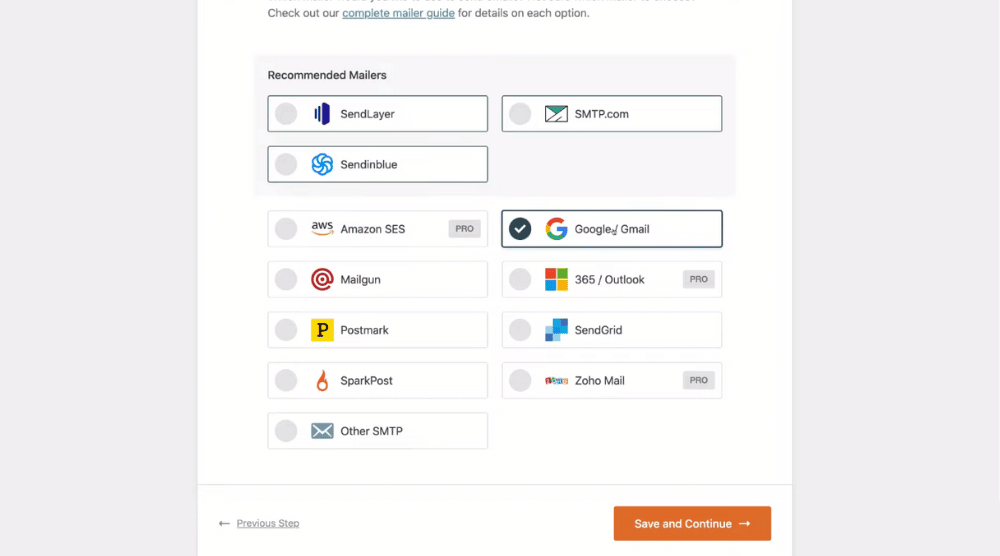
- Scroll down and click on ‘Google/Gmail’
- Hit ‘Save and Continue’
- Select ‘I Understand, Continue’
- Under ‘Configure Mailer Settings’
We now need to enter the client ID and client secret.
To do this:

- Type in console.developers.google.com
- Ensure that you have the correct Gmail account selected inside the Google Cloud Platform (see top-right corner)
- Click on ‘Create Project’

- Add the project name. We’ll call it “WP Mail SMTP”
- Hit ‘Create’
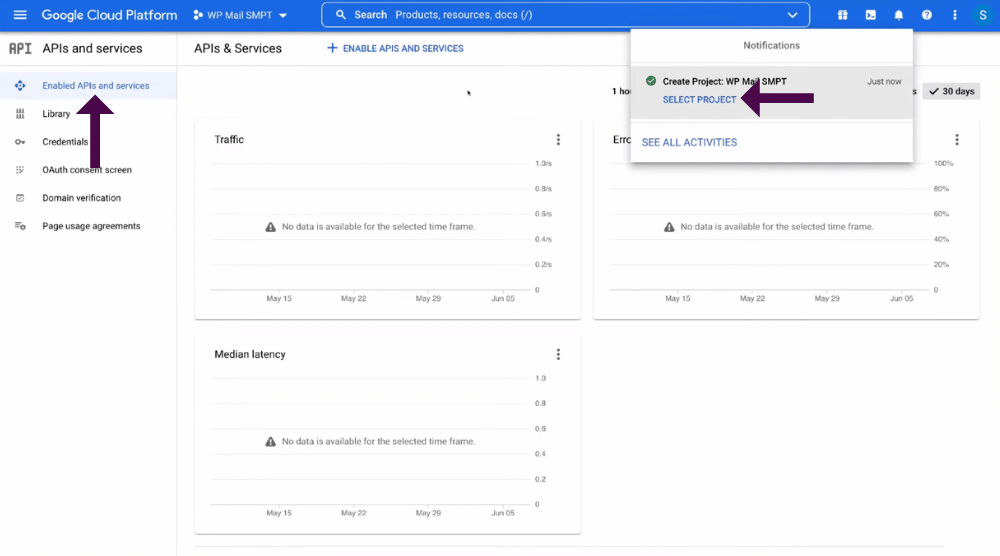
- Select the project (refer to the screengrab)
- Click on ‘Enabled APIs and services’
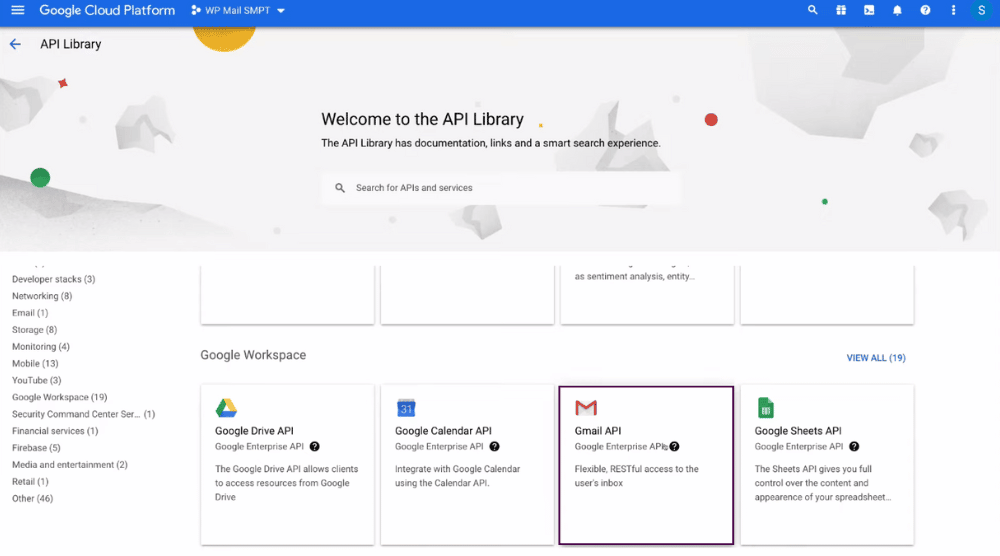
- Scroll down and locate the Gmail API
- Tap on ‘Enable’

- Click on ‘Create Credentials’ (top-right corner)

- Under ‘Select an API’, make sure you have ‘Gmail API’ selected
- Under ‘What data will you be accessing’, tap on ‘User data’
- Hit ‘Next’
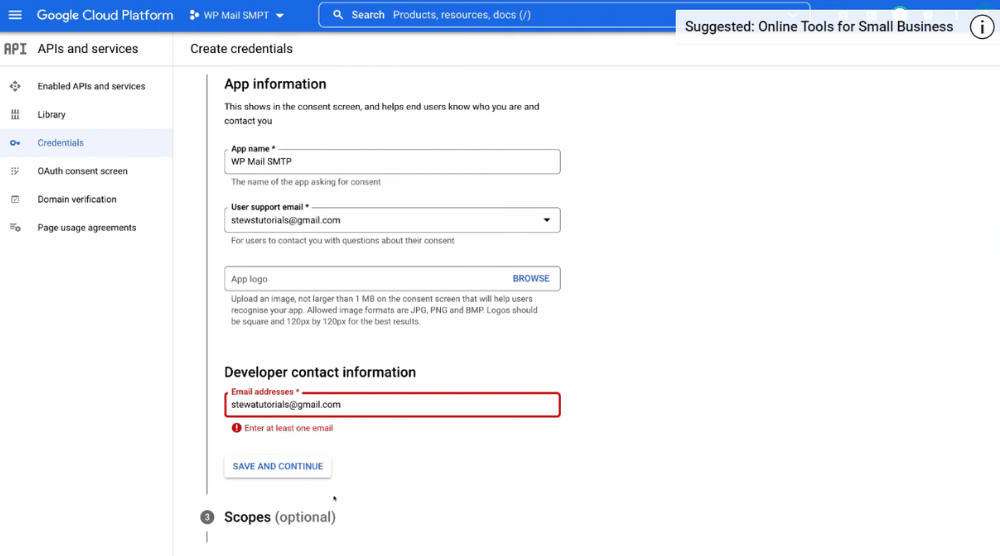
- Under ‘App information’, enter the app name – WP Mail SMTP
- Add your Gmail in the ‘User support email’ field
- Enter your email again under ‘Developer contact information’
- Hit ‘Save and Continue’
- Leave everything under ‘Scopes’ as it is
- Hit ‘Save and Continue’
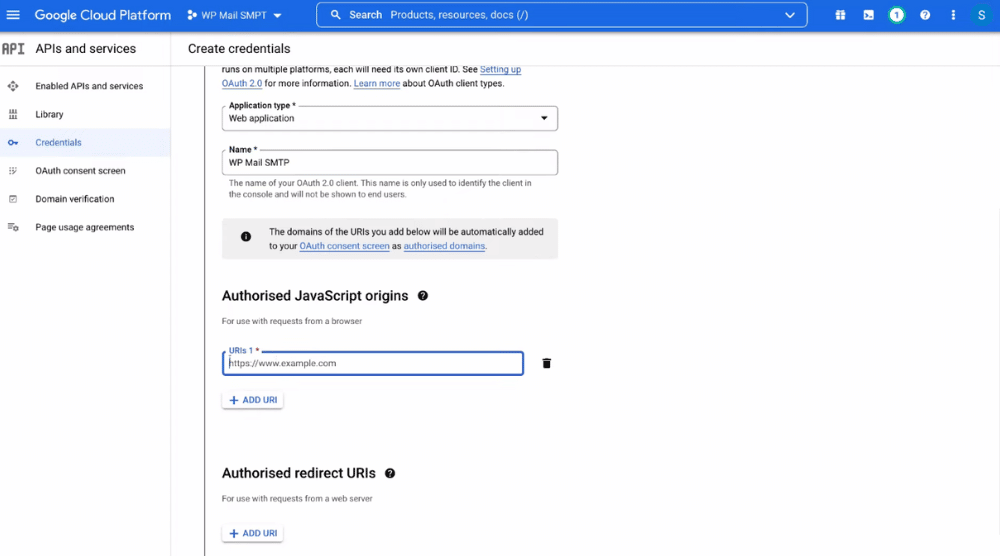
- Under Client ID, tap on ‘Application type’
- Choose ‘Web application’ from the dropdown
- Add ‘WP Mail SMTP’ in the Name field for internal reference
- Enter your WordPress website URL under ‘Authorised JavaScript origins’
- Under ‘Authorized redirect URLs’, tap on ‘Add URL’
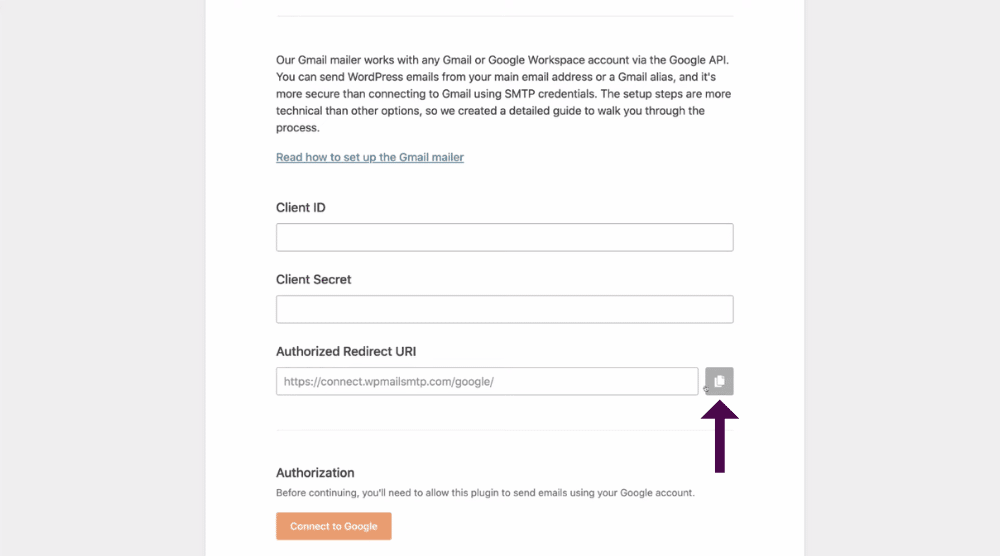
- Head back to your WP Mail SMTP setup
- Copy the Authorized Redirect URL
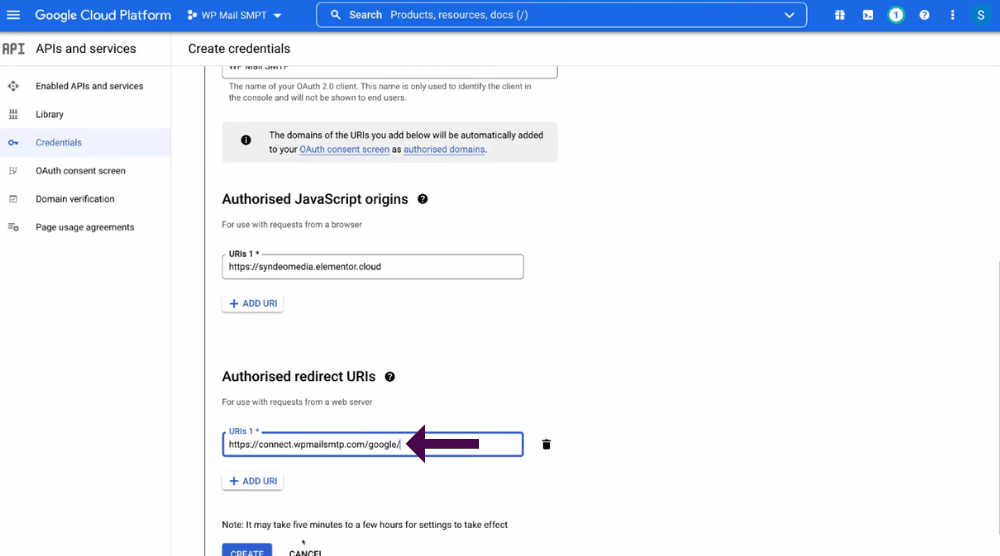
- Revisit Google Cloud Platform
- Paste the URL (check the screengrab)
- Hit ‘Create’
- Copy your client ID
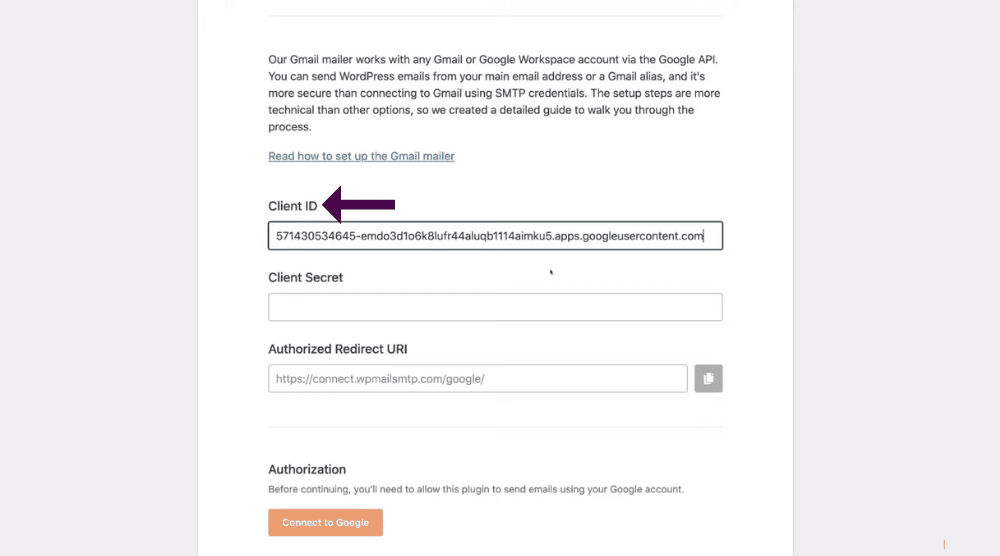
- Head back to your WP Mail SMTP setup
- Paste the client ID
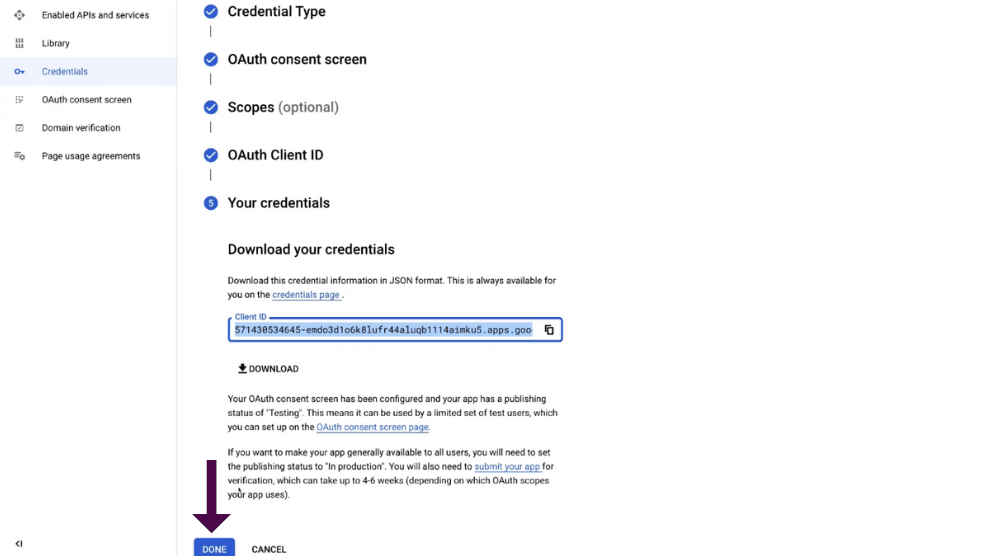
- Head back to Google Cloud Platform again
- Select ‘Done’
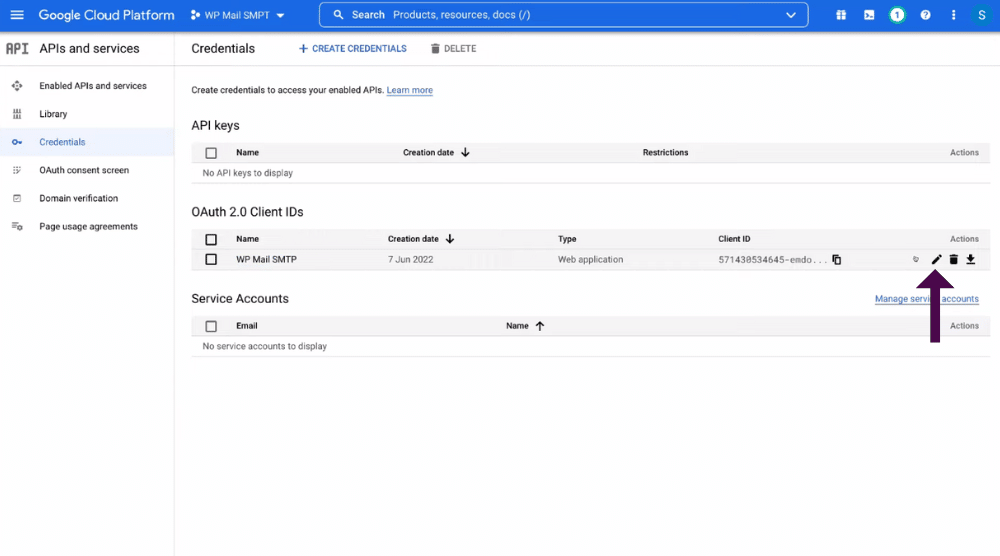
- Tap on ‘Credentials’ (left-hand side)
- Locate your WP Mail SMTP project
- Navigate over to ‘Actions’
- Click on ‘Edit OAuth client’
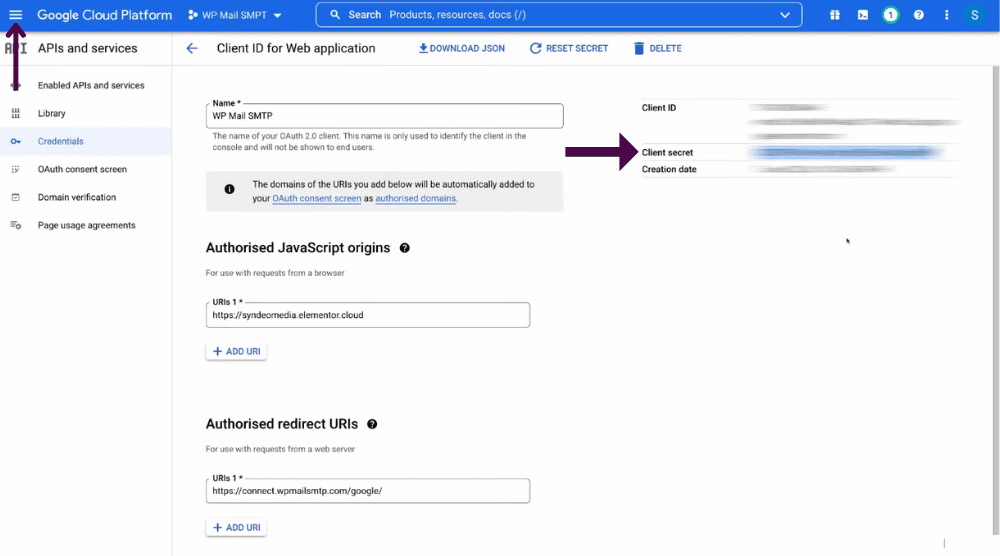
- Copy the client secret I(right-hand side)
- Click on the navigation menu
- Select ‘APIs and services’
- Choose ‘Auth consent screen’ from the options
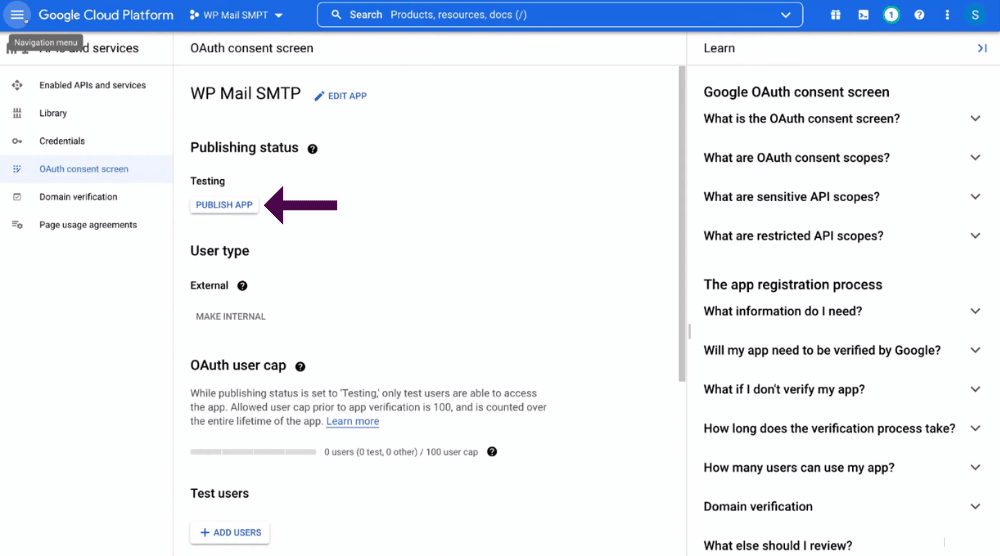
- Hit ‘Publish App’ and select ‘Confirm’. This will change the publishing status from ‘Testing’ to ‘In production’
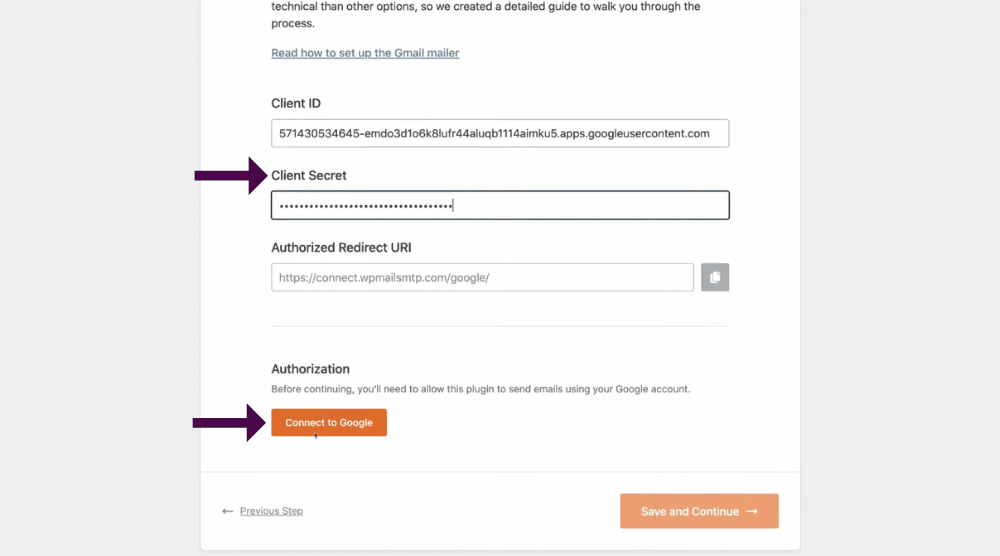
- Head back to your WP Mail SMTP setup
- Paste the client secret
- Click ‘Connect to Google’
- Choose the Google account used to set up the Gmail SMTP server
- Once you see the ‘Google hasn’t verified this app’ notification, click ‘Advanced’
- Tap on ‘Go to wpmailsmtp.com’
- Hit ‘Continue’
- When you see the ‘Successful Authorization’ message on your screen, click ‘Ok’
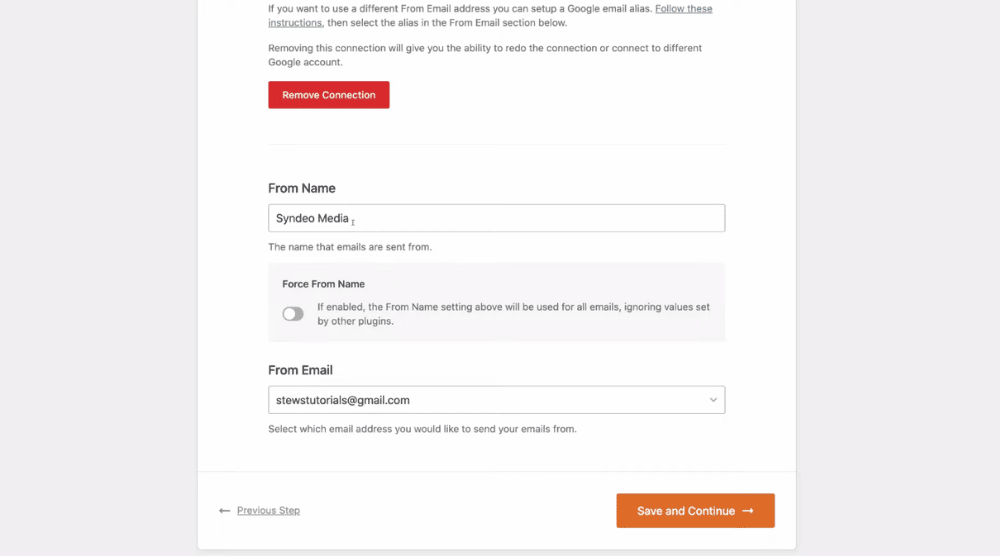
- Scroll down to ‘From Name;
- Add the name where your emails are sent from. For this WordPress best SMTP plugin tutorial, we’ll type in ‘Syndeo Media’.
- Make sure you have your email selected
- Hit ‘Save and Continue’
- Navigate down the page and Hit ‘Save and Continue’ again
- You can add your email address to receive emails from WP Mail SMTP. But we’ll skip it for now.
- Click on ‘Close and exit the Setup Wizard’
Read more: Email Templates in Gmail
3. Test Email (Ensure Emails Are Working)
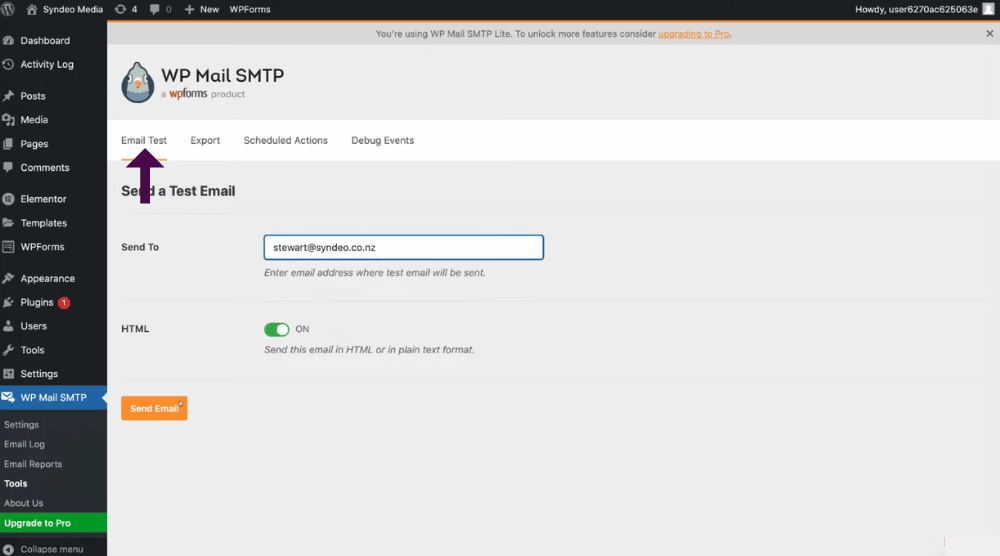
- On your WordPress dashboard, click on ‘WP Mail SMTP’ (navigation panel)
- Tap on ‘Email Test’
- Add the email address that you want to send the test email to
- Hit ‘Send Email’
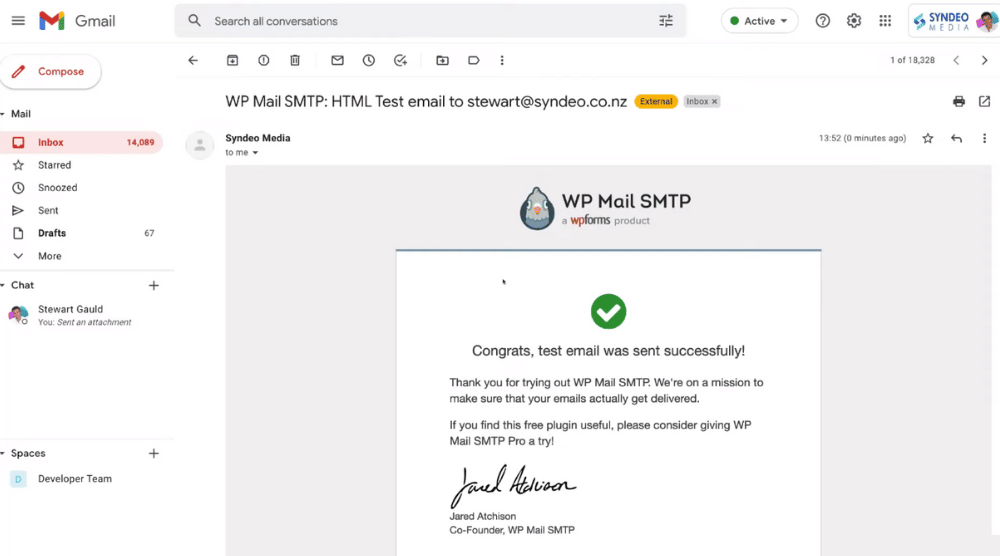
- After the success message is displayed on your screen, head over to your email inbox
- You’ll find that the test email was sent successfully
Read more: How To Track Emails in Gmail
Install & Setup WordPress Gmail SMTP (Video Tutorial)
By setting up WordPress Gmail SMTP, you’ve increased the deliverability of your emails.
Your prospects and customers shall now receive your emails in their inbox rather than in the spam folder.
Moreover, your website emails will be sent correctly henceforth.
And that’s a wrap for this WP Mail SMTP tutorial!
Check out our full video below.

