If you’re looking to create an online course but don’t know where to begin, you’ve come to the right place.
In this online course tutorial, we’ll explain how to create an online course and host this course through your own membership website.
Your students can then sign up and simply access your course inside your membership website.
This process is possible thanks to a free platform called Systeme.io.
Did you know, by 2025, the global e-learning market is projected to surpass the $325 billion mark?
The days of learning in a classroom have shifted into online education and learning.
Therefore, it’s important to transition online and share your skills, knowledge, and expertise online.
Read more: Top 10 Website Builders for Small Businesses
How to Create an Online Course for Free?
In this article, we are going to leverage a free online course builder called Systeme.io and walk you through the process of using this all-in-one platform to create your own online course.
Step 1: Getting Started with Systeme.io
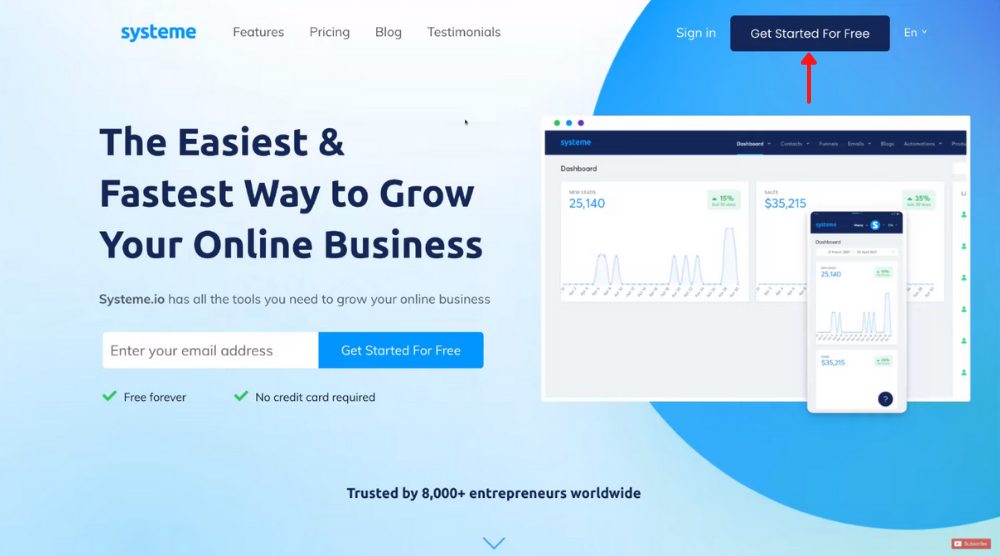
Before we go ahead and create a membership website, head over to Systeme.io.
Get started with Systeme.io for FREE here
*The link above is an affiliate link, which means we will get a commission if you upgrade to a paid plan (with no extra cost to you). This helps support our education-based website and we thank you in advance!
Click here to get started with Systeme.io for free!
Now, follow this step-by-step process:
- Tap on ‘Get Started for Free’ in the upper-right corner.
- Complete the initial signup to arrive at the Systeme.io dashboard
Step 2: Explore Systeme.io Dashboard
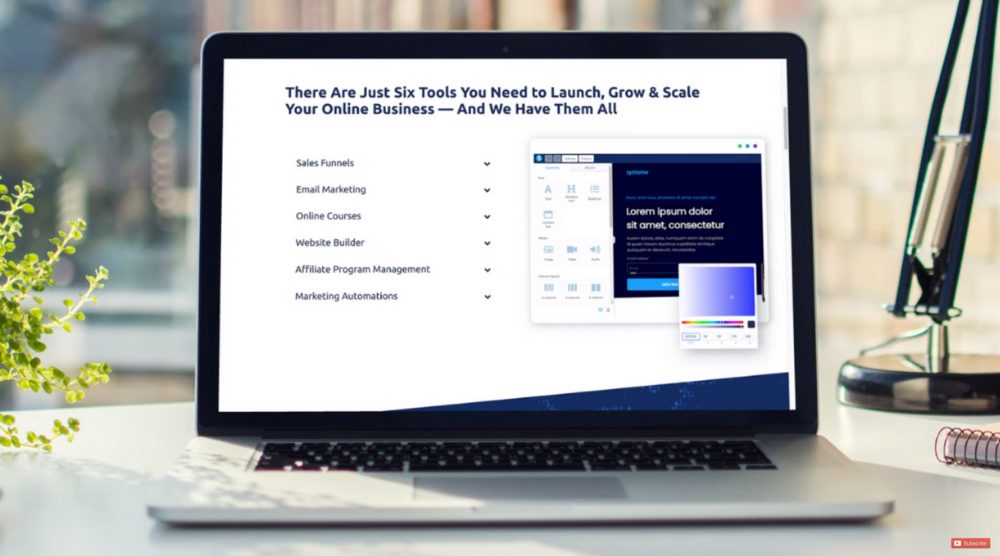
All this is completely for free!
Individuals and small businesses that don’t have big budgets to use all these services from other providers must check out Systeme.io.
Even though it’s free, Systeme.io is incredibly user-friendly.
This makes it an easy online course builder for novice and experienced course creators alike.
Let’s go ahead and create our first course with the best free online course builder:
Step 3: Create an Online Course
If you want to build more than one course you will need to upgrade to an affordable paid plan.
The following steps are necessary to create an online course with Systeme.io:
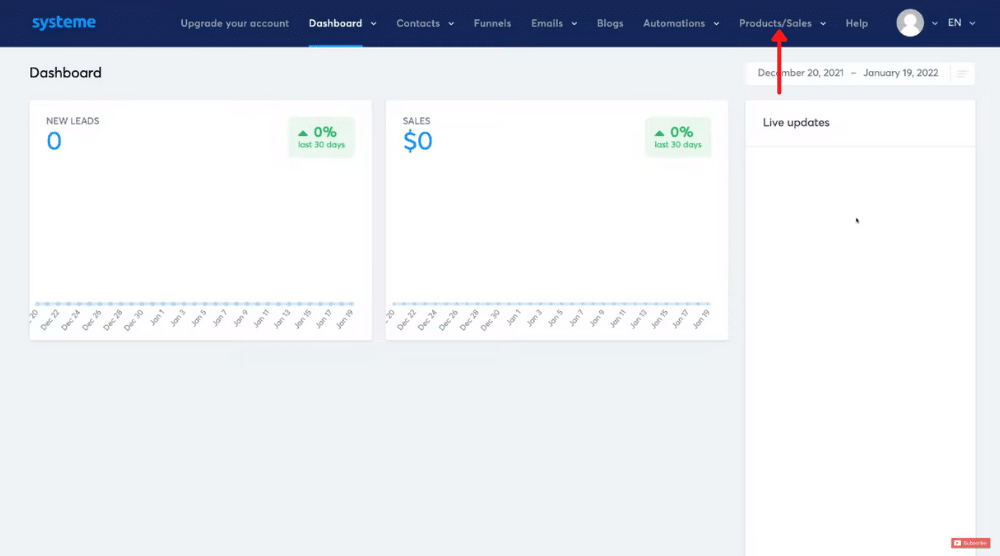
- On your Systeme.io dashboard, click on ‘Products/Sales’ as seen on the top menu.
- Select ‘Courses’. At present, it’s because we have zero courses right now.
- Tap the ‘Add a new course’ button in the upper-right area of your dashboard.
- Fill in your course details, such as course name, description, URL path (which should have the course name in it), course domain (which is by default the email address you chose to sign up for Systeme.io)
- Next, you need to pick a theme of your membership site and choose a font.
- Add the instructor’s name in the given field.
- Upload a logo and make sure it’s center-aligned. Watch this beginner’s tutorial if you wish to create a logo using a free design tool called Canva.
- Check the box that says “Show module titles for students”
- Click ‘Save’
Using this online course builder software, we will now add modules to our newly created course.
Read more: Canva Free Logo Maker
Step 4: Add Modules

Listed below are the required steps to add a module:
- Tap on ‘view’ to see what your membership site looks like (refer to the screengrab). We want to keep it minimalistic and easy to navigate.
- Head back to your Systeme.io dashboard and click ‘Add module’.
Think about modules as course sections. Within your modules, you will add multiple lectures.
- Enter the module name and hit ‘Save’.
- Repeat the above two steps to add another module (or as many as you want).
- Click on the bin icon next to any module if you wish to delete it
Now, it’s time to add lectures to this online course tutorial.
Step 5: Add Lectures

- Click the ‘Add lecture’ button (refer to the screengrab).
- Type in the lecture name.
- To provide instant access to your content once the student pays for it, let the delay between lectures be zero.
- Select a page template and hit ‘Save’
Step 6: Customize the Lecture Template
Therefore, in this part of our online course tutorial, we’ll explain how to customize the lecture template you’ve selected.
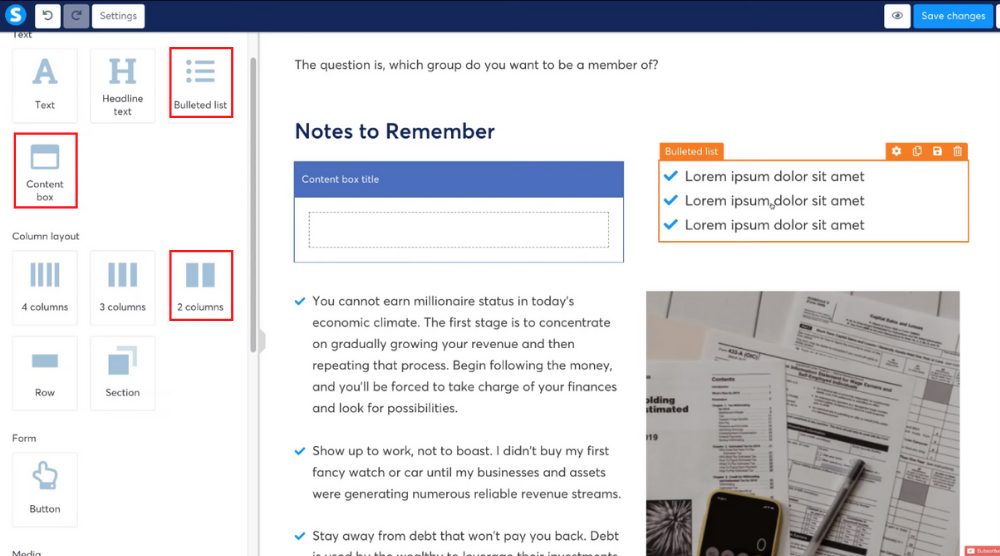
On your right is the default template content.
On your left are the elements that you can drag and drop to replace the existing elements on the right.
Some of the elements are text, layouts, forms, bulleted lists, and media.
Refer to the screenshot to see how we’ve added a 2 column, content box, and bulleted list on the right using the drag-and-drop method.
Apart from adding new elements, you can also customize the existing ones on your lecture template.
To do that, just select the template and start customizing it using the basic formatting options that appear on the element itself or the advanced formatting options on your left.
Some of these formatting options include font type, font size, vertical spacing, color, icon selector, margins, and more.
As far as the content is concerned, you can just delete the content and replace it with your own copy.
Customizing the lecture template is super easy using this online course builder.
To add a video module:

- Under ‘Video’, select the ‘Video type’ (YouTube, for example).
- Enter the YouTube URL below it.
- Alternatively, you can enter a custom link or upload a video file to the online course builder.
- Hit ‘Save changes’ (see top-right corner)
Using the process explained, you can add multiple lectures in all the modules.
In the bottom-left corner, you’ll find the option to preview the lecture template once it’s customized.
You want the lecture to be responsive across all devices.
Adjacent to ‘Save changes’ (top-right corner), you have the view button.
By clicking on it, you can observe what your lecture page looks like on the membership site.
To your left, notice the course progress bar, modules, and lectures.
When a student finishes the lecture, they can click ‘Mark as complete’ at the bottom.
Back to your lecture template, remember to save changes.
Going one step back to the course dashboard, you’ll now notice the newly created lecture under module 5.
However, you can drag it and place it under module 1 (or any module) as needed.
To add more lectures:
- Select the module that you want the lecture to be included in.
- Click on ‘Add lecture’.
- Customize it using the process explained for the first lecture template.
Using this online course builder platform is that easy!
Next to each lecture, you have these options (far right):
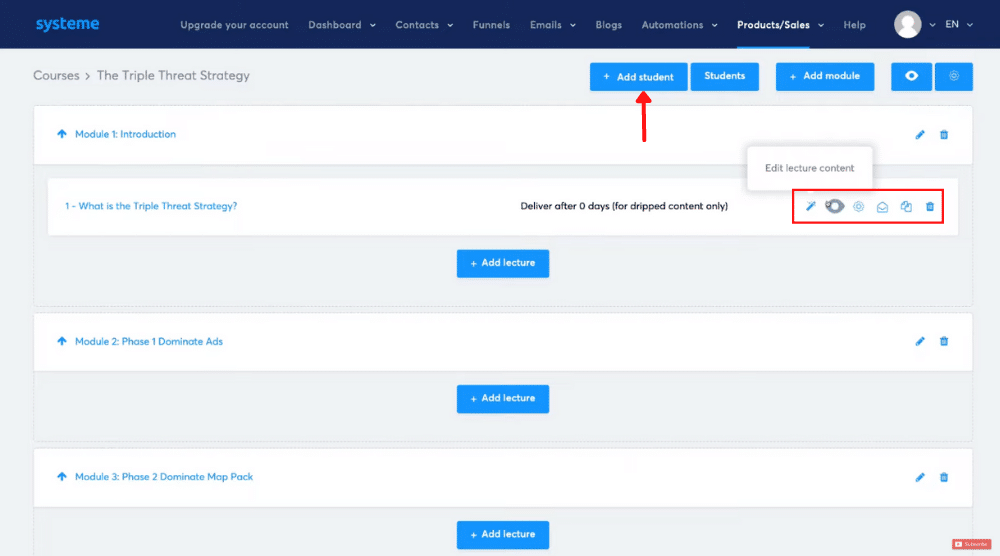
- Edit lecture content (the pencil icon).
- Preview lecture page (the eye icon).
- Edit lecture settings: you can change the lecture name with this option.
- Create drip campaign email (we’re not going to cover it in this online course tutorial).
- Duplicate the lecture: this is an extremely valuable feature offered by Systeme.io because the overall structure and theme of your lectures are going to be the same. You save an incredible amount of time by duplicating the lecture and then just changing the content, uploading another video, etc.
- Delete the lecture
Now, to add students, all you need to do is click on ‘Add students’ (this is optional; use only if you are an experienced course instructor and you already have students from another platform).
And this is how you create a membership website!
This brings us to another crucial part of our online course tutorial.
Step 7: Create a Sales Funnel

This is where you can add pricing plans and where your students can pay for your course and access your membership site.
To build a funnel:
- Select ‘Funnels’ from the menu above.
- Click ‘Create’ and name your new funnel.
- Pick ‘Sell’ from the options and hit ‘Create’.
- Select an appropriate template for the order form
Step 8: Add Resources

Customers can access this resource after they make the purchase.
Just click on the ‘+’ icon next to ‘Resources’ and select ‘Course’ from the drop-down.
Below, you need to choose the course you’ve just created using the best free online course builder.
Under ‘Choose course access type’, select the ‘Full access’ option.
Step 9: Add Price Plans
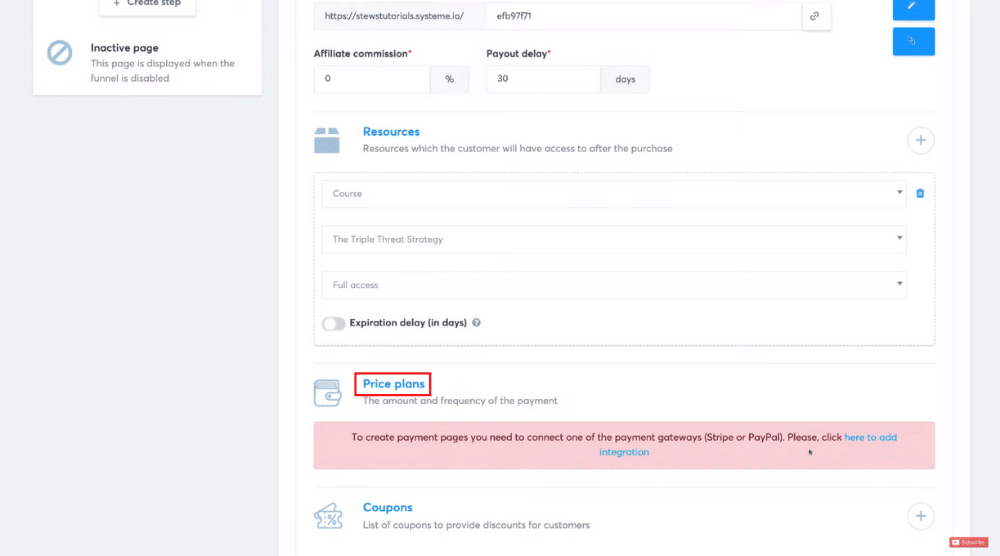
But before we do that, we’d need to integrate a payment gateway: Stripe or PayPal.
Therefore, click on “here to add integration”.
For this online course tutorial, we’ll quickly add Stripe as our payment gateway (This is so you can be paid!).
When the integration is complete:
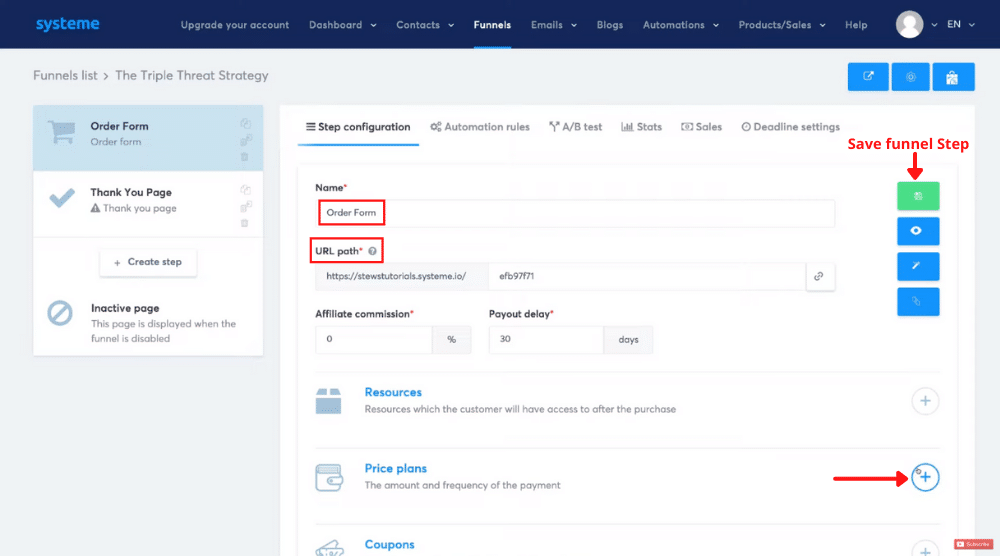
- Click on the ‘+’ icon next to ‘Price plans’.
- Name your price plan (as seen on the Systeme.io dashboard).
- Add another price plan name (as seen on the payment page).
- Include a statement descriptor (as seen on bank statements).
- Under ‘Type’, select ‘One shot’ from the options.
- Type in the payment amount.
- Hit ‘Save’
Notice that for ‘Order Form’, you can change the name as well as the URL path.
Click ‘Save funnel step’ after making changes (refer to the screengrab).
Step 10: Customize the Sales Funnel

Start customizing the order form template.
The customization process is the same as explained for lecture pages.
If you wish to watch a detailed tutorial on how to create a sales funnel with Systeme.io, we recommend watching this tutorial.
After the customization, remember to hit ‘Save changes.
Similarly, you can customize the ‘Thank You Page’ by adding the name, URL path, and links to other channels like a Facebook group.
Make sure that the unified branding is maintained while building the sales funnel as well.
And that’s how you create an online course for free using Systeme.io.
Read more: Build a Sales Funnel for FREE | (Systeme.io Tutorial)
How To Create A Free Online Course (Video Guide)
What I will also do is add our full Systeme.io video tutorial down below to help you with this process using a visual walkthrough. Enjoy!

