SMS marketing software allows you to automate text notifications, reminders, and confirmations.
Moreover, you can send bulk SMS marketing campaigns to promote your products or services.
Therefore, SMS (text message marketing) is a great opportunity for businesses to enhance their customer experience.
TextMagic: SMS Marketing Software For Small Business
One of the leading SMS marketing software for small businesses is TextMagic (in our opinion).
In this SMS marketing tutorial, therefore, we’ll get you up and running with TextMagic.
1. Get Started
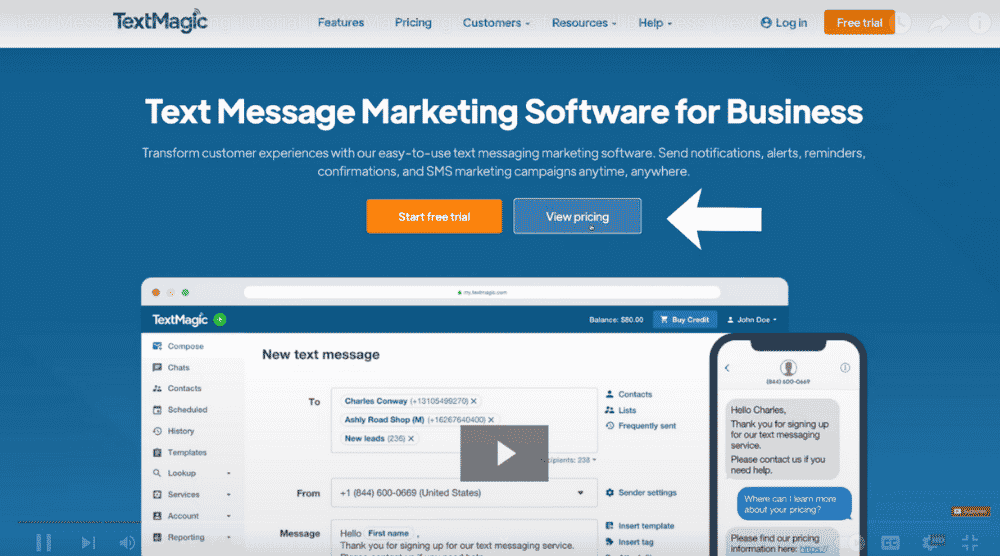
Get started with TextMagic for FREE here
*The link above is an affiliate link, which means we will get a commission if you upgrade to a paid plan (with no extra cost to you). This helps support our education-based website and we thank you in advance!
- Visit TextMagic
- On the homepage, click ‘View pricing’
2. Navigate Pricing
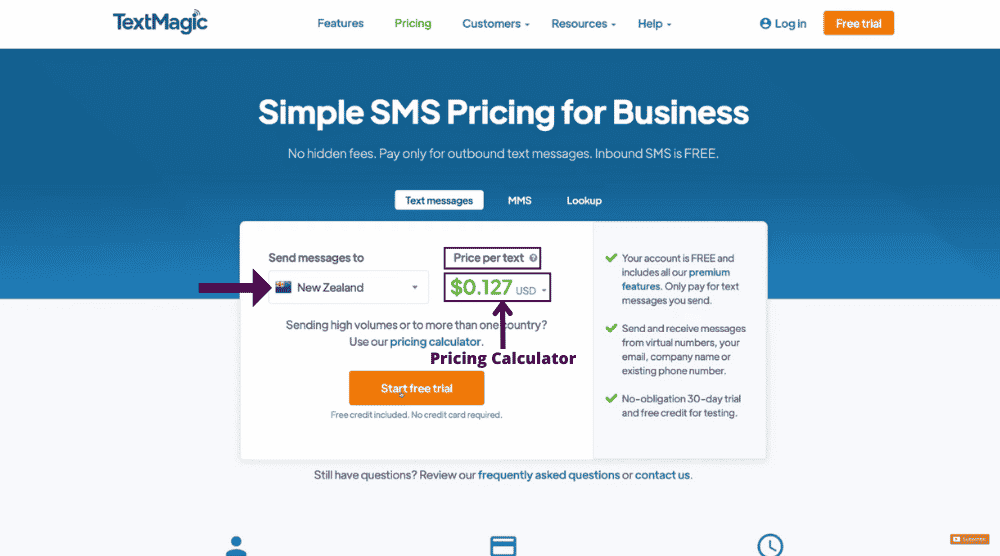
As a local business, you’d need to select a country where your customers are in. For this tutorial, we’ll use a local restaurant business as an example.
- Hit the dropdown next to the country name.
- Choose a country of your choice. For this text message marketing tutorial, we’ll select New Zealand.
- Select the dropdown below ‘Price per text’ and choose a relevant currency.
- Refer to the pricing calculator to determine the cost of sending high-volume SMS marketing campaigns to multiple countries.
Note: Your TextMagic account is free. The cost is only attached to the text messages you send. You can even take advantage of the 30-day free trial.
Under the free trial, you receive free credit for testing.
Moreover, this credit never expires. TextMagic works on a prepaid credit-based model.
This means you top up your account and use the credit available in it.
This, in turn, enables you to have better control over your budget.
Select ‘Start free trial’ to begin and complete the initial setup.
3. Set Up Your TextMagic Account
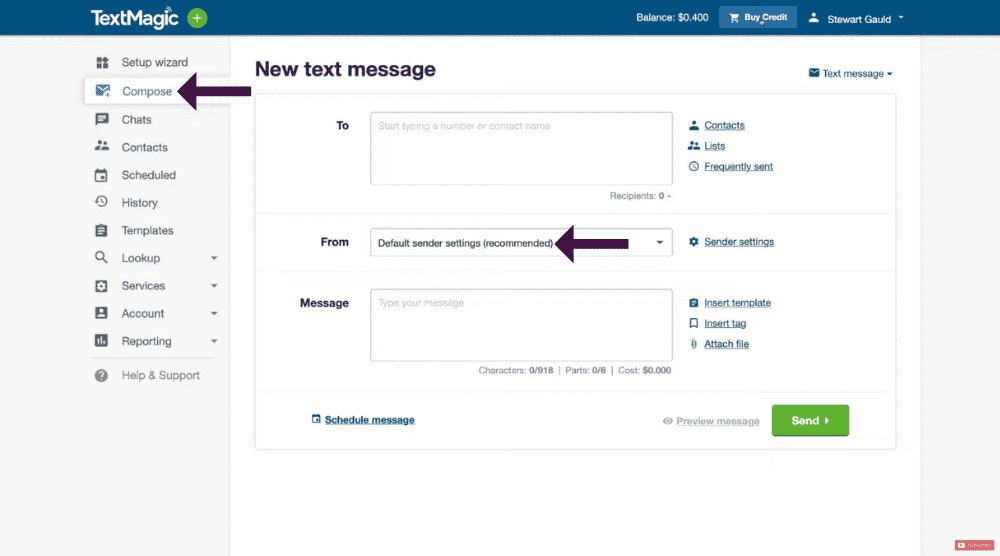
Inside your TextMagic account, follow these steps:
- Click on ‘Compose’ (see left).
- Notice that we have the default sender settings selected. You can buy a TextMagic number, apply for a sender ID, add your mobile number, or access shared reply numbers.
If you are new to TextMagic, we recommend keeping the default sender option selected.
And unless you have a business mobile number that you want to use.
4. Add Credit
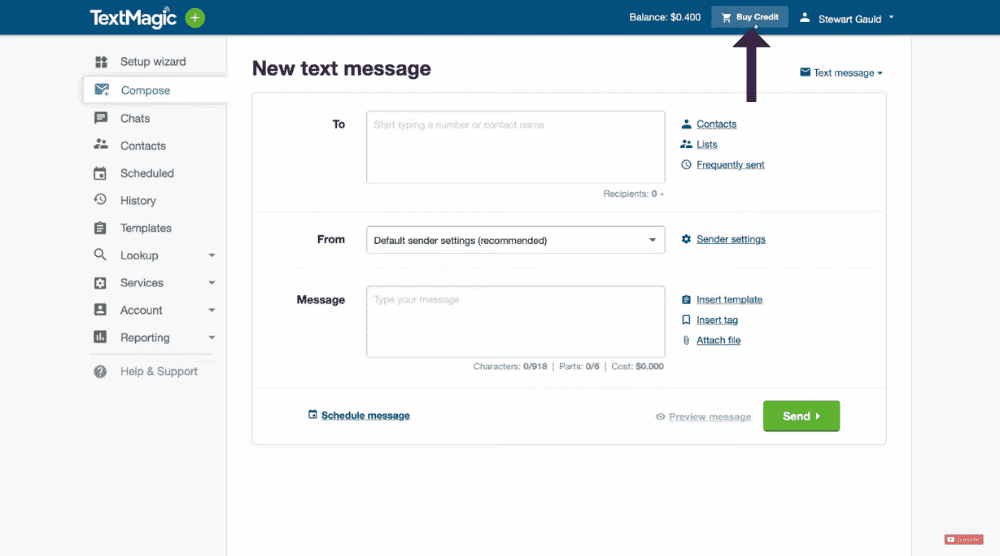
As mentioned before in this text message marketing tutorial, you receive free credits during the free trial.
You can also purchase them by clicking on ‘Buy Credit’.
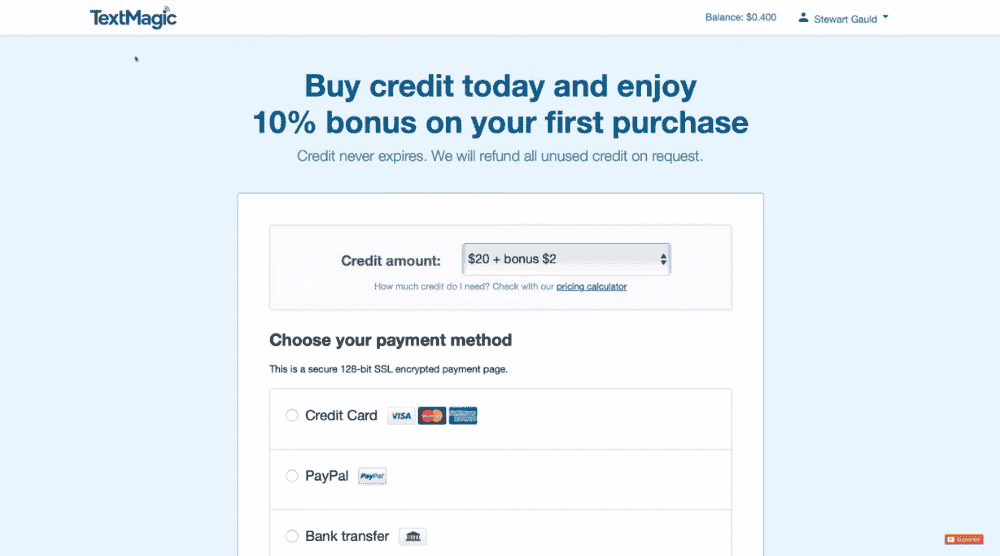
Now, take these actions:
- Pick the credit amount (the top-up)
- Choose a payment method
- Add your billing details
- Hit ‘Pay Now’
By selecting ‘TextMagic’ in the top-left corner, you can head back to your account.
Remember, this credit balance will never expire and you can always get a refund.
5. Access Chats (Text Messaging)
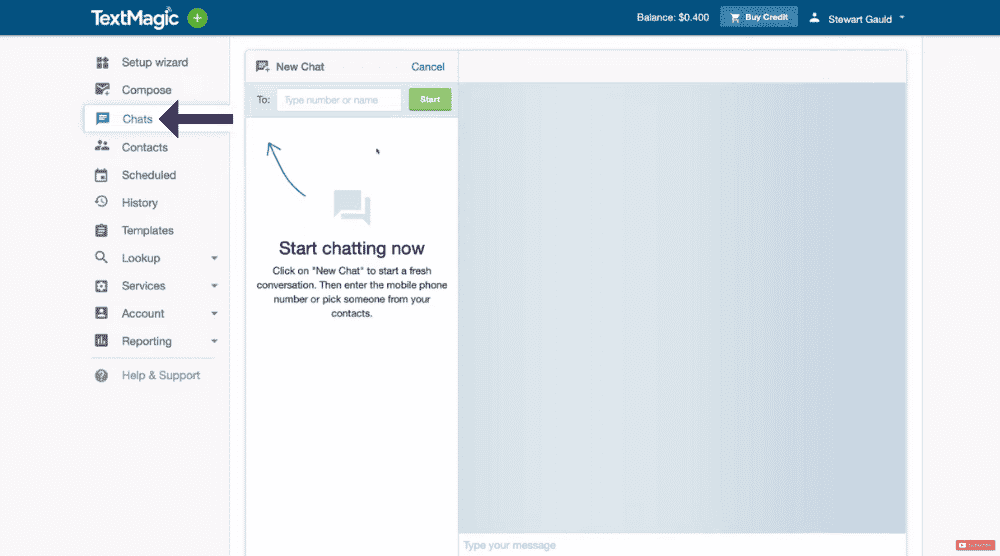
Below ‘Compose’, we have ‘Chats’.
This is where you can engage with your contacts.
All your text conversations will be visible here.
Refer to the screengrab.
Since this is just a practice TextMagic account, there are currently no conversations here.
Let’s say you send a bulk SMS marketing campaign and a contact responds to your text.
This is where you would interact with them.
6. Manage Contacts & Lists
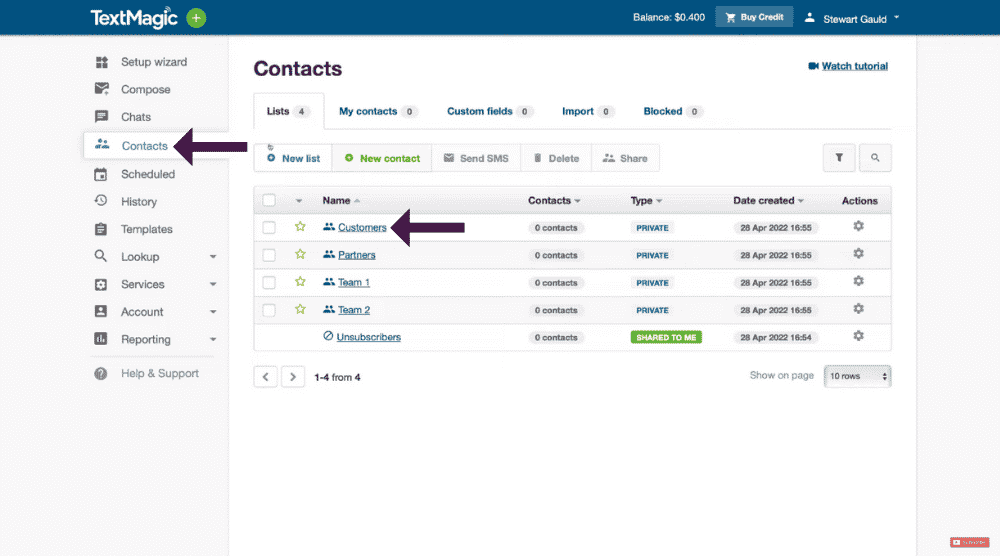
Head back to the left-hand-side menu where we have ‘Contacts’ below ‘Chats’.
This is where you can, as the name suggests, manage all your contacts within TextMagic.
Here you can create a list of subscribers, customers, and other types of contacts.
For example, you can click on the default list called ‘Customers’
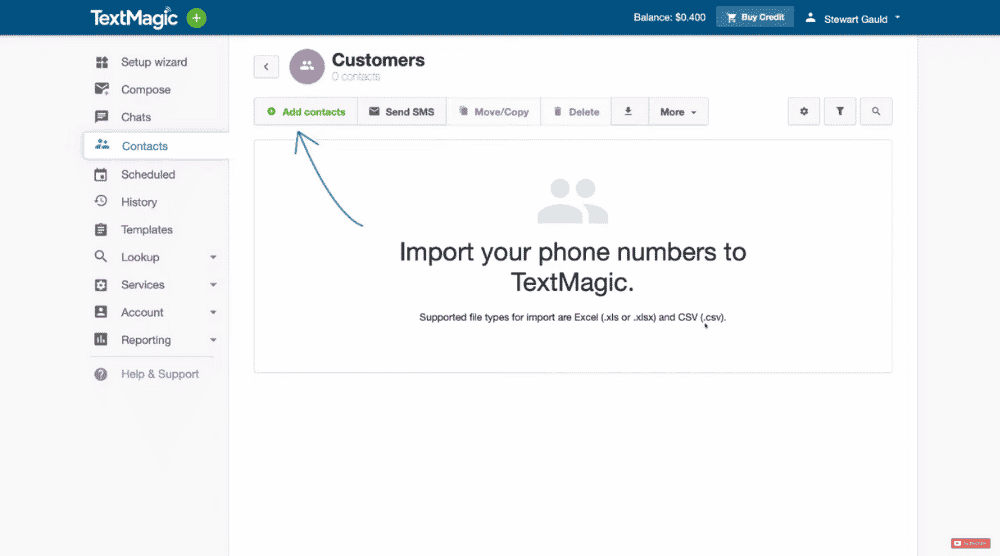
Add new customers by tapping the ‘Add contacts’ button.
You can then import the CSV and Excel file types to do so.
Similarly, you can create multiple lists and organize your contacts.
Now, let’s talk about templates in this TextMagic tutorial.
7. Create Templates
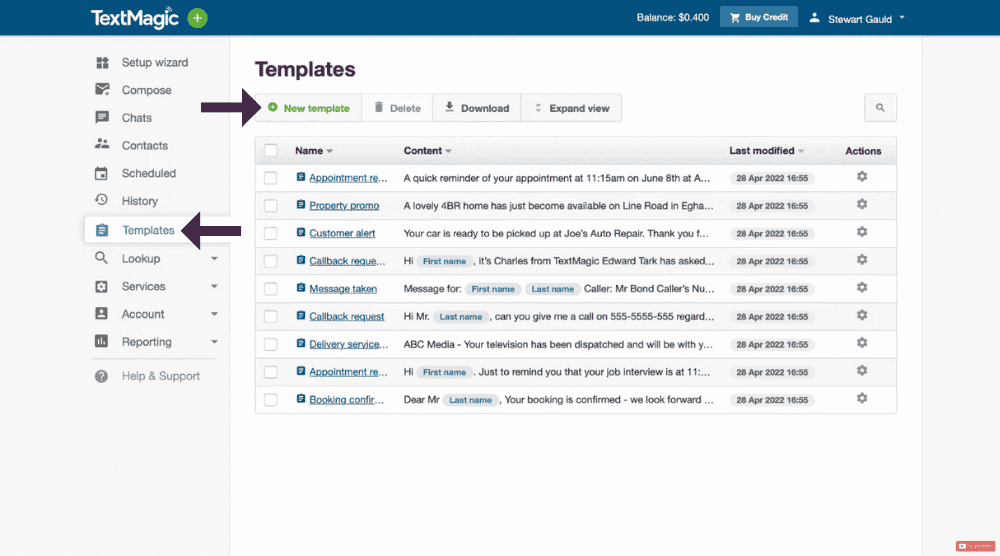
On the left-hand-side menu, hit ‘Templates’. This is where you can create text message marketing templates to send to your contacts.
- Select ‘New template’ to create a new template
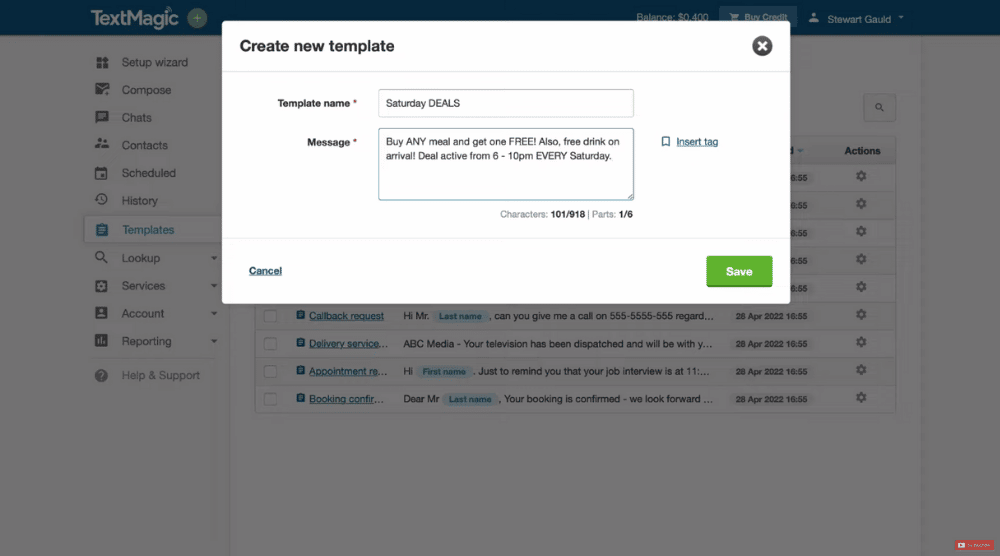
- Name your template. Let’s say the restaurant is running a weekly SMS campaign. We can then name it ‘Saturday DEALS’ in this example.
- Add a text message for the campaign. Refer to the screengrab to see what the text template looks like.
- Hit ‘Save’
Your first SMS marketing campaign template has been successfully created.
We will now create a bulk SMS marketing campaign in the following steps.
8. Compose (Create SMS Campaign)
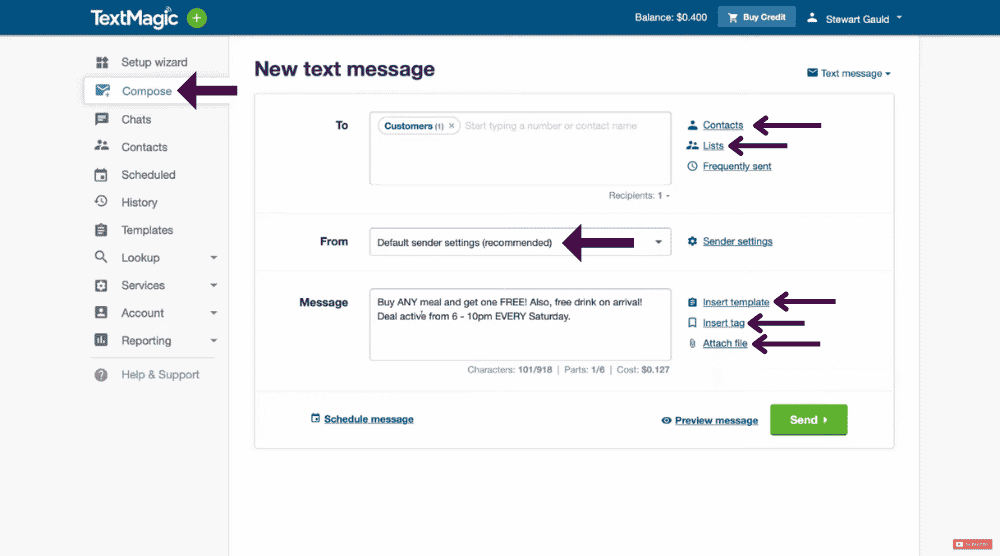
- Click ‘Compose’ (see left)
- In the ‘To’ field, type in the numbers that you want to send this SMS marketing campaign You have other time-saving options like typing the name, selecting contacts and lists created earlier.
- Keep the default sender settings.
- Add your campaign text in the message field.
- Click on ‘Insert Template’ and select ‘Saturday DEALS’
- Tap on the ‘Insert Template’ button
- Notice that you also have the option to insert tags
- You can attach files relevant to this campaign. For a local restaurant, it could be a menu.
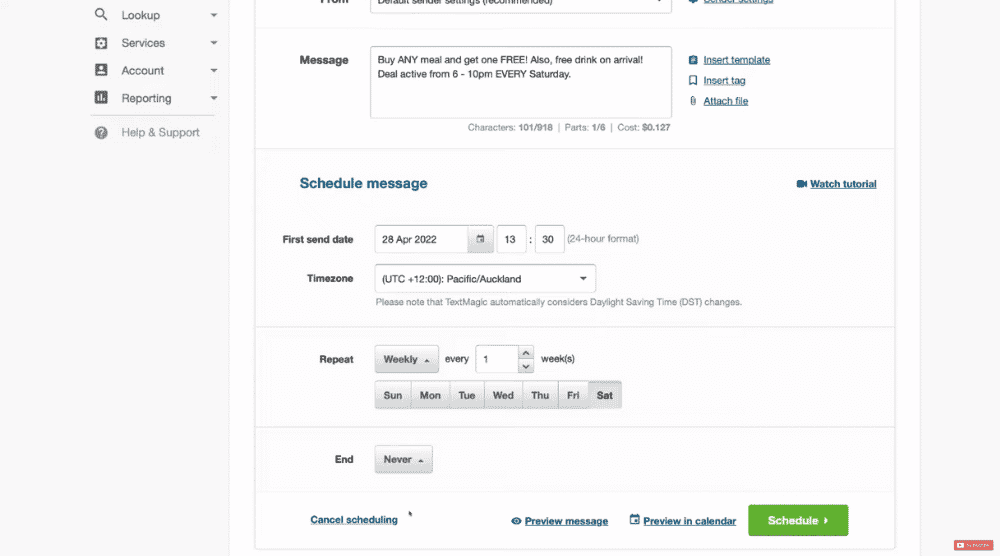
Using TextMagic, you can schedule your text message marketing campaigns.
Under ‘Schedule message’, you can add the first send date, time zone, and frequency.
Since this is a Saturday deal, we’ll choose ‘Weekly’ next to ‘Repeat’ and then pick Saturday.
Next to ‘End’, you can choose when to stop sending this campaign.
Below that, you can preview your message and the scheduled campaigns in the calendar.
Once you’re ready, hit ‘Schedule’. Alternatively, you can also choose ‘Cancel scheduling’ and hit ‘Send’ to launch the bulk SMS marketing campaign right now.
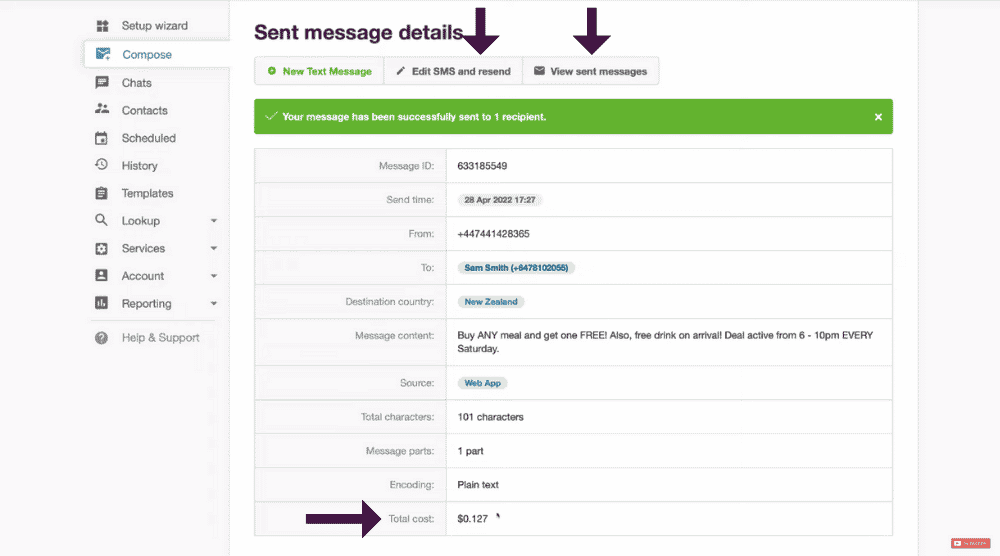
As soon as you do that, you’ll see the success message (refer to the screengrab).
Under ‘Sent message details’, you can:
- Edit the SMS content and resend it
- View sent messages
- View campaign details like total cost (this is something you can see before launching the campaign too).
Also read: Best Password Manager for Personal & Businesses
9. View History
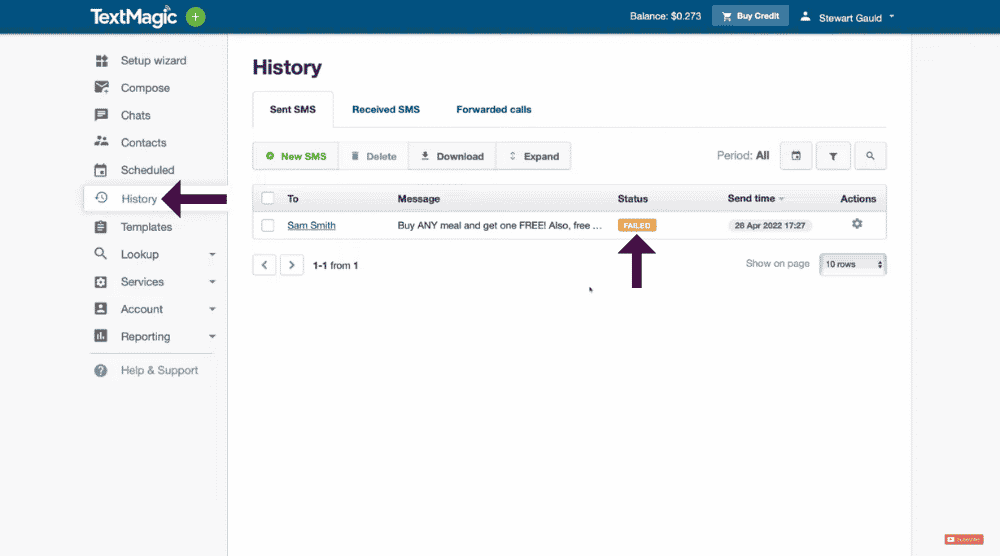
- Hover over to the menu
- Choose ‘History’
This is where you can view the history of all your messages.
As you can see from the screengrab, one of the contacts did not receive our text message marketing campaign.
The status of this SMS is reflected as failed.
There are multiple reasons as to why this could happen, including incorrect numbers, out of coverage, phones switched off, etc.
Note that we have used the web version of TextMagic for this tutorial.
However, you can also download its desktop or mobile app as well.
This is will allow you to manage your SMS marketing activities from anywhere.
Let’s talk about an important feature.
10. Use Email to SMS Feature
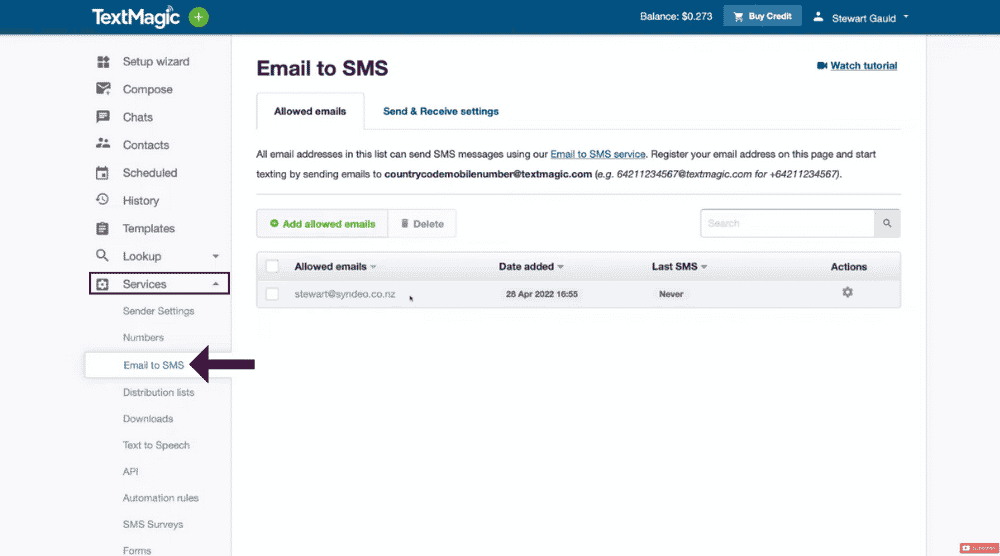
- Navigate over to ‘Services’ on the menu
- Select ‘Email to SMS’
This is where you can convert emails created within Gmail, for instance, into text messages.
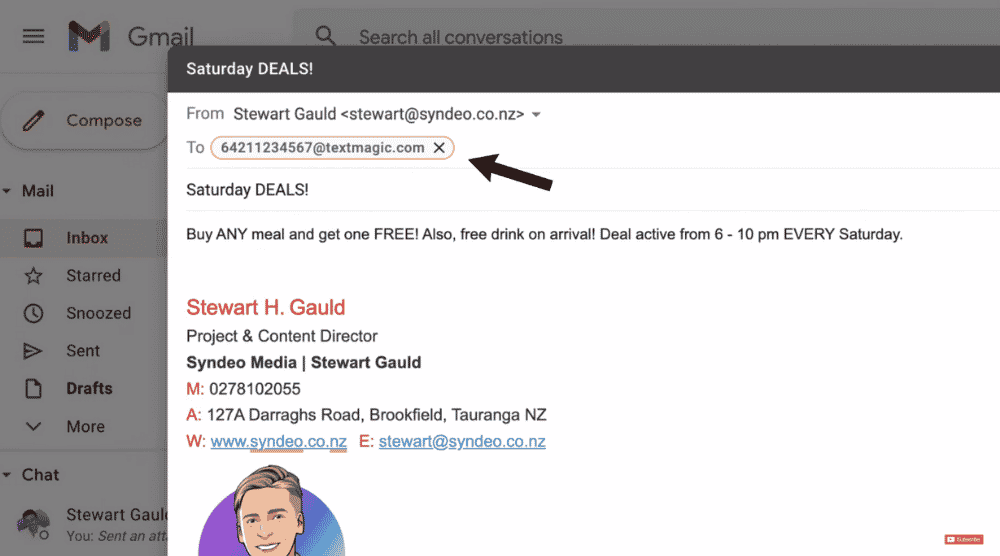
When sending an email, you’d add the receivers’ phone number instead of their email address.
This phone number would be accompanied by ‘@textmagic.com’. Refer to the screengrab.
Doing this will automatically convert the email into a text message.
Read more: How To Create Free Email Templates in Gmail
11. Integrations
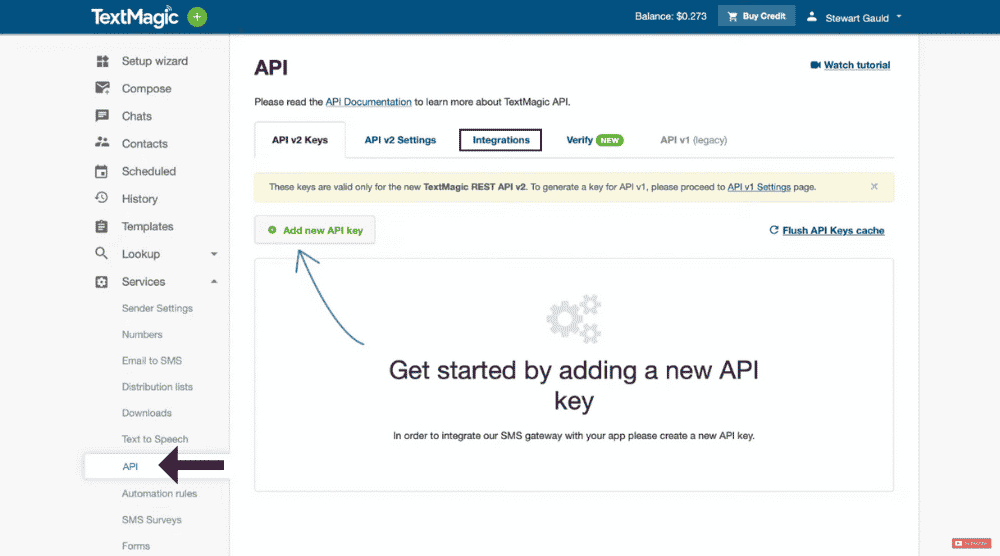
You can also add APIs (integrations) within TextMagic.
To do so:
- Select ‘API’ from the menu (refer to the screengrab)
- Tap on ‘Add new API key’ to integrate other tools that you use every day, such as HubSpot CRM.
When HubSpot captures a contact, it will also be added to TextMagic and vice versa.
Now, head over to ‘Integrations’ which is where you’ll find Zapier.
It’s independent software that lets you connect different tools or apps together.
Hence, it’s through Zapier that you can connect HubSpot and TextMagic together.
The process is quite straightforward and Zapier guides you through it without you having to code anything.
Read more: How To Use HubSpot CRM
Text Message Marketing Tutorial (Video Guide)
That covers everything in this text message marketing tutorial for beginners.
You are now ready to launch your bulk SMS marketing campaigns!
Check out the full video guide down below to help you get started with SMS Marketing!
