Table of Contents
If your WordPress website is showing ‘not secure’, then it means your website does not have a free SSL certificate for Wordpress that causes an encrypted connection.
Not only does it negatively impact the visibility of your website on search engines, but also scares away visitors.
Therefore, it’s important that your website has an SSL (Secure Socket Layer) certificate to protect your visitors’ information with an encrypted connection. In this article, you’ll learn how to get a free SSL certificate using a simple step-by-step process.
How to Get a Free SSL Certificate?
Once you obtain a free SSL certificate for WordPress, your website will show ‘HTTPS’ instead of ‘HTTP’.
Here are some quick steps to getting a free SSL certificate.
Step 1: Getting Started

As you may notice, the left-hand side of the website’s domain shows ‘Not Secure’.
When you don’t have an SSL certificate, this is what every visitor that lands on your website see.
We want to change that. After acquiring the free SSL, you’ll see a ‘lock’ option that indicates your website is secure.
To make that possible, head over to Cloudflare.
Read more : How to Setup Cloudflare Free CDN for WordPress in 4 steps
Step 2: Sign Up for Cloudflare
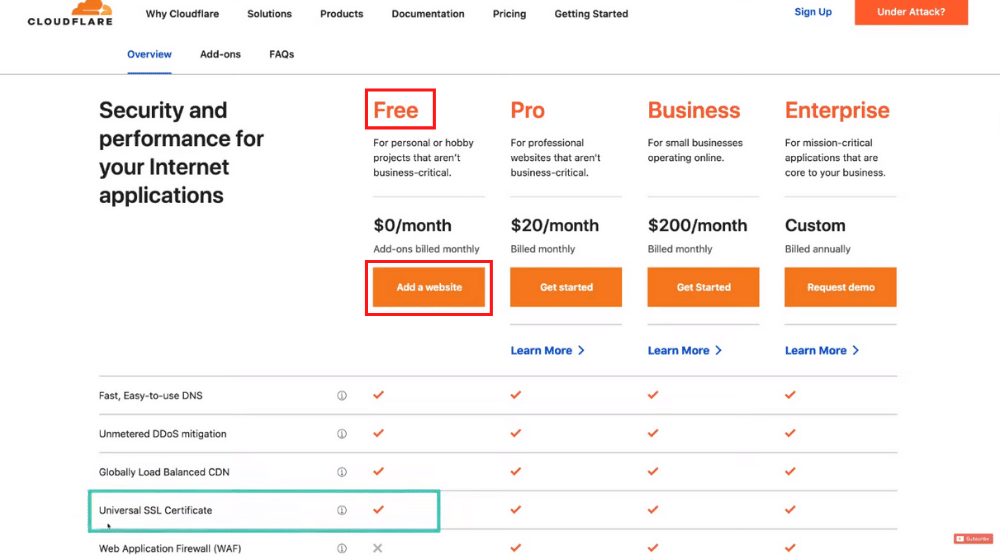
Once you arrive at their home page, scroll down to the different plans.
As you may notice, Cloudflare offers a universal SSL certificate with its free plan. Proceed to click ‘Add a website’ under the free plan.
Add your email and create a strong password in the next step. Select ‘Create Account’.
Now, enter your website’s domain name and click ‘Add site’. Since the free plan is already selected, hit ‘Continue’. Cloudflare will take a moment to scan your website.
Step 3: Verify DNS Configuration
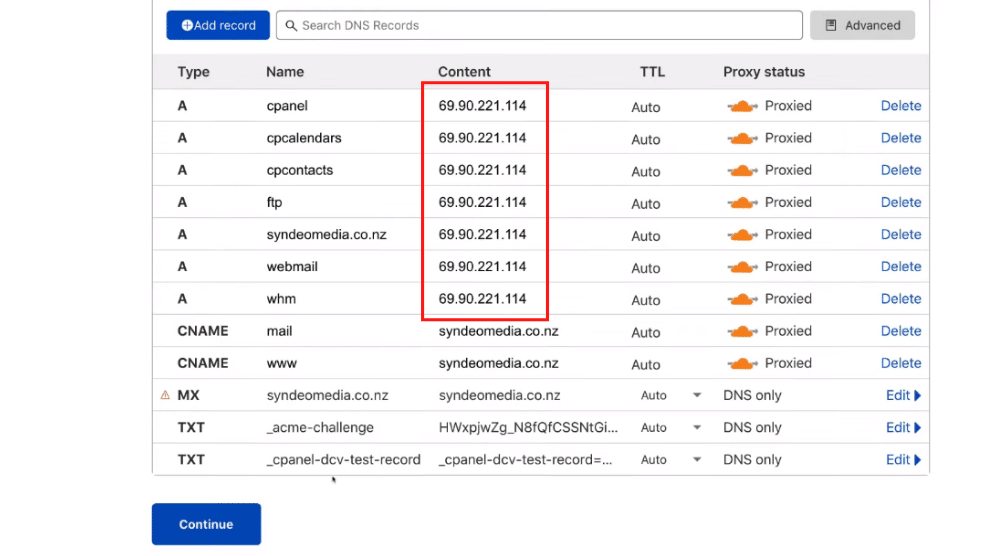
Make sure the IP address is correct. You can head over to your WordPress cPanel to ensure accuracy.
If you don’t have a cPanel or you’re not sure where to find your IP address, then you should contact your domain provider and ask them for the IP address. In the next step of this free SSL for WordPress, you’ll need to change the nameservers.
Step 4: Change Nameservers
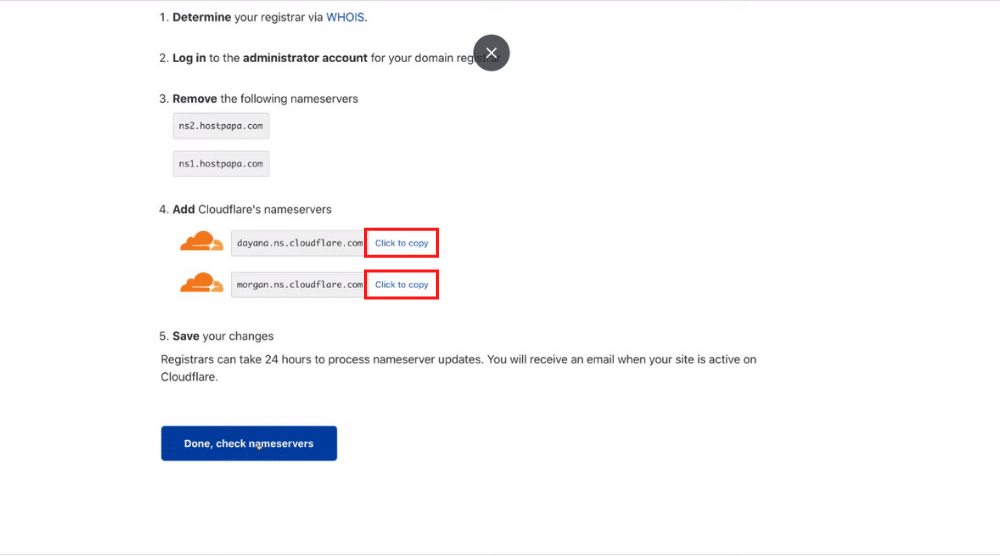
Copy the first DNS record by clicking ‘Click to copy’. Now, head over to your domain provider.
For this free SSL tutorial, we’ll use HostPapa. Under ‘My Domains’, locate the domain that you want to change the DNS for and click ‘Manage’.
This process may be slightly different depending on your domain provider. Under ‘Nameservers’, select ‘Use custom nameservers’.
Now, paste the first nameserver in the DNS1 field. Head back to Cloudflare to find the second nameserver, copy it, and paste it into the DNS2 field.
Once you do that, click ‘Update DNS Servers’.
However, if you’re not sure about the process, contact your hosting provider and give them the two nameservers from Cloudflare (they can do this for you).
Now, after you update the DNS field, head back to Cloudflare and click ‘Done, check nameservers’.
In the subsequent step, click ‘Finish later’. This can take upto 24 hours to propagate. Scroll down the page to click ‘Check nameservers’.
You can see that it is already being re-checked, and you can submit only one re-check every hour.
Keep refreshing this page every few hours to see if your nameservers have been updated. Once they are updated, you’ll receive the message.
Step 5: Install Plugin
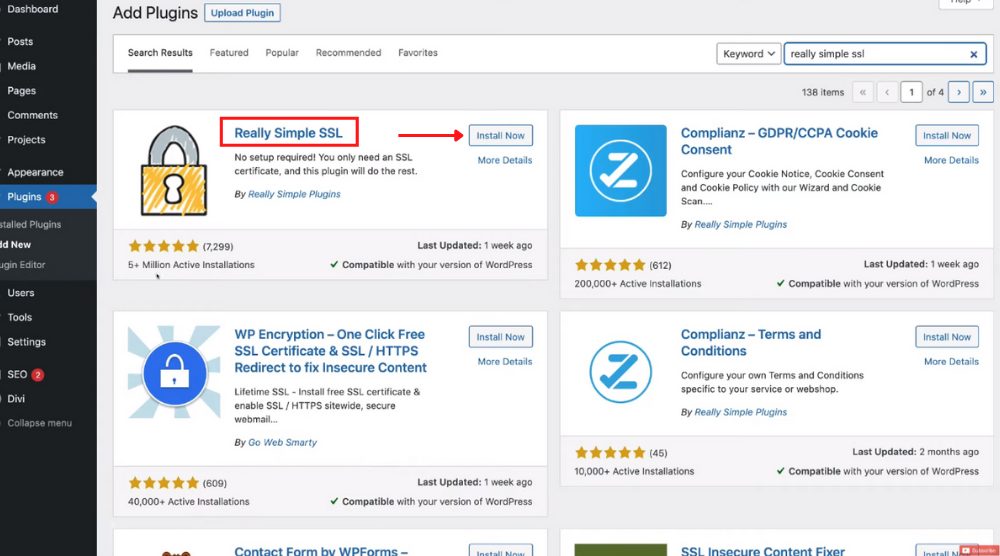
Login to your WordPress dashboard and click ‘Plugins’ on the left. Select ‘Add New’ and enter ‘Really Simple SSL’ in the search bar.
Locate the plugin (with over 5 million active installations and a great number of positive reviews), install, and activate it.
Click ‘Activate SSL’ and you’ve successfully pushed and enabled your SSL certificate. Your WordPress website is now secure!
Congratulations!
Also Read: How to Add Facebook Messenger Chat to WordPress
Beginners Guide to Getting a Free SSL Certificate for WordPress (Video Tutorial)
You may load your website in the browser to notice the lock icon next to your domain. The connection is now secure. It’s a relatively straightforward process. For better understanding, we have a video tutorial below to help you get your Free SSL Certificate for your WordPress website.
