Table of Contents
When it comes to free business emails, Zoho Mail is a leading provider.
The ad-free email hosting service has developed a reputation among small business owners, thanks to its premium features offered within the free plan.
Using the free forever plan, individual users and small business owners can leverage 5GB of storage (each user) as well as a 25MB attachment limit.
You get everything you’d expect from an email management tool, including mail filters, mobile apps, and spam filters.
Apart from that, you can share notes with teammates, create events, assign tasks, or make announcements with this free business email provider.
Inside your inbox, Zoho offers you bookmarks, contacts, calendar, and more.
How to Use Zoho Mail for Free?
Knowing how incredible Zoho is, let’s understand how to use Zoho Mail in this tutorial.
1. Personal vs Business Account
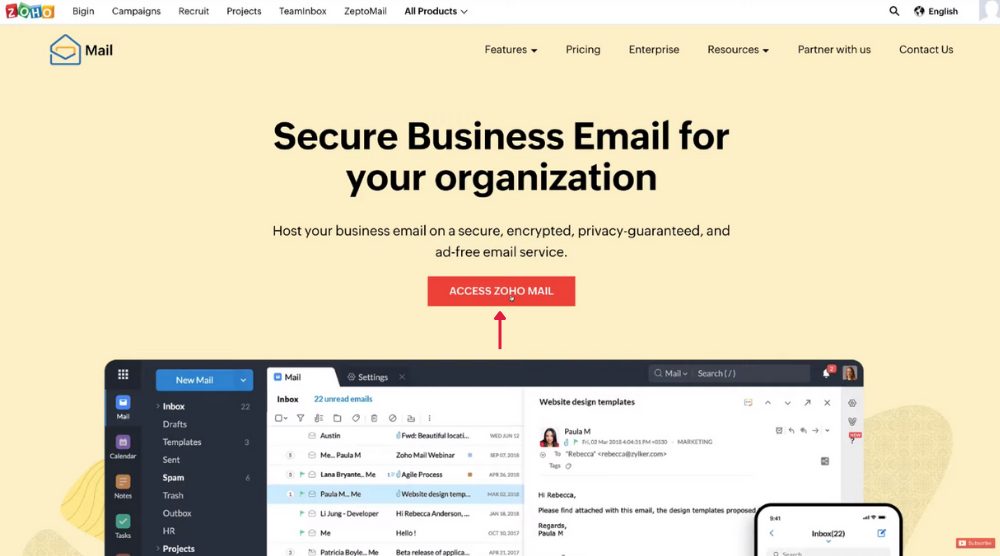
You may use this link to arrive at Zoho Mail.
Now, you have the option to either go for a business account or a personal account.
With the business account, you can use your own domain name to create professional business emails.
However, if you choose to create a personal account, you’ll end up with a branded Zoho email address (refer to the screengrab).
That said, in both options, you’ll get the same user interface that Zoho Mail is known for – both for desktops and mobile devices.
If you don’t already have an account, you can sign up for free by clicking ‘Access Zoho Mail’ on the home page.
Note: If you need help setting up free business emails with Zoho, watch this beginner’s tutorial here.
However, if you want to get started with your personal email, Zoho will guide you through simple steps to create your account.
After completing the Zoho Mail sign-in (for either business or personal use), you’ll be able to see your Zoho inbox.
Read More: Create FREE Business Emails with Zoho Mail
2. Introducing Zoho App Integrations
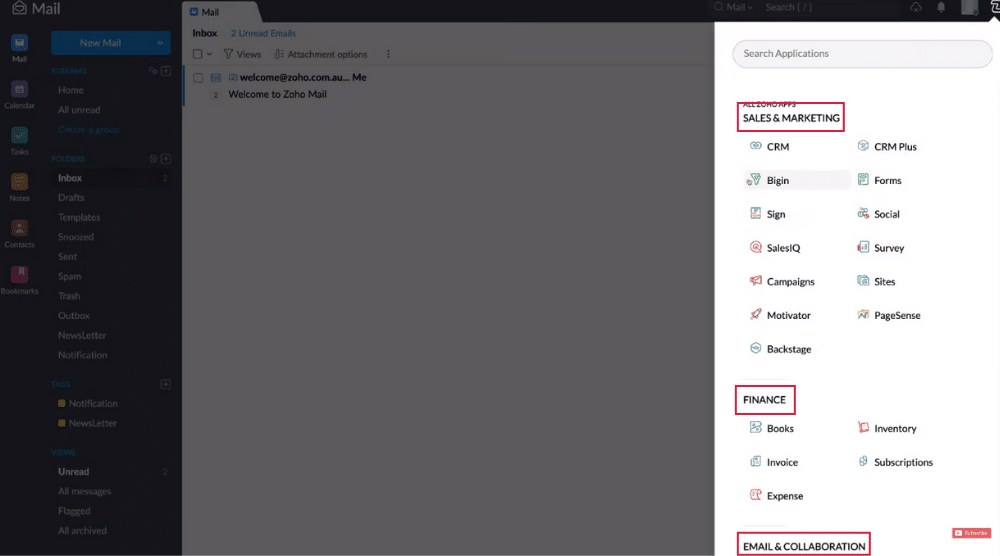
Here, you can view notifications, access your profile and customize it, and find all Zoho apps.
If you click on ‘All Zoho apps’, you’ll notice a ton of applications related to sales & marketing, finance, and email & collaboration that you can integrate with Zoho Mail.
Zoho is an integrated ecosystem, which means that you can connect your Zoho CRM with your Zoho Mail, for instance.
By connecting Zoho Campaigns, you can also engage in email campaigns. Free email marketing with Zoho – yes please!
Feel free to go through the other tools and apps offered by Zoho and integrate the ones you need to run your business (or your personal account).
This certainly streamlines collaboration, communication, and productivity and gives you easy access to everything in one place.
Also, did you notice the settings button?
This is where you go to edit settings in Zoho Mail.
Read more : How To Use Zoho for Email Marketing Campaigns
3. Time to Explore Zoho Settings
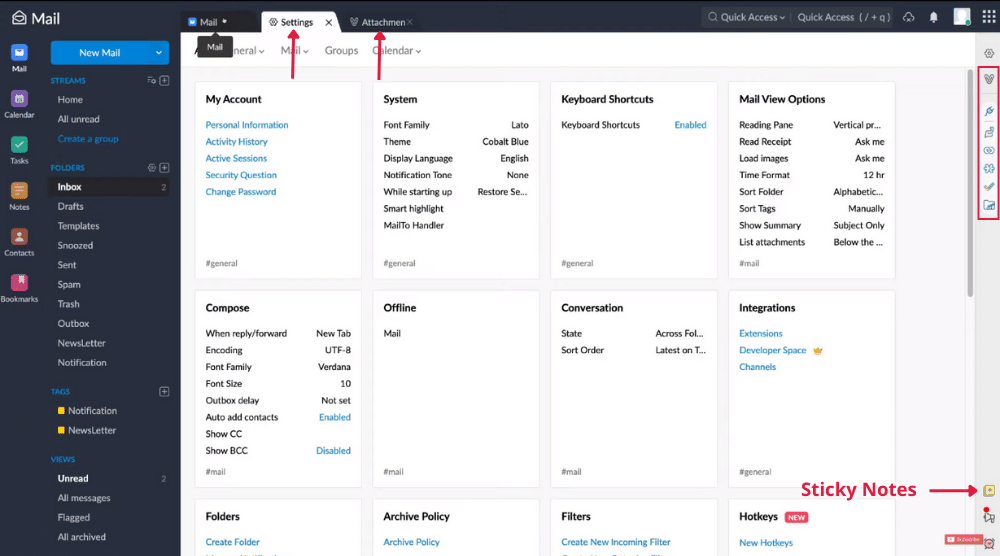
Zoho Mail works similar to web browsers, in that if you click a link, it opens up a new tab.
Similarly, if you click on ‘Settings’, it will open up as a tab in your inbox.
Then if you click ‘Attachment Viewer’, it will open up a second tab next to settings. It’s a great feature for quickly accessing different areas of your Zoho Mail.
While we’re on that, make sure you go through ‘Security Questions’ under ‘My Account’.
Now, below the attachment viewer, we have ‘Toggle eWidget’.
If you click on it, this allows you to search for app integration extensions that can be added to the right-hand sidebar.
As you can see, Zoho CRM and Zoho Meeting are pinned.
Below ‘Toggle eWidget’ we have product updates and reminders.
Whenever you create a task or set a reminder on Calendar, you’ll be able to see if you have any tasks or reminders on any given day here.
Note: Did you know that sticky notes are embedded in Zoho Mail? All you need to do is click on ‘Sticky Notes’ in the bottom-right corner and start typing.
Time to create our first email in this Zoho Mail tutorial!
Read more : How To Use Zoho CRM
4. Composing the First Email
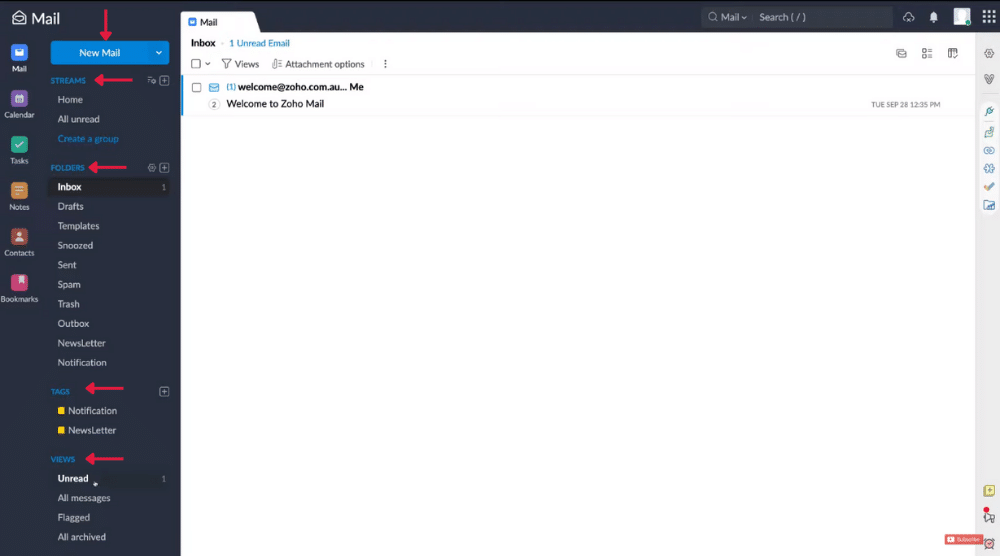
You can either send this email right now or schedule it for later. The process is very similar to Outlook or Gmail (if you’ve used them in the past).
You need to:
- Enter sender’s email address
- Type in the receiver’s email address (cc, bcc in case of multiple receivers)
- Come up with a good subject line
- Write the email body, while playing around with a bunch of formatting options
With Zoho Mail, you can compose multiple emails simultaneously.
Select ‘New Mail’ again, and this will open a new tab.
Notice the different folders on your left-hand side – inbox, drafts, sent, spam, trash, etc.
If needed, you can create new folders – sorted by your clients, for example.
Below ‘Folders’, we have ‘Tags’ and then ‘Views’ – the latter allows you to see unread, flagged, or archived messages. Each of these sections can be rearranged.
For example, you can drag and drop folders below ‘Streams’ or ‘Views’ if you prefer it that way.
Now, if you click the drop-down next to ‘New Mail’, you can quickly create a:
- New Note
- New Task
- New Event
- New Contact
- New Bookmark
Let’s break down each of these sections in this Zoho Mail tutorial:
Read more : How To Use Zoho Social
5. Calendar

Fill in the required information like day, date, time, location, etc. pertaining to your event.
You can also add attendees and associate your event with tasks or notes.
When you add attendees to your event, they will be notified of it. Scroll down and click ‘Save’.
Your Zoho Calendar will now display the upcoming event (a meeting in this case).
You can also click any area of your calendar to quickly create events for that particular time slot by entering the required details.
Hit ‘More Details’ to include additional information related to your event.
Alternatively, you may click ‘Create’ and edit the details later on.
By clicking the ‘+’ sign next to ‘My Calendars’, you can create additional calendars as well.
For instance, you can create an additional calendar for all the birthdays in your organization.
It’s time to learn how to use Zoho Mail to create Tasks.
Read more : Best Customer Service Software for Small Teams
6. Tasks
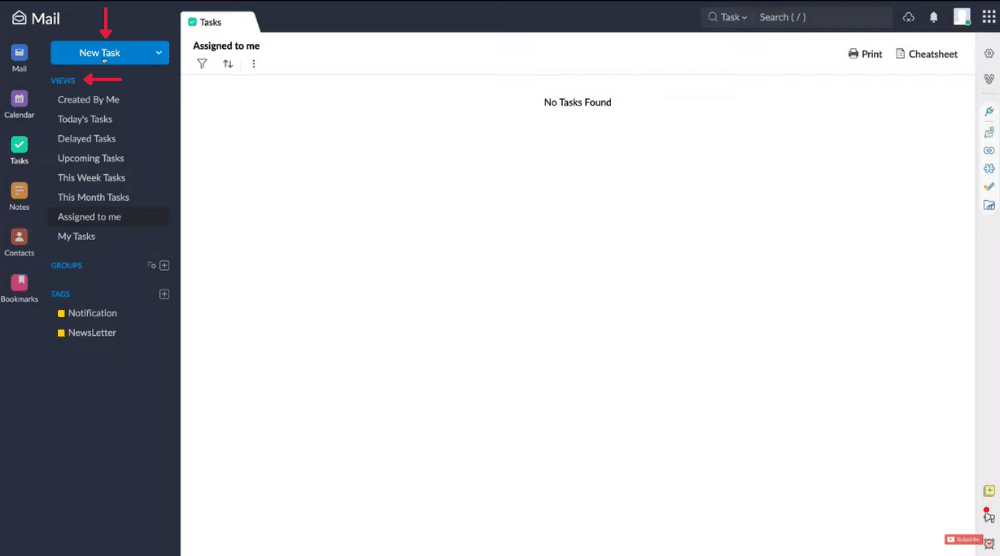
It could be a reminder or a project that you need to complete.
Click Tasks > New Task to add a task (and subtasks).
These tasks, once created, will show up in your calendar.
Under ‘View’, you can see your:
- Today’s Tasks
- Delayed Tasks
- Upcoming Tasks
- This Week Tasks
- This Month Tasks …and more
Read more : Zoho Projects | Online Project Management Software
7. Notes

This is where you can quickly create a note by simply clicking ‘New Note’.
Notice the formatting options at the bottom.
Under ‘Views’, you’ll find different categories to view your notes.
Zoho Mail is your all-in-one workspace, not just for sending and receiving emails but also a productive space where you can create events, notes, tasks, manage your calendar, and integrate with other important Zoho apps.
Read more : Zoho CRM Tutorial for Beginners
8. Contacts
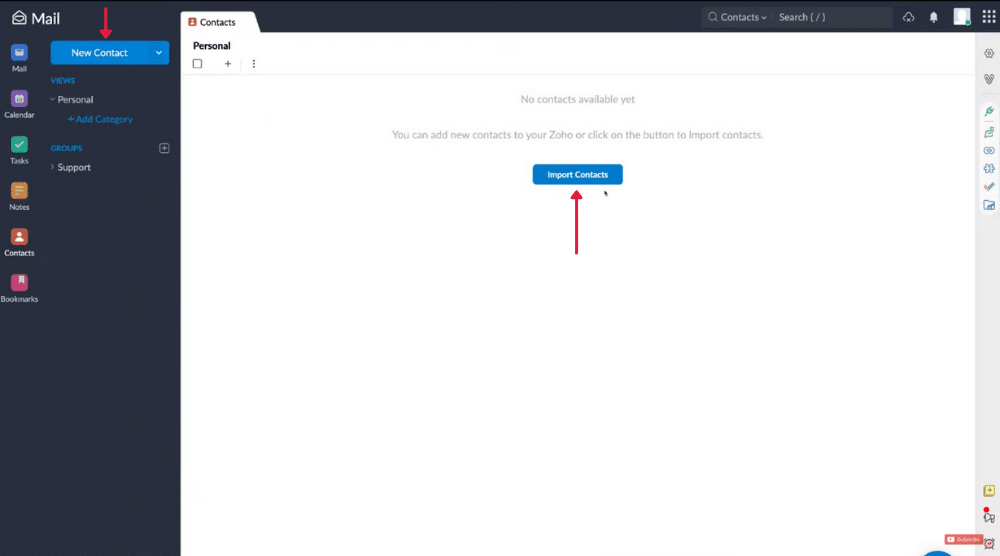
You can either create new contacts or simply import them (refer the screengrab).
Sync this with your Zoho CRM to further streamline your business communication and customer relationships.
Under ‘Views’, you can create additional categories.
9. Bookmarks
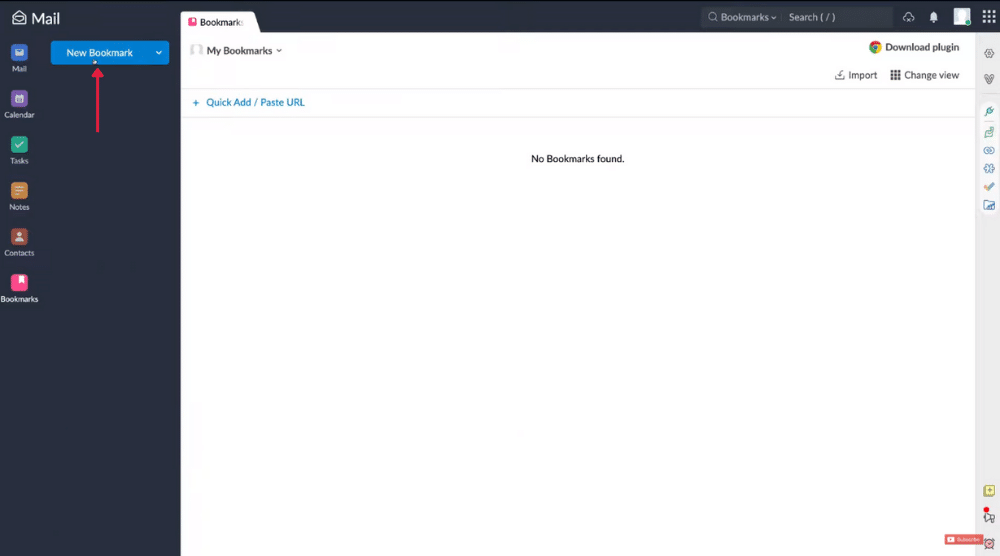
As the name suggests, this is where you can add bookmarks within Zoho Mail.
10. Chats
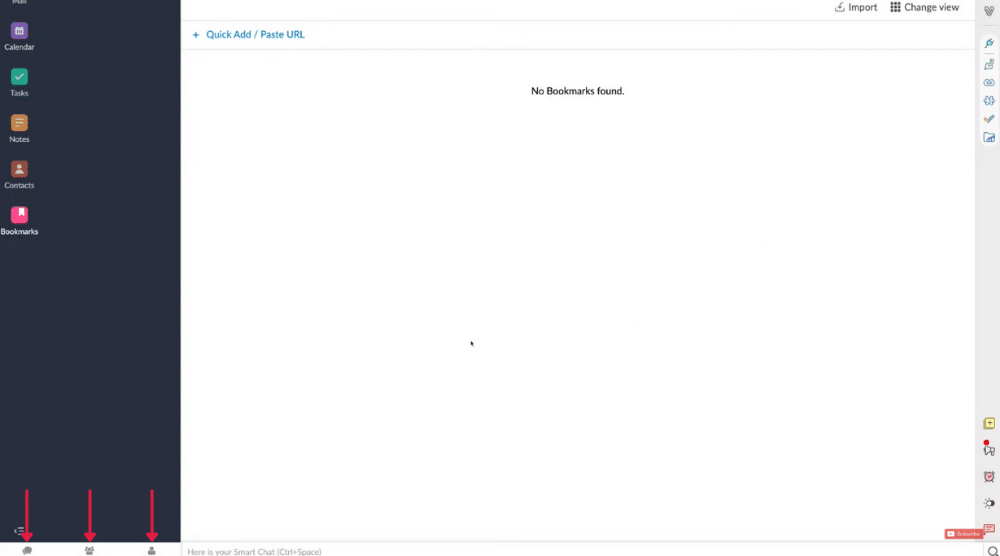
Use this option to engage with your team.
Here, you may also select ‘Channels’ to create and join specific channels (sales channel, HR channel, project channel, etc.) to engage on.
Read More : Zoho CRM Tutorial for Beginners
Create Free Business Emails with Zoho
Zoho is an all-in-one business suite that offers productivity, marketing, finance, and other solutions to small, medium, and large businesses.
One of their many popular tools is the secure and free business email service – ideal for small businesses looking to set up professional emails for their teams for free.
Zoho Mail Tutorial for Beginners (Video Guide)
This Zoho Mail tutorial will help you set up your business emails and workspace.
If you are a beginner, we have added a video tutorial below to complement this article for better understanding. Enjoy!
Disclosure: Some of these links on this page are affiliate links, meaning we will get a commission if you buy through them, this helps support our education-based platform – thank you in advance.


