![Zoho CRM - Best Free CRM Software for Small Business [2022]](https://stewartgauld.com/wp-content/uploads/2022/06/How-To-Use-Zoho-CRM-_-Free-CRM-Software-for-Small-Business-Extensive-Integrations-2022.png)
Table of Contents
Why You NEED A Good CRM
To streamline day-to-day activities, enhance communication and optimise sales processes every business must invest in customer relationship management (CRM) software.
A good CRM allows you to engage in marketing activities (such as email marketing), manage tasks (such as meetings, reminders, and follow-ups), manage relationships (with leads, suppliers, and clients), and optimise sales processes (including deals and pipelines management).
Without a doubt, carrying out all these business activities manually becomes impossible as the company scales.
Hence, you require an integrative tool like Zoho’s CRM software to make your life as a business owner more manageable.
How to Use Zoho CRM Software?
The good news is, that it’s also a free CRM software for small businesses, allowing you to leverage its many powerful features free of cost.
In this updated Zoho CRM tutorial, therefore, we’ll help you understand how to use Zoho CRM and also utilize its free integrations with other Zoho products.
1. Get Started with Zoho CRM
For this Zoho CRM tutorial, we’ll create a fresh Zoho account using the web version.
Get started with Zoho CRM for FREE here
*The link above is an affiliate link, which means we will get a commission if you upgrade to a paid plan (with no extra cost to you). This helps support our education-based website and we thank you in advance!
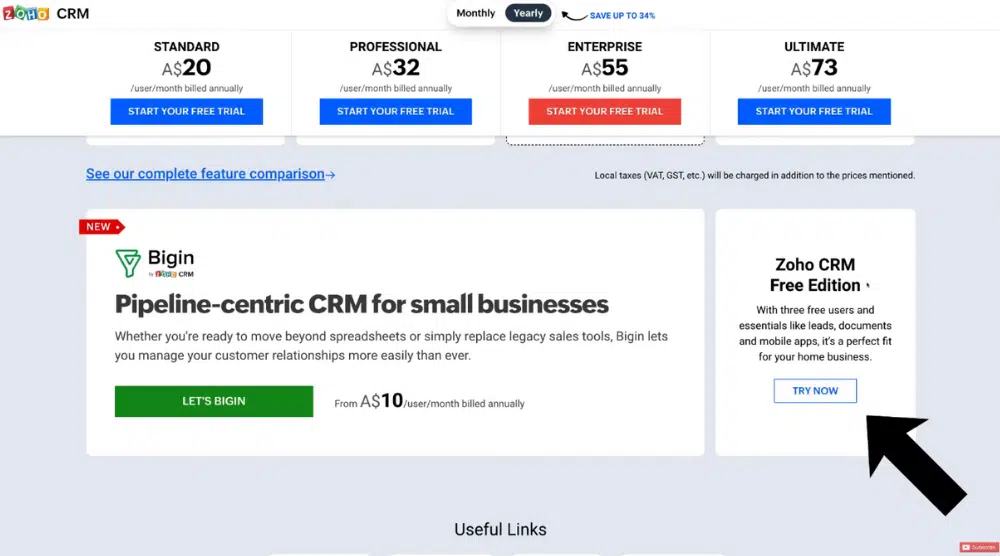
- Visit Zoho CRM
- Click on ‘Pricing’
- Scroll down until you see the paid plans
- Locate the ‘Zoho CRM Free Edition’ below the paid plans
- Hit ‘Try Now’ (refer to the screengrab)
The free version of Zoho CRM software allows you to:
- access essential CRM activities
- add up to three teammates
Once your company outgrows the free plan and its features, you can upgrade the plan.
Read more: How To Use Zoho Social
2. Sign Up for Free
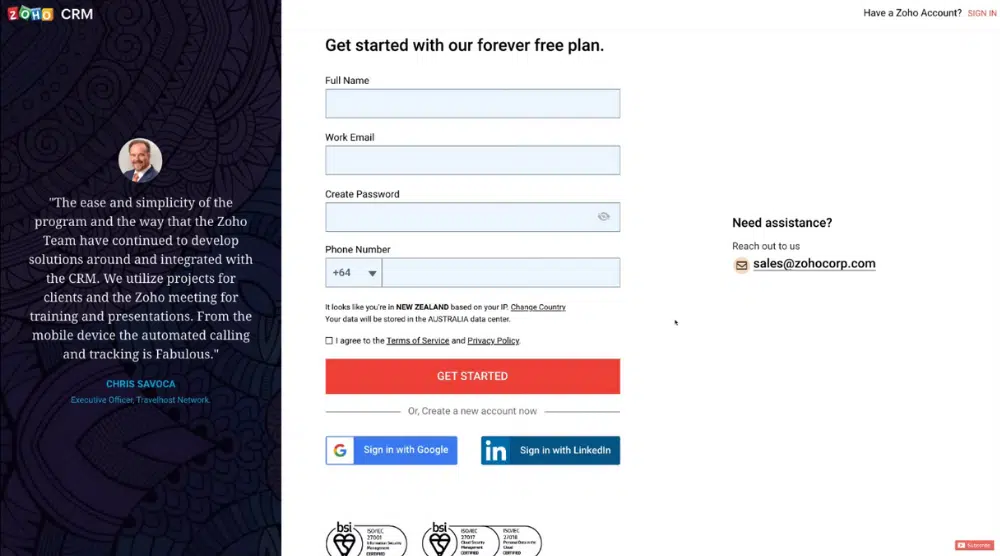
To complete the Zoho CRM signup:
- Enter your work email and name
- Create a strong password
- Enter your phone number
- Click ‘Get Started’
Alternatively, you may complete the Zoho CRM signup using your LinkedIn or Google account.
You will arrive at your ‘Home’ dashboard
The free CRM software will now prompt you to either:

- Take a tour
- Migrate your data
If you have never used a CRM before, we recommend taking a tour.
And if you have data in a previous CRM software, you can migrate it here.
However, for this Zoho CRM tutorial for beginners, we’ll select ‘Skip’.
Our focus in this tutorial is to help you understand the free features offered by Zoho CRM.
At the top of your dashboard, you’ll find a menu with different tabs like home, leads, contacts, accounts, deals, tasks, meetings, calls, reports, and feeds.
If you click the three horizontal dots next to ‘Feeds’, you’ll also find additional modules like campaigns, documents, and visits (more on these later).
3. Discover & Modify Settings
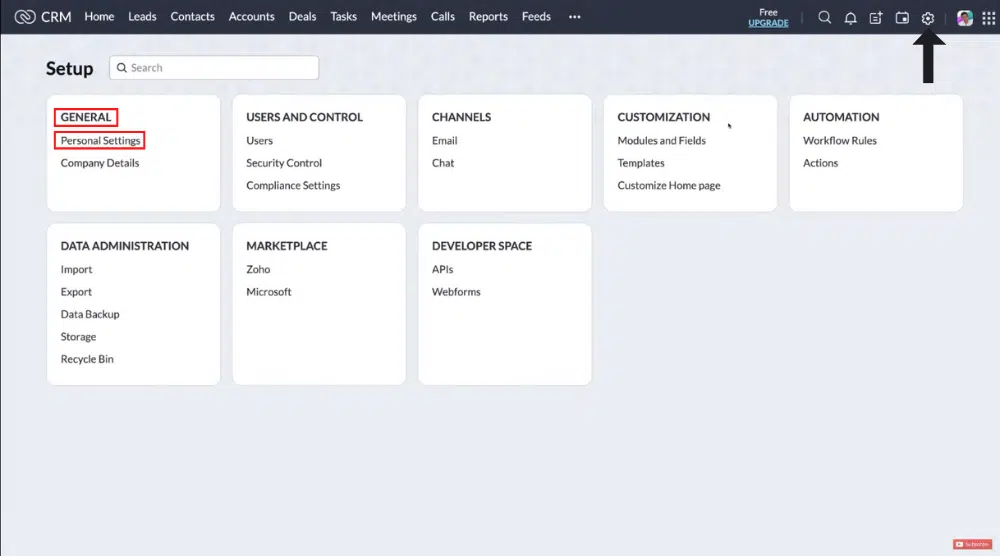
- Click the gear icon on the menu (refer to the screengrab to locate it).
- Under ‘General’, select ‘Personal Settings’.
- Go ahead and customize your information, including your social profiles, locale information, display name format, etc.
- Click on ‘Company Details’ below ‘Personal Settings’ (see left).
- Add your company details, such as name, alias, employee count, website, admin, etc.
- Hit ‘Save’
Now, using the best CRM for small businesses, we will now add our team members.
4. Add Users (Team Members)
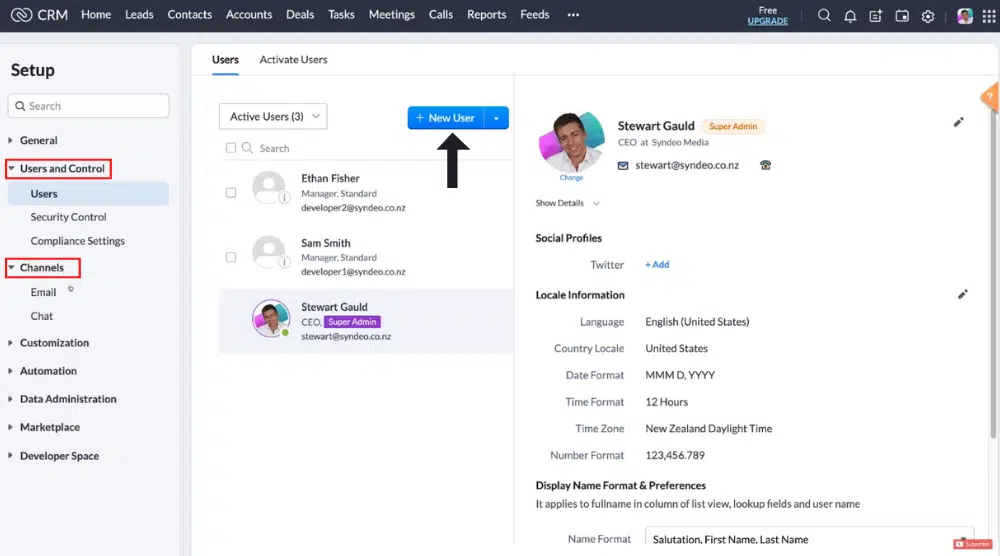
- Tap on ‘Users and Control’ (see left)
- Choose ‘Users’ from the options
- Select ‘New User’ (the blue button on your right)
- Add the name, email, role, and profile of this user
- Hit ‘Save’
Using this simple process, you can add two more team members.
Remember, the free plan of Zoho CRM software allows you to add a maximum of three people.
On the ‘Users’ dashboard, you’ll now see the newly added team members.
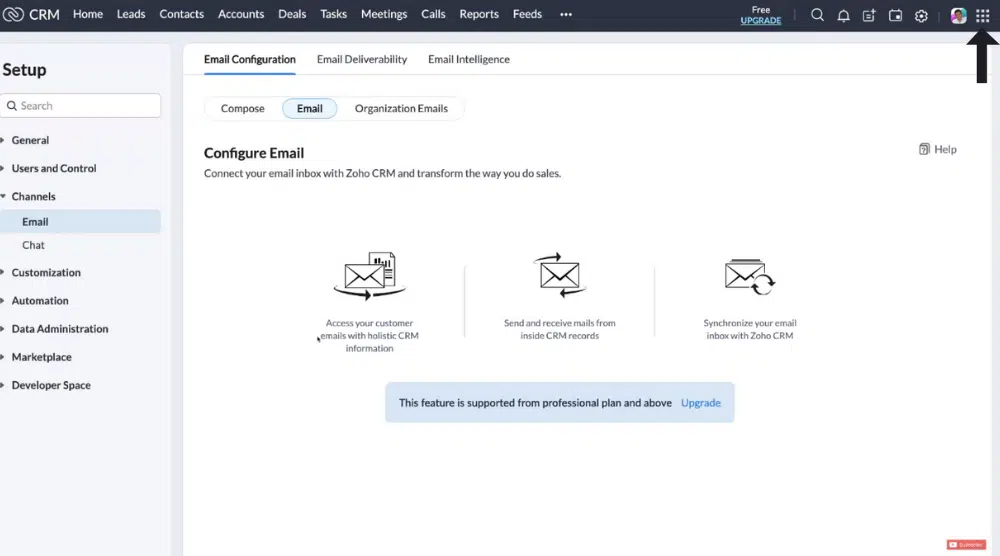
Now, if you click on Channels > Email > Compose, this is where you can connect your inbox with Zoho CRM.
Unfortunately, you can’t do that with the free plan.
You need a Professional plan and above.
This is the main downside to the free plan offered by Zoho CRM software.
5. Integrate Zoho Applications
To discover other Zoho products, click on the top-right icon.
This is where you can integrate other Zoho apps related to sales & marketing, finance, email & collaboration, IT & Help Desk, and more.
For example, ‘Projects’ is a project management software created by Zoho.
It is designed to help you effortlessly manage your day-to-day tasks.
Watch this tutorial to understand how it works.
‘Sheet’ is another Zoho app that you can utilize.
A majority of these Zoho applications offer a free plan, which is good news for small business owners and new entrepreneurs.
Additionally, to check out Zoho Mail, we recommend watching this tutorial.
Zoho Desk, on the other hand, is an IT & Help Desk app designed to help you streamline customer service.
Watch this tutorial to know more.
Read more: Zoho Projects | Online Project Management Software
6. Understand the Home Dashboard
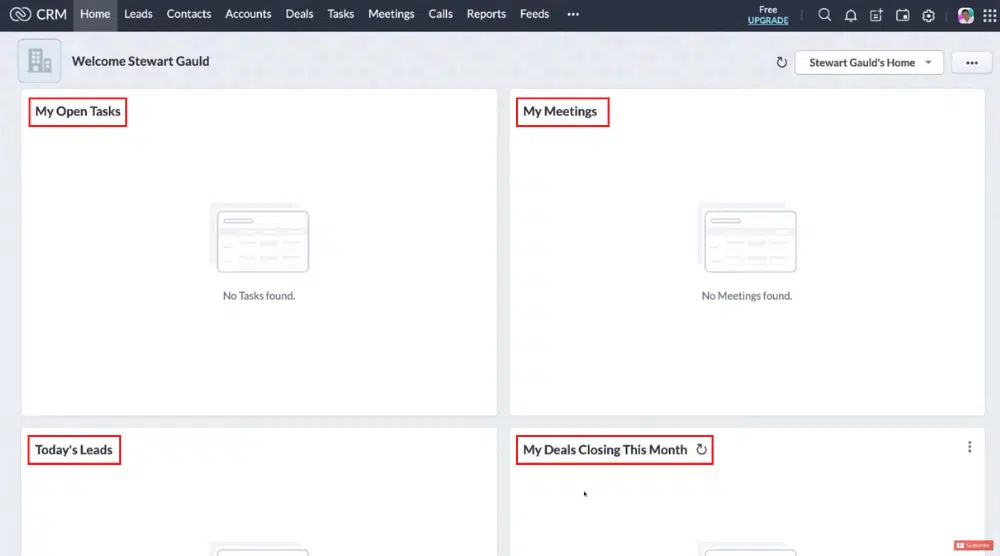
In this part of our Zoho CRM tutorial, we’ll help you get more familiar with your dashboard.
On the Home dashboard, you can:
- View different activities happening within your CRM, such as open tasks, meetings, leads, and deals.
- Customize the dashboard to display the activities relevant to your business.
- If we click on ‘Stewart Gauld’s Home’, we can switch to a classic view if required. Since this is a fresh account, you don’t see any data right now.
Read more: Zoho Desk | Best Customer Service Software for Small Teams
7. Customize the Home Page
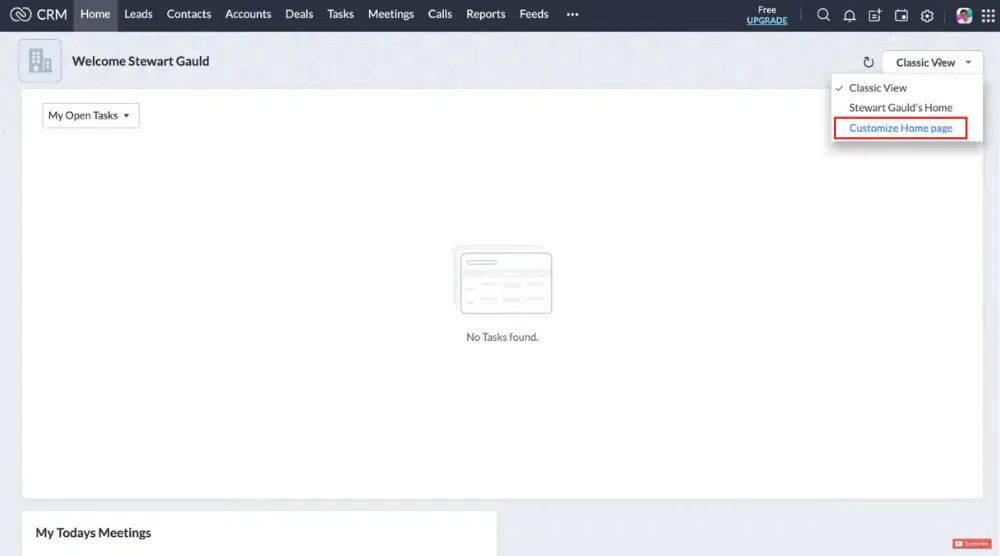
- Tap on ‘Classic View’
- Choose ‘Customize Home page’ from the dropdown
- Click ‘New Home Page’ (the blue button)
- Select ‘Custom View’ on the left
- Pick a module from the dropdown. In this Zoho CRM tutorial, we’ll choose ‘Campaigns’.
- Select ‘All Campaigns’ and a module will appear on your right
- Drag and drop this module to change its position on the dashboard or resize it as necessary
- Under ‘Custom View’, select another module – let’s say ‘Tasks’.
- Add ‘My Overdue Tasks’ to your Home dashboard
If managing tasks is crucial to your business, displaying overdue tasks on your dashboard is important to you.
We will also select the ‘Contacts’ module and add the ‘New This Week’ component to our dashboard.
Similarly, based on your business needs, you can add more modules using the process explained above.
Read more: How To Use Zoho Mail
After adding the modules:
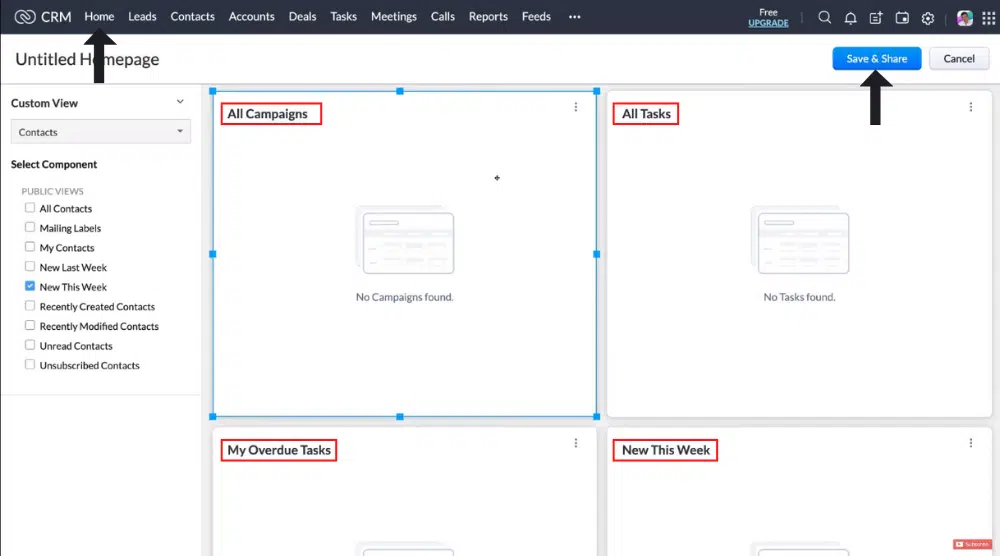
- Hit ‘Save & Share’
- Name your customized home page
- Share with roles (such as CEO, manager, etc., the other two users who can collaborate with you on this account)
- Tap the ‘Save’ button
Thus, we have added four modules to this Zoho CRM tutorial for beginners.
Your custom home dashboard has been created!
Click on ‘Home’ from the top menu to visit your new dashboard.
Again, you can switch back to the default view when needed.
Read more: How To Create FREE Business Emails with Zoho Mail
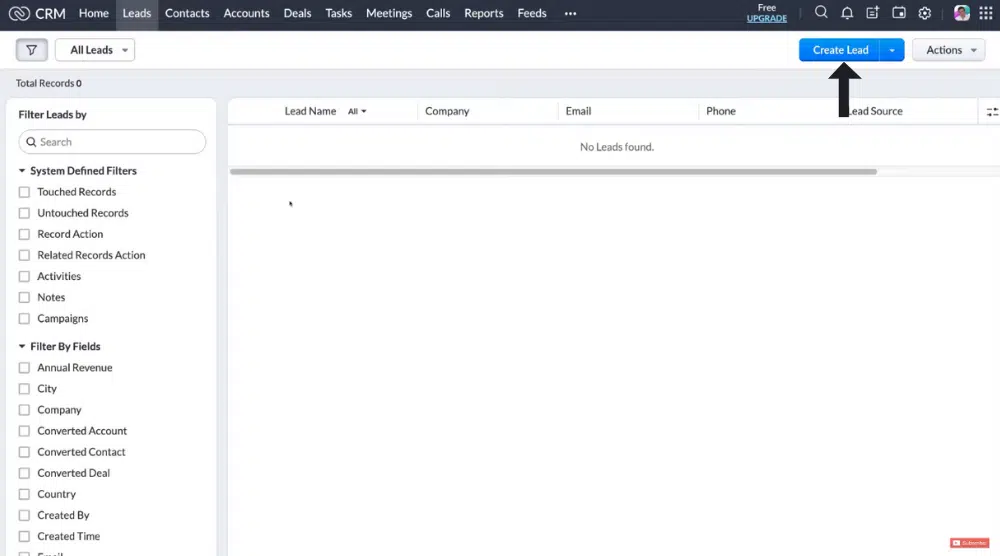
8. Create & Manage Leads
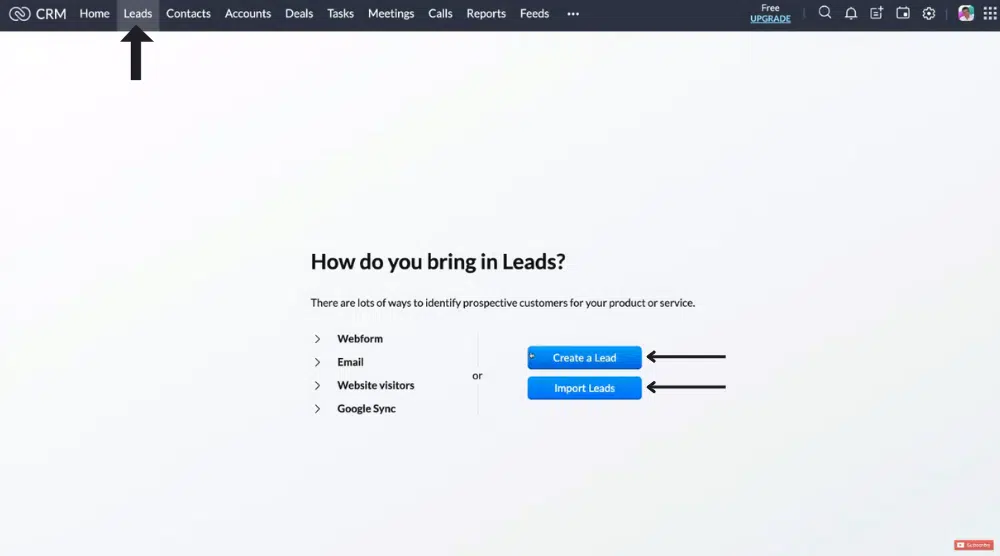
- Click on ‘Leads’ next to ‘Home’ (top menu)
- By selecting ‘Create a Lead’, you can manually add a new prospect
- By choosing ‘Import Leads’ instead, you can import spreadsheets of your leads’ contact information.
Zoho CRM software is the best CRM for small businesses that also allows you to collect leads using other methods.
For example, you can create a ‘Webform’ and embed it on your website.
The other two options that you see – Email and Google Sync – are paid features.
We will cover Webform in another tutorial.
Adding a lead to Zoho CRM is super easy.
You just need to:
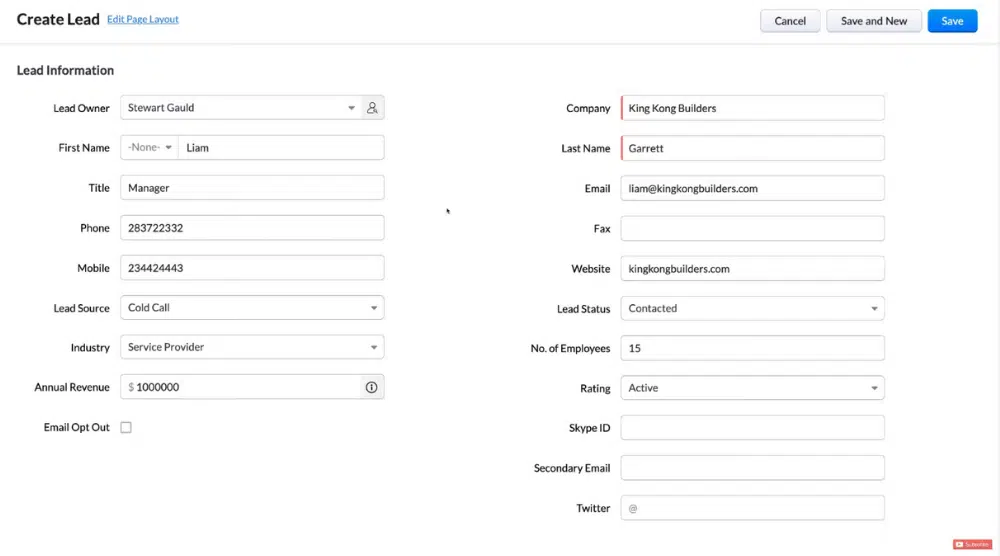
- Click on ‘Create a Lead’
- Fill in the lead information (refer to the screengrab). Also, you can update this information anytime you like.
- Hit ‘Save’ (top-right corner)
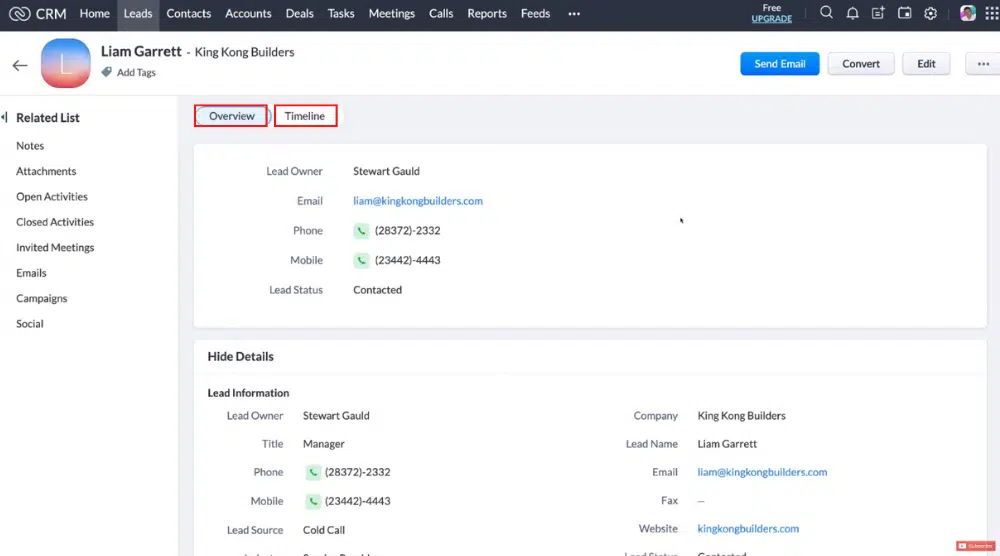
- Under ‘Overview’, you can see the lead status, contact info, email, and lead owner.
- Scroll down to edit more information. For instance, you can add attachments, see open activities, closed activities, invited meetings, emails, campaigns, and social
- Next to ‘Overview’, we have ‘Timeline’. Click on it.
- Under Timeline is where you can view the lead’s history. It helps you analyze the customer’s journey.
- To send an email to this prospect, simply click on ‘Send Email’
Now, we’ll explain how to convert leads using this free CRM software.
9. Convert Leads using Zoho CRM

- Point your cursor to ‘Convert’, next to ‘Send Email’
- Click on it
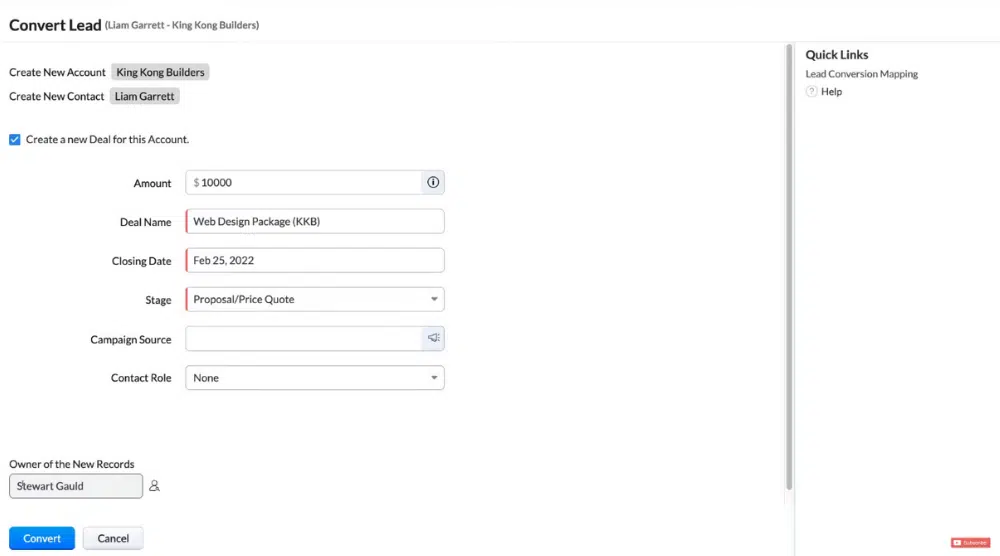
- Notice the options to convert the lead into a new account or a new contact. This information was added while creating the lead in Zoho CRM software.
- You can also check the box that says ‘Create a new Deal for this Account’.
Let’s say that our new lead needs us to build a new website for their organization named King Kong Builders.
So, we’ll add ‘Web Design Package’ next to ‘Deal Name’.
Enter the amount for this deal.
For this Zoho CRM tutorial, let’s assume it’s $10,000.
We will also choose a closing date (a month from now, for instance), stage in your sales pipeline (proposal/price quote in this case), and the owner of the new records.
Hit ‘Convert’ once you’re done.
Click ‘Go to Leads’ to visit the leads dashboard.
In the top-right area of your leads dashboard:
- You can select ‘Create Lead’
- Tap on the downward arrow next to ‘Create Lead’ and import leads or notes.
Since we have successfully converted our lead, we no longer see it on our dashboard.
But you will find it in your contacts.
10. Add & Manage Contacts
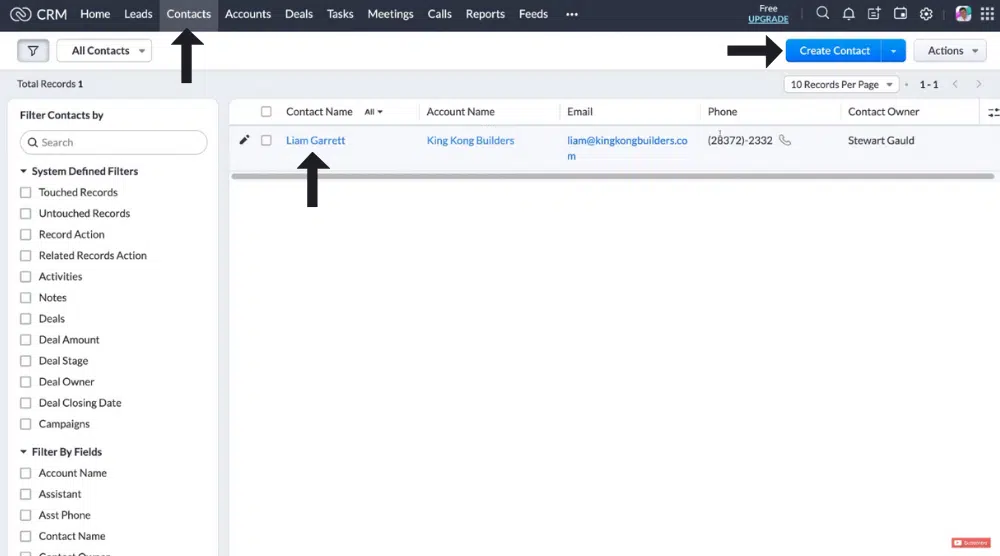
- Navigate over to ‘Contacts’, next to ‘Leads’ (see top menu)
- Click on it
- On your left, you will notice the converted lead
- To add a new contact, simply hit ‘Create Contact’
- Alternatively, you can import contacts by clicking the dropdown
- Click on your contact to see individual details
- Next to ‘Overview’ is ‘Timeline’, where you can view the history of your contact
The process of adding a new contact is quite similar to adding a lead.
All you have to do is enter the details (and modify those later on, if required) and click ‘Save’.
Hence, we won’t dive too much into creating a contact in this Zoho CRM tutorial for beginners.
11. Create & Manage Accounts
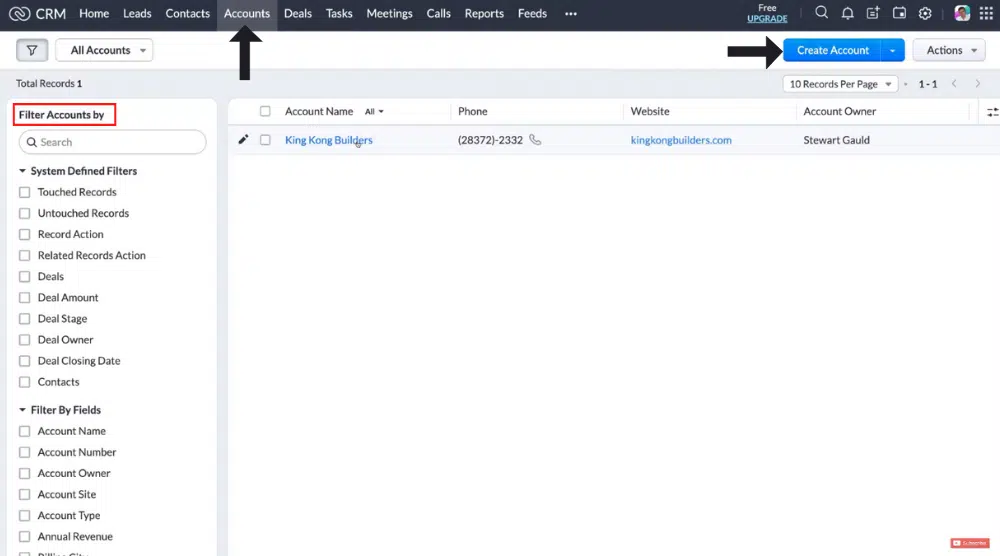
Each lead or contact is part of an organization.
That company or organization is listed under ‘account’.
To access those, select ‘Accounts’ from the top menu.
As of now, we have one account named King Kong Builders.
- By selecting ‘Create Account’, you can manually add a new account within Zoho CRM software.
- By clicking the dropdown, you can alternatively import your accounts
- Again, the process of adding the account details is similar to that of lead and contact.
- View and edit account information
- Notice the filters on your left. By selecting the various checkboxes, you can filter the accounts. This will prove to be a highly valuable feature when you have several accounts.
12. Create & Manage Deals (Sales Pipeline)
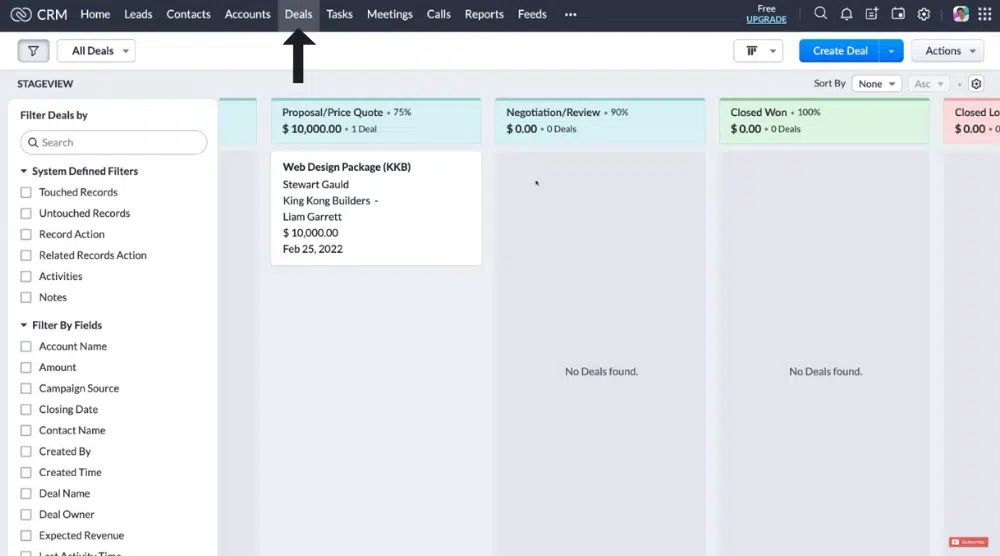
Zoho CRM is one of the most common CRM software that allows you to manage your sales pipeline.
Follow the steps below to learn how:
- Click on ‘Deals’, adjacent to ‘Accounts’ (see top menu)
- Notice the various stages of your sales pipeline
- Under ‘Proposal/Price Quote’, you’ll find the Web Design Package deal created earlier
- For each deal, you can also view the associated details like deal owner and deal amount.
- By clicking and dragging, you can move the deal to the next stage – Negotiation/Review. It’s that easy!
- Observe that the value or amount also moves to the next stage
- Using the drag-and-drop movement, you can then move the deal to the ‘Closed Won’ stage.
- Verify the details related to the deal and edit if required (refer to the screengrab). For example, you may edit the negotiated amount or the closing date of the deal.
- Save changes
- To add a new deal, simply click ‘Create Deal’
- Enter the required details as you did for leads, contacts, and accounts
- Save the deal
13. Customize the Sales Pipeline

Using Zoho CRM software, it’s also possible to customize the sales pipeline.
Let’s learn how:
- Click on Settings (top-right corner)
- Select ‘Modules and Fields’ under ‘Customization’
- Locate ‘Deals’ and hover over the three dots
- Choose ‘Stage-Probability Mapping’ from the options
- Customize the stage name and probability
- Using the ‘+’ and ‘–‘ signs, you can add/remove a stage from the pipeline
- Change the sequence of any stage by simply dragging and dropping
- When you are happy with your sales pipeline, click ‘Save’
- If you don’t want to change anything, hit ‘Cancel’ instead
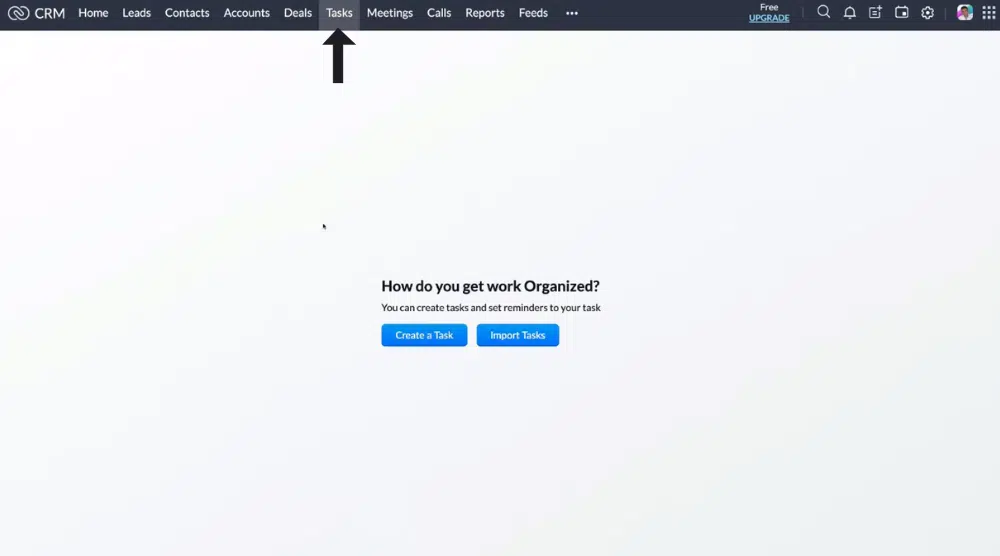
14. Create Tasks Within Zoho CRM
Think of tasks as your day-to-day business activities happening within the free CRM software.
- Select ‘Tasks’ next to ‘Deals’ (see top menu)
- Hit ‘Create a Task’
- Fill in the task information, such as the task owner, subject (meeting), due date, contact, account, status, priority, etc.
- Turn on the toggle next to ‘Repeat’ if it’s a weekly or monthly task
- Add a description
- Hit ‘Save’ (top-right corner)
- View the additional details and head back to your Tasks dashboard
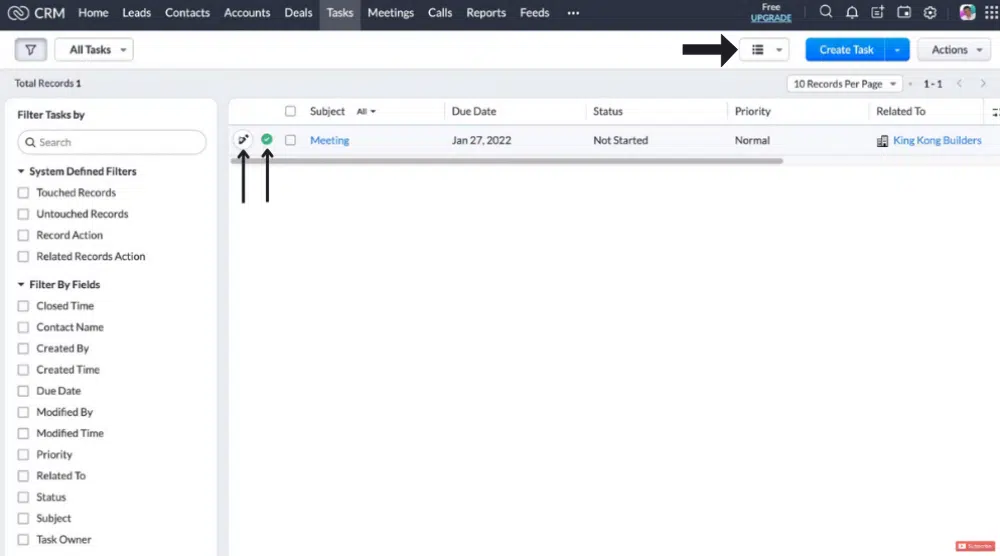
- By clicking the bulleted list icon on the top, you can choose between the list view and the Kanban view. We feel that the list view is more organized. So, we’ll keep it selected for this Zoho CRM tutorial.
- When the task is complete, simply click on the green tick
- Go ahead and edit the task if needed
15. Schedule & Manage Meetings
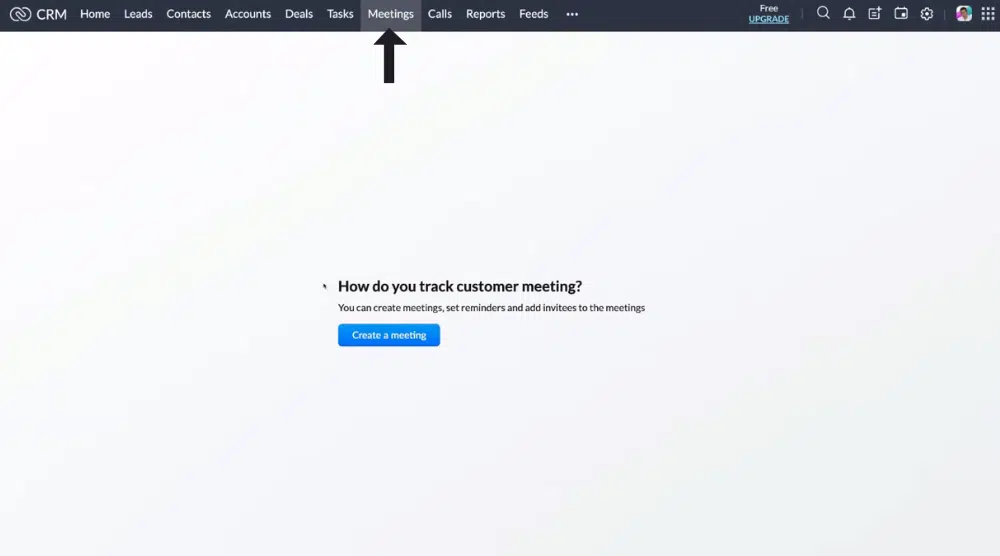
- Select ‘Meetings’, next to ‘Tasks’ from the top menu.
- Hit ‘Create a meeting’
- Fill in the meeting details, including the meeting name, location, date & time, host, number of participants, reminder, and more.
- The current participant’s reminder is set to one hour. It means that the meeting participants will be reminded an hour before the meeting.
- For this Zoho CRM tutorial, we will also choose ‘None’ for both ‘Repeat’ and ‘Related to’
- Click ‘Add more details’ if required
- Hit ‘Save’
- Choose ‘Send’ to send invitations to the meeting participants
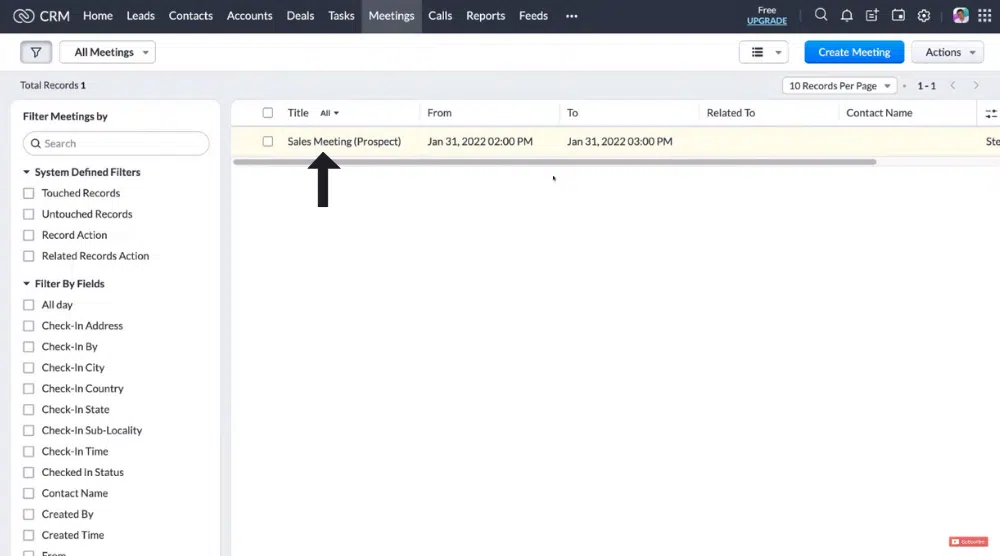
- You will be taken to the meetings dashboard. Its interface is pretty much the same as deals, contacts, and accounts dashboards within Zoho CRM.
- By clicking on the meeting, you can edit the details as seen fit
16. Log Calls
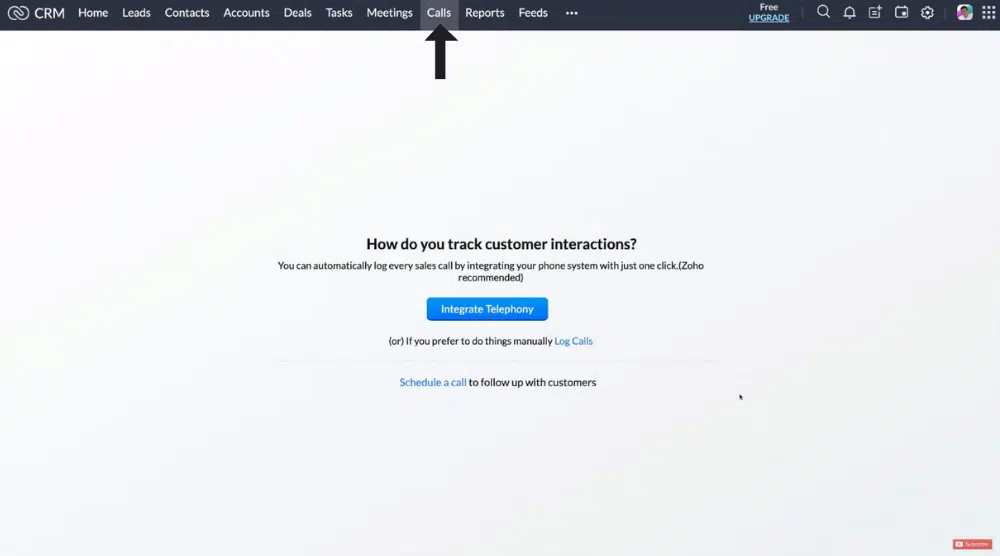
- Click on ‘Calls’ next to ‘Meetings’ from the menu
- You can manually log calls within the free Zoho CRM software. Unfortunately, you can’t integrate your telephone without a paid plan.
- Schedule a call if you like
17. View and Analyze Reports
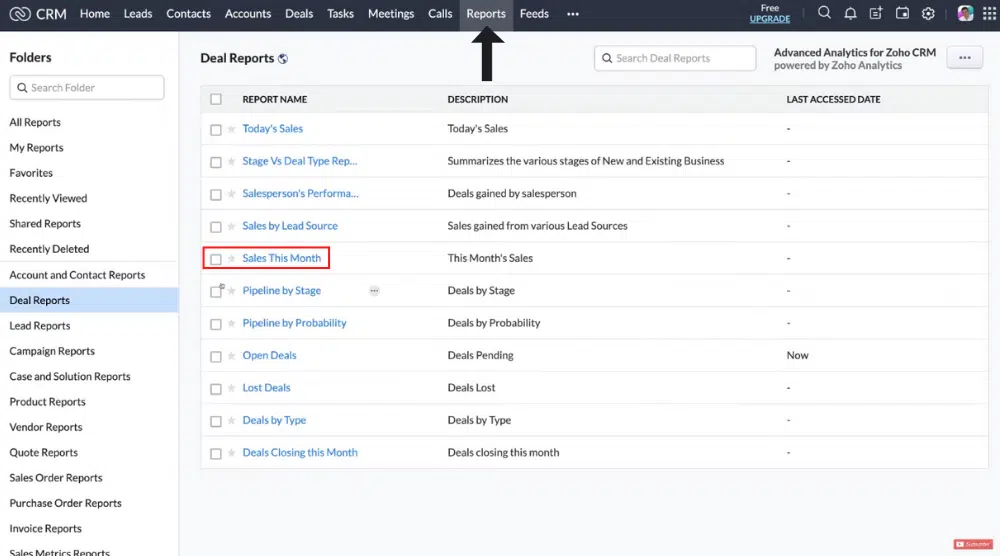
Tap on ‘Reports’ next to ‘Calls’ on the menu.
This is where you can view, analyze, manage, and download your reports.
For instance:
- Click on ‘Deal Reports’ from the left-hand-side navigation menu
- Choose ‘Sales This Month’ from your right.
To export your report:
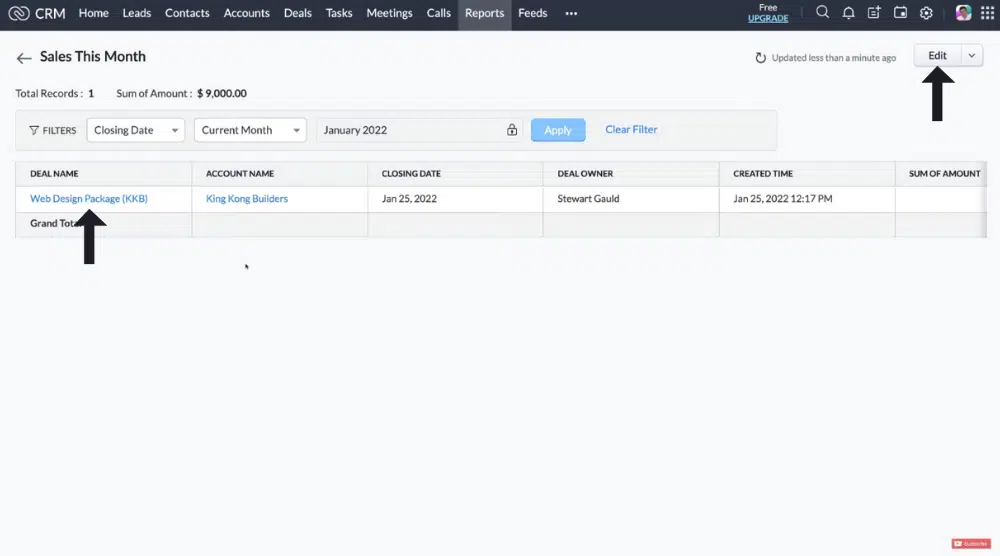
Since this is a fresh account and we only have one deal, that’s all you see on the dashboard right now (refer to the screengrab).
- Click the downward arrow next to ‘Edit’
- Select ‘Export’
18. Leverage Feeds
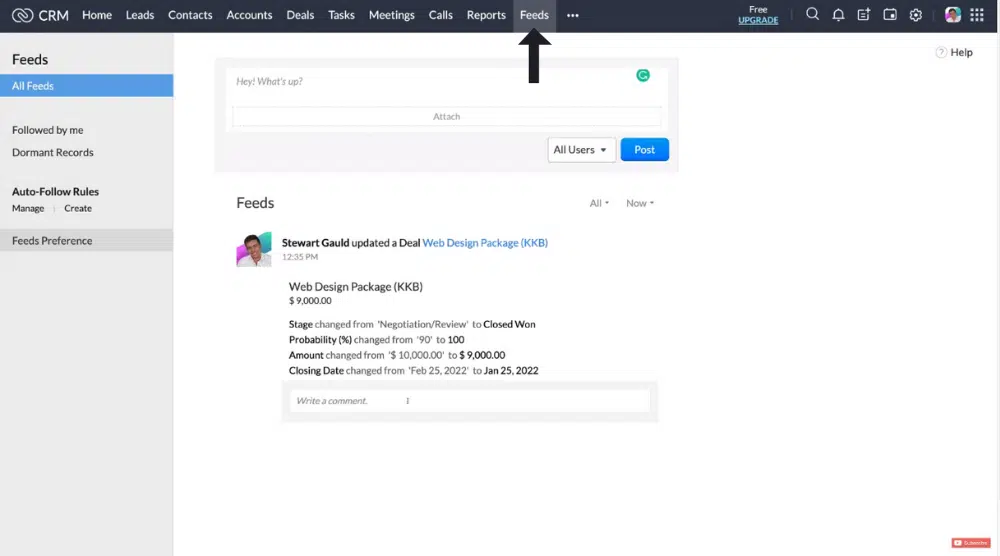
Adjacent to the Reports tab, we have ‘Feeds’.
This is where you can communicate with other users added to the Zoho CRM account.
Simply add a message, attach files, choose a user, and post the message.
Individuals within your organization are free to leave their comments.
19. Add Modules
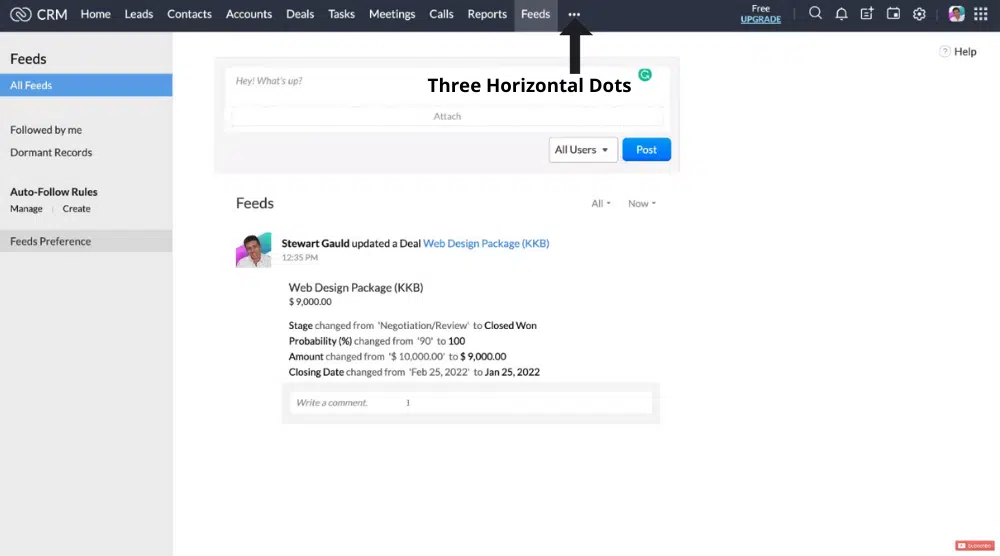
See the three horizontal dots next to ‘Feeds’? Click on them.
This is where you can add additional modules to the free CRM software.
For example, if you click on ‘Documents’, it will allow you to access all the documents that your team has uploaded to the CRM.
You also have the following options:
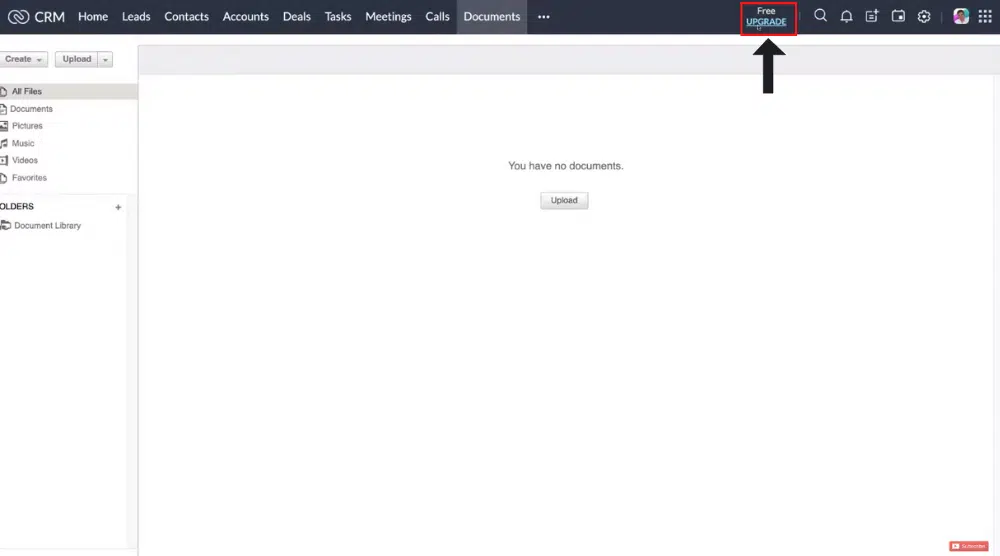
- From the far-right-hand side, you can upgrade to a premium Zoho CRM plan.
- You can search for specific items using the search bar given
- Tap the bell icon for checking notifications
- Next to notifications, you have the quick action button. Here, you can add anything including leads, contacts, accounts, deals, tasks, meetings, calls, or campaigns.
- Next to the quick action button is where you will find the calendar
- Adjacent to the calendar is where you will find Settings again
You can now head back to your home dashboard. This ends our Zoho CRM tutorial for beginners.
Read more: Zoho CRM Tutorial for Beginners
Zoho CRM Tutorial (Full Video Guide Here)
The free plan of Zoho CRM software is a great solution for small teams. This updated Zoho CRM tutorial will help you leverage the most out of its free edition.
As your organization grows, feel free to upgrade anytime you want.
Other videos you may like:
