Table of Contents
If you’re looking to create your own professional small business website, then using the popular platform WordPress with the powerful and easy-to-use Divi theme will enable you to craft a beautiful and fully functional website.
Today, we will walk you through our favorite website-building platform for beginners looking to design and build their own premium website.
In this Divi theme tutorial, we will explain the complete journey of creating a website for your business.
How to Create a Website for Your Small Business?
Okay so let’s walk you through the step by step guide to create a premium small business website:
Step 1: Domain & Hosting

Before learning how to create a small business website with the Divi theme, we first need to purchase a domain name and hosting.
We recommend using HostPapa as they are an amazing hosting provider that offers incredible and affordable plans for small businesses.
They also offer exceptional 24/7 support.
If you encounter any issues with your premium website, you can reach out to HostPapa through their live chat.
They are always happy to help you with any problems you might have.
Once you open HostPapa, you want to select the ‘Starter’ plan. This is suitable for small businesses.
As your business expands, you can always upgrade to ‘Business’ and ‘Business Pro’ plans.
Click ‘Get Started’.
Now, scroll down to ‘Order Details’ and choose your billing term.
For this Divi theme tutorial, we will select 12 months.
We will deselect the additional features. You can add these later when needed.
When you purchase web hosting through HostPapa, you get a free domain name.
The total price may, however, vary with the country you’re in.
Now, click on ‘Next step’. Here, you have the option to add your domain name or get a new one through HostPapa.
We want to enter a new domain name that we get for free with our hosting.
Click ‘Get my domain’.
Learn how to choose the right domain name for your business here.
In the next step, you need to enter your account details and payment information.
Click ‘Place Your Order’ and ‘Next’. Now, you will receive an email containing the client ID and password. Use these credentials to sign in.
To protect your HostPapa account, fill in the security questions and click ‘Save’.
Your new HostPapa account is now ready!
Now, you can navigate up to your cPanel. Scroll down the page to locate WordPress under ‘Scripts’.
Click on ‘WordPress’ and then ‘Install Now’.
Under ‘Site Settings’, enter your Site Name and Site Description.
- Note down the Admin Username and Admin Password needed to log in to your WordPress account.
Remember to add your existing email under ‘Admin Email’.
Hit ‘Install’ at the bottom.
WordPress is now successfully installed. Now, click on the administrative URL to access your WordPress dashboard.
You also have the option to access your dashboard through your website.
For that, we will select ‘admin’ on the top right and then click ‘Log out’.
Now, select “Go to Your Website”.
This is how your WordPress website looks right now.
We will design and customize it using the Divi theme.
To navigate to your dashboard from your website, just enter this into your browser: website URL/wp-admin. Enter your credentials and simply log in.
Read more: Best Web Hosting for Small Business
Step 2: Installing Divi

In this step, we’ll learn how to use the Divi theme. This is a powerful visual builder that allows you to create your own small business website from the front end. You can purchase the Divi theme from this link.
This will take you to Elegant Themes.
Now, click on ‘Pricing’ to see two options available here. Select the best option for you.
In the next step, complete your registration and login with your account details. Then download the Divi theme from the Members Area.
Once the download is complete, head back to your WordPress dashboard, click on ‘Appearance’ and then ‘Themes’.
Select ‘Add New’ at the top and then ‘Upload Theme’.
Come down and select ‘Choose File’, locate the Divi theme (zip file), and click ‘Open’.
Hit ‘Install Now’ and ‘Activate’.
You have now installed and activated the Divi theme successfully.
Now click on ‘Divi’ on the left-hand side of your WordPress dashboard.
Under the ‘Updates’, you will need to enter your username and API Key to keep Divi updated at all times.
Back to the Members Area, select ‘My Account’ to find your username and API Key.
Use this information to fill in the details on your WordPress dashboard. Hit ‘Save Changes’.
On the top left corner, if you click your business name, it’s going to take you to your website.
You can see how it looks now. By clicking on the business name again, you can head back to your dashboard.
Read more: Best WordPress Theme for Beginners
Step 3: Add Website Pages
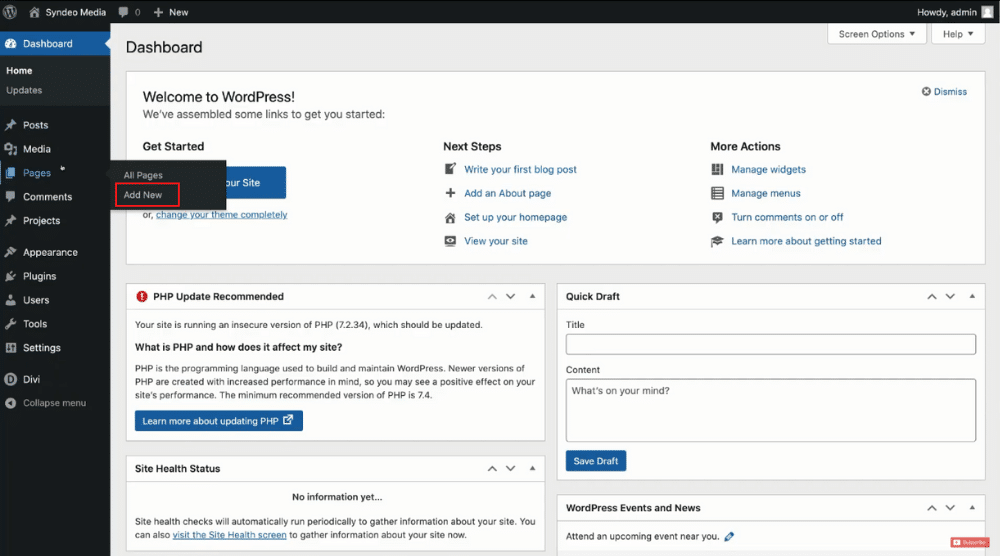
In this Divi theme builder tutorial on how to create a small business website, we will also learn how to add website pages.
For that, click ‘Pages’ on your WordPress dashboard and then ‘Add New’.
Since every website needs a Home Page, we will create that first.
Name the page ‘Home’ and then on your right-hand side, hit ‘Publish’ and then click ‘Publish’ again.
Just like that your first web page is now published.
Before customizing this newly created page, we need to add more pages.
For this Divi theme tutorial, we will also create a Services page, About Us page, and Contact Us page.
Click on the WordPress logo on your top-left.
Again, select ‘Add New’ from the ‘Pages’ tab.
You can repeat the above process for adding all the other web pages.
Under the ‘Pages’ tab, you will see all the web pages along with two default ones – privacy policy and a sample page.
We are going to delete the privacy policy and sample page.
Select both pages, navigate to ‘Bulk actions’, and click ‘Move to Trash’.
Now, we need to ensure that our home page is a static web page.
To do that, click on ‘Settings’ and then ‘Reading’.
Under ‘Your homepage displays’, select ‘A static page’.
From the ‘Homepage’ drop-down, click on ‘Home’.
Then hit ‘Save changes’. Apart from that, to make sure that our primary menu is correct, we will navigate over to ‘Appearances’.
Read more: How To Use Divi Theme in WordPress
Step 4: Create your primary menu
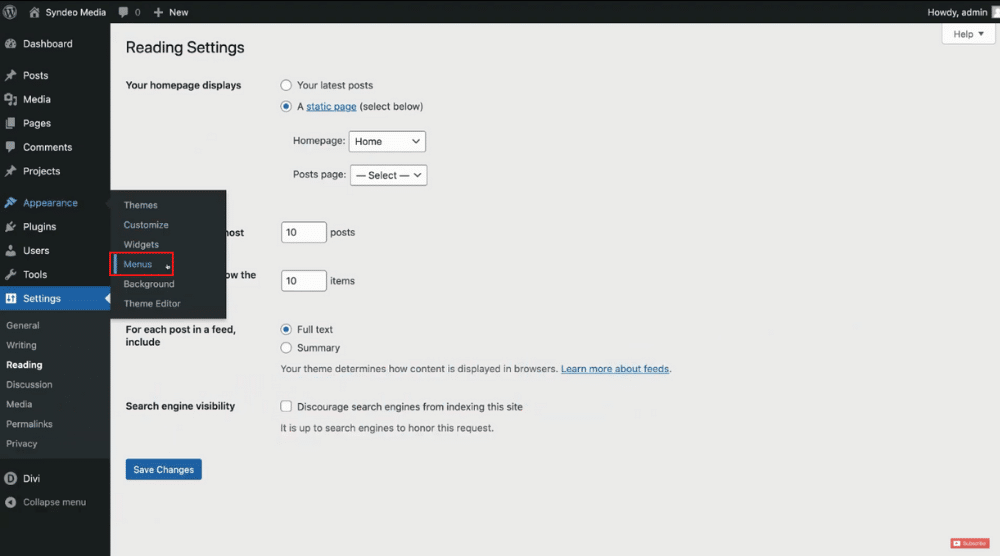
From there we will select ‘Menus’.
Add ‘Primary Menu’ in Menu Name and then click ‘Primary Menu’.
Then select ‘Create Menu’. To add menu items under our primary menu, we will click ‘View All’ under ‘Pages’.
Check all the four options below it or all the website pages you have created.
Come down and click ‘Add to Menu’. You can take the time to rearrange the order of your menu items based on your preference. To create a sub-page, you can just drag a page and place it as a sub-item below a main page.
Once you’re happy with how your menu looks, come down and hit ‘Save Menu’.
To see how it looks on your website, head up to ‘Visit site’ and then you see the primary menu live.
Read more: How To Add A Logo To WordPress
Step 5: Add your logo
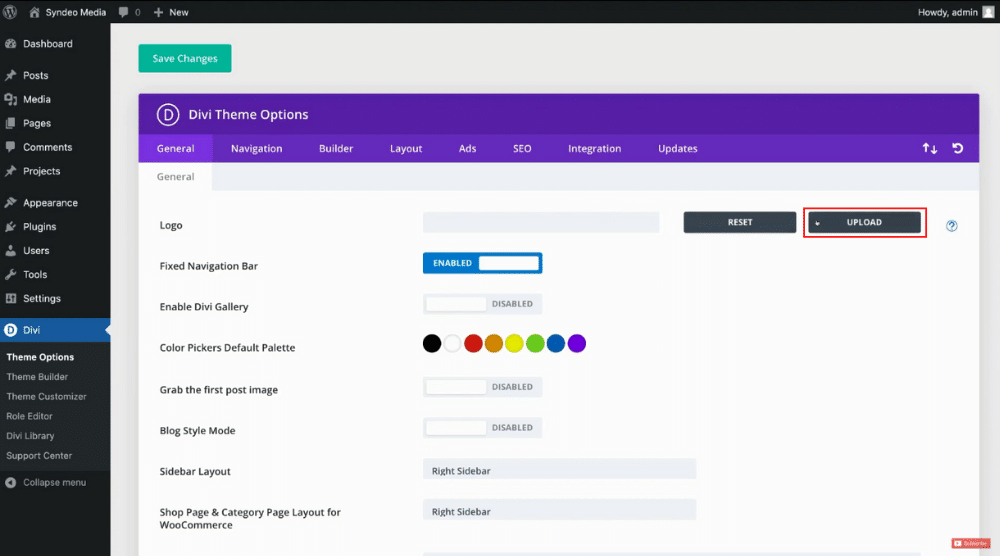
To do that, head back to your dashboard and click ‘Divi’.
Under the ‘General’ tab and next to ‘Logo’, click ‘Upload’.
Select your logo, click ‘Open’ and ‘Set as Logo’.
Remember to hit ‘Save changes’ before viewing the logo on your website.
If you don’t have a business logo already, watch our tutorial to learn how to create one for free using Canva.
Read more: Canva Free Logo Maker
Step 6: Customize Pages

Select the page you want to customize. We will customize the home page here, for instance. Click ‘Edit’ and then select ‘Edit with The Divi Builder’.
Then come down and click ‘Start building’.
Here you will see 3 options:
- Build from scratch
- Choose a premade layout among 1,500 options
- Clone existing page
For beginners learning how to create a small business website, choosing a premade layout in Divi is the right way to go. Click ‘Browse layouts’ and then start customizing it.
Also, you can build the entire website or just a few pages with Divi.
On your left, you may select any of the categories that suit your business.
By clicking on the layout, you can preview each of these templates.
Check each page individually by scrolling through it and determine if that’s the right fit.
For instance, you can select the homepage in any of these layouts and then view the live demo.
We are now going to click ‘Use This Layout’.
Your premium Divi layout is now imported. It’s time to now customize and preview our homepage across different devices.
You will see the preview options (desktop, phone, and tablet) in the bottom left corner.
With the Divi builder, you don’t have to construct your website at the backend, you can simply use it’s powerful visual builder to customize it at the front end.
All you need to do is enable your visual builder. Just double-click the element you want to change and enter the new text. You also have ample formatting options for content and design.
If you’re happy with the changes, just click the green tick and then just hit ‘Save’ on the bottom right corner.
By also highlighting any text, you can bring up the formatting options. Similarly, you can also change the button text and link.
Each page is broken down into modules – text, buttons, sections, rows.
To customize the Section, click on the gear icon. Here, you can change the background color if you like.
Click the green tick to save the changes or click the purple button and navigate over to ‘Save’ on the bottom right.
You can similarly customize the image module as well.
Once you’re satisfied with the changes, click ‘Exit Visual Builder’ and view your website live.
You will observe cool animations when the page loads.
For the About Us and Contact pages, you can import templates from Divi and follow the same process to customize them.
To get the most out of Divi visual builder, this video tutorial will walk you through how to use the divi builder.
For the Services page, however, let’s understand how you can build it from scratch.
Enable visual builder and then select ‘Build from Scratch’.
Now, insert a row and locate a text module. In the text settings, add your services (content) and format them as you like.
By clicking the blue ‘+’ icon, you can insert a section and select ‘Regular’. In the succeeding step, add triple rows this time and click on ‘Blurb’. Add your text in the blurb settings and format it as per your style.
You can also change the image by simply clicking on it and then either use an icon or image. Apart from that, you can easily duplicate each module. You can always change the content in module settings.
For a more in-depth look into customizing each page, you can watch this tutorial. Remember to click the green tick each time and then hit ‘Save’.
Click ‘Exit Visual Builder’.
Now, to add a proper footer to your website, navigate back to your dashboard. Click ‘Divi’ and then select ‘Theme Builder’.
Then select ‘Add Global Footer’ and ‘Build from Scratch’. Again, add triple rows and locate the text module.
We will add location in the text settings.
Under the ‘Design’ tab, you can format the text (font size, style, alignment, etc.) as per your preferences.
Click the green tick. Besides, you can change the background color of the footer from Section Settings (gear icon).
Now, duplicate this module twice and rename them ‘Menu’ and ‘Follow us’.
Navigate to the ‘Location’ module to insert three additional rows and choose the text module.
Add your location here and fix the formatting.
Again, duplicate this text module and drag it below ‘Menu’.
Under Menu, you can add all of your business pages and then link each of them here. Now, when someone clicks on Contact, that’s going to take them to the contact us page.
For the Follow us footer, locate ‘Social Media Follows’ and this is where you can add your social media accounts where people can follow you. Remember to center align them under the Design tab. Click ‘Save’.
On the top right corner, click ‘Exit’ and then ‘Save changes’.
Read more: How To Create Website Pages in WordPress
Step 7: Understanding Plugins

For instance, you can use ‘Yoast SEO’ to increase your online presence. It can be installed for free.
Plugins like ‘Jetpack’ allow you to increase the website speed, amongst other important technical issues collectively called “core web vitals”. Essentially, these are the main things that Google looks at from a technical aspect, when ranking websites high or low on search results pages.
Read more: Ultimate WordPress Tutorial for Beginners
Step 8: Ongoing Support

If we head back over to our HostPapa account, we can simply navigate down to ‘Chat Now’.
Enter your details and then simply click ‘Start Chat’. This will connect you to a HostPapa support member and you can ask any questions that you might have. This is quite an amazing service!
If you come across any issues that you cannot resolve yourself, you can just ask HostPapa to do this for you. They provide an unbelievable, large scope of backend support to ensure that your website is always online.
You’ll notice that your website says ‘Not Secure’ in the browser. To fix that, you can start a chat and request them to enable SSL and activate the lock to secure your site.
Read more: Elementor Tutorial for Beginners
Divi Theme Tutorial for Beginners (Video Guide)
Congratulations! You just learned how to create a small business website using this Divi theme tutorial.
Remember, take the time to get your head around the visual builder and how you can use premade layouts to design each of your website pages.
If you are a complete beginner and want to learn how to start designing and building a website from scratch, we have a video tutorial just for you.
Enjoy the designing process!
Disclosure: Some of these links on this page are affiliate links, meaning we will get a commission if you buy through them, this helps support our education-based platform and we thank you in advance.
