Table of Contents
What is Google Sites?
Google Sites is a powerful free website builder that anyone can access through their Google account.
Today, I will guide you through how to create a single-page website with Google Sites. Also, if you’re looking to create a website with multiple pages, then this guide is for you too.
This Google website builder allows complete beginners to design and build a comprehensive multi-page website or a single-page website with ease.
In this Google Sites tutorial, we will guide you through how you can create a one-page website for free using Google Sites.
A single-page website is an ideal alternative for small businesses that don’t have much information to put on their website.
They also often have a single-focus call to action (CTA) such as:
- Booking form
- Promoting event
- Promoting products/services
How to make a one-page website?
Now, let’s find out how to make a one-page website for free with Google Sites!
1. Get Started
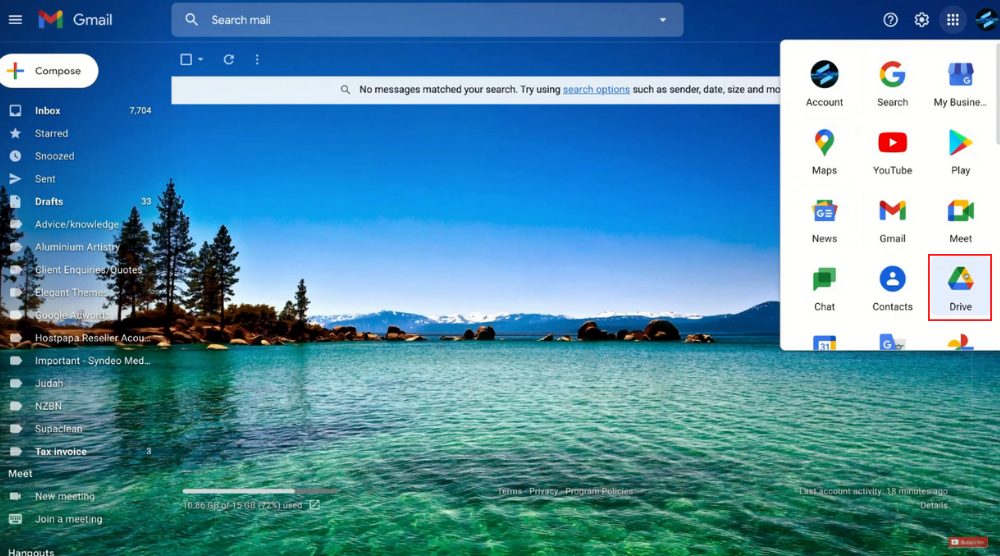
If you don’t already own a Google account, you can sign up for free. Once you have accessed your inbox, navigate over to your Apps on the top right-hand corner.
Select Google Drive.
You also have the option to directly visit your Google Drive.
Now, click on ‘New’ under your Google Drive.
From the drop-down, select ‘More’ and then ‘Google Sites’.
You have now arrived on Google Sites, one of the best one-page website builders out there.
You can start customizing your one-page website.
Read more: Google Sites VS Google Business Profile
2. Visit Google Sites Dashboard
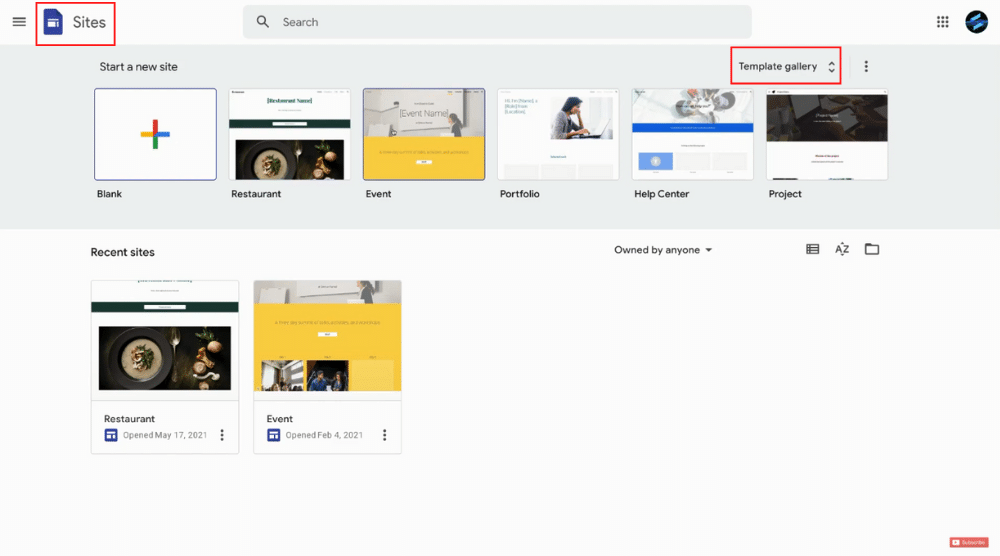
Over here, you will see the option to create a single-page website from scratch or use a premade one-page website template.
Now, if we select ‘Template gallery’, that’s going to open up a few other templates that we can choose.
For instance, we can create a personal website, work website, or small business website (like dog walker, holiday party, photo portfolio, restaurant, and salon).
But for the purpose of this Google Sites tutorial, we will learn how to create a one-page website from scratch.
Select ‘Blank’ and now we can begin with the customization process.
Read more: How to Make a FREE WEBSITE in 10 – 30 Minutes
3. Name Your New Website
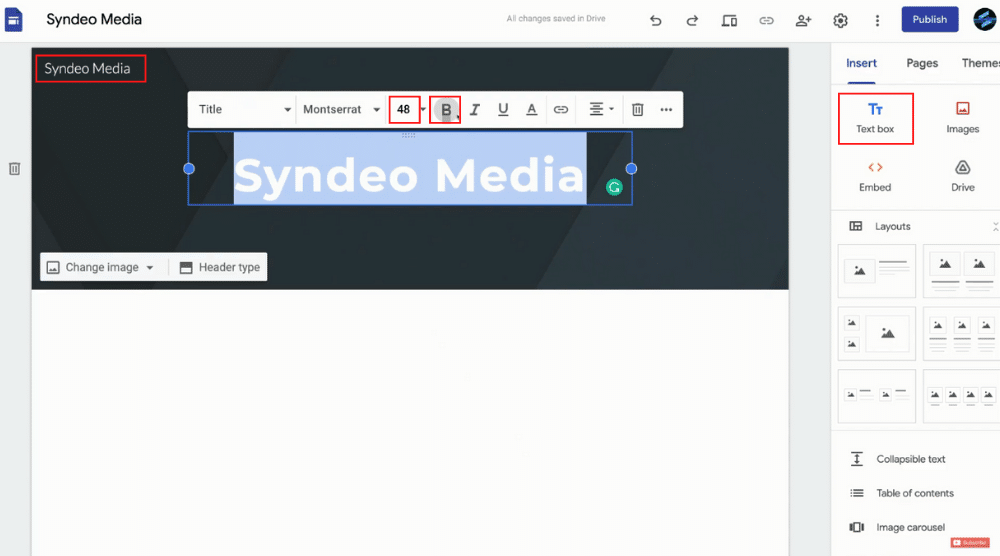
In this Google Sites tutorial, we will create a single-page website for a digital marketing consultancy called Syndeo Media.
Let’s name our site just that. Now, we will add our business name in the page title below.
Remember, this is a single-page website.
So, we want our visitors to know what exactly this website is about as soon as they land on it. Hence, you must add your business name, Syndeo Media, to the page title.
Up here, you will also notice some formatting options for your text. We want to highlight the page title and make it bold. Besides this, you can also choose the font style of your choice.
Change the font size to 48 for a better appearance.
You can experiment with other formatting options but for now, we will leave it as is.
Read more: How To Create a Google My Business Website for free
4. Add Your Business Logo
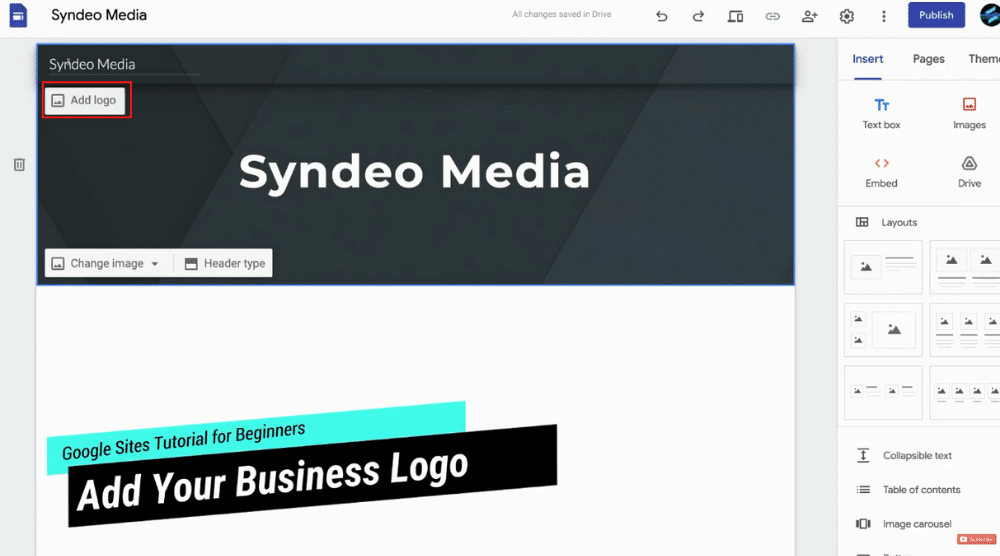
Now, click on ‘Upload’, locate your business logo, and then click ‘Open’.
Your logo will now appear in the top left-hand corner.
If you don’t already have a logo for your business, then what you can do is watch our beginner’s tutorial on how to make a logo for free with an easy-to-use design tool called Canva.
Once you’ve uploaded your logo, Google Sites will automatically generate colors that you can use for your theme based on the logo.
You can select one of these three colors to use as a theme on your one-page website.
You can upload a Favicon to your Google Sites website builder and what this does is essentially adds a logo into your browser. It makes it look more professional when people navigate to your website.
However, we will click exit, and leave that for now.
Read more: Canva Free Logo Maker
5. Change Header Image
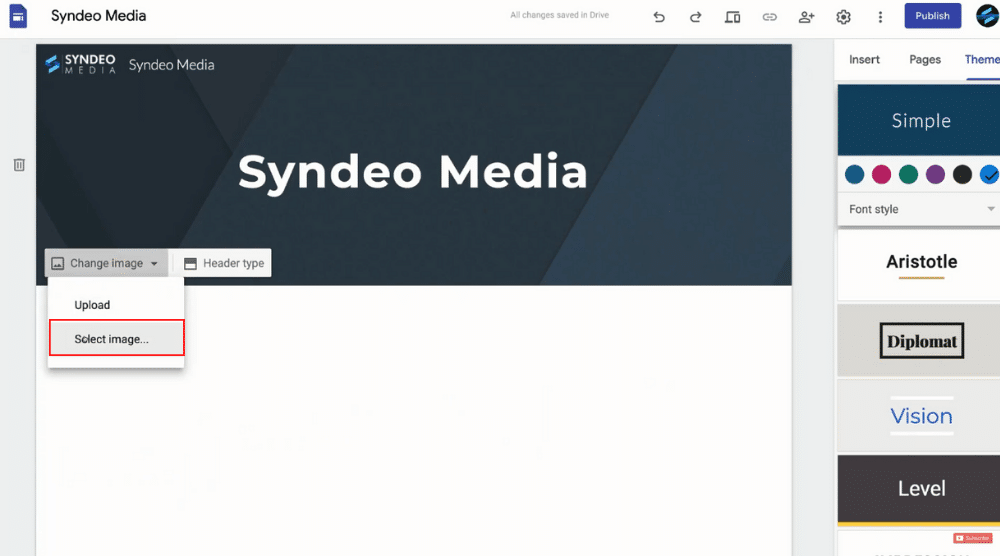
If you choose the second option, you will be taken to Google’s stock image gallery.
Use any one of these stock images for your header.
Google Sites will automatically readjust the header to make it more readable.
However, you can bring it back to its standard view by removing the ‘adjust for readability’ from the right-hand side.
However, in this Google Sites tutorial, we will upload a cover image rather than use a stock image.
The recommended size for a cover image on this one-page website creator is 2560 × 1440 px.
Again, if you don’t have a cover image ready, use Canva to your advantage.
Just remember to use the recommended size for it. Canva has thousands of free and paid images in its gallery that you can use for your website.
Since you already have your logo up there, you can remove the business name just next to it.
Read more: How To Add a Contact Form on Google Sites
6. Select Google Sites Website Themes
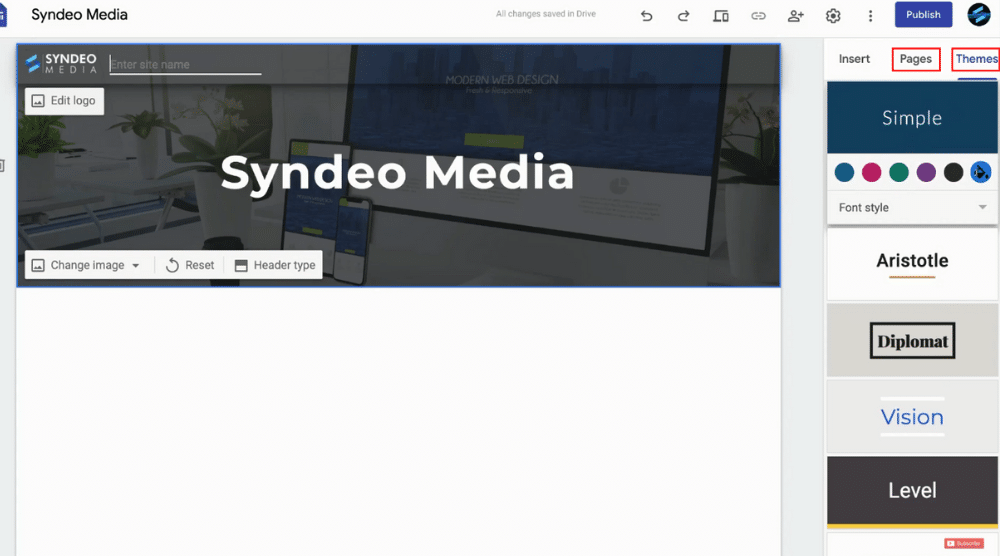
First, we want to ensure that we have the right theme selected for our site.
For instance, we have ‘Simple’ and the color blue selected on the right.
However, we can choose any of the other Google Sites themes if we like. You are not going to see much of a change since we only have a header right now.
Once you’ve got more content in place, then you can analyze which theme works best for your brand and personal preferences.
For now, we’re happy with the current theme. If you navigate to ‘Pages’, this is where you can create additional pages or links.
It’s important to note that this is if you want to create a website with multiple pages.
However, for this Google Sites tutorial, we’ll stick to single-page websites.
If you want to create a multi-page website, you can watch this tutorial.
Now, if you navigate to ‘Insert’, you will have many customization options here.
Read more: Best WordPress Theme for Beginners
7. Add a Text Box Element
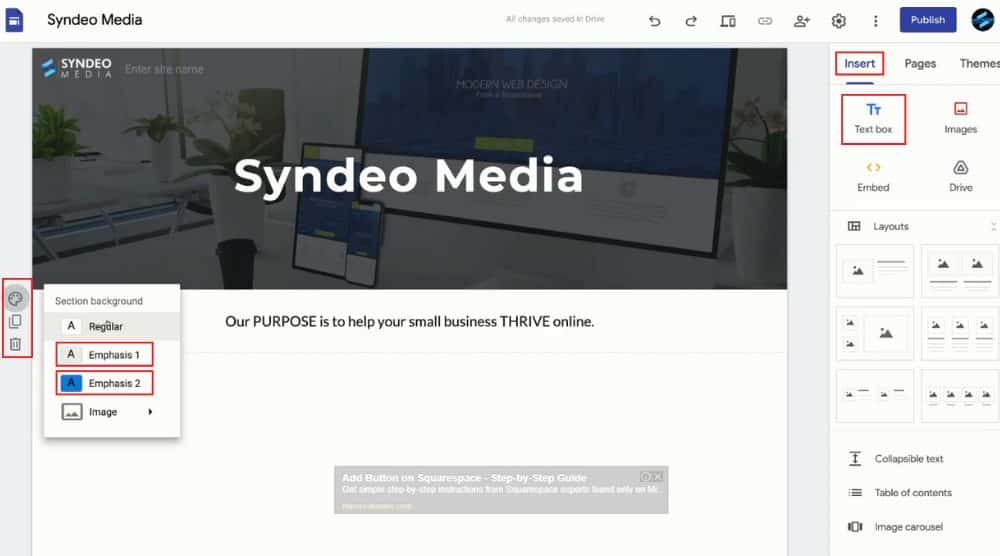
Under ‘Insert’ just click on ‘Text box’. You can then simply add the text to your new text box and format it.
On your left, you can see three options:
- Delete the section
- Duplicate the section – to use it later anywhere on the page
- Section background – you can change the background of your text box with this or upload an image
For this tutorial, we will select ‘Emphasis 1’ that will add a light grey color to the background of this text box.
Based on the theme color that you decide to go with, you can always change the text box background color.
We can, for instance, choose a darker theme and then select ‘Emphasis 2’ to change the background color of the text box.
Read more: Create A FREE Online Store with Google Sites
8. Embed a Video
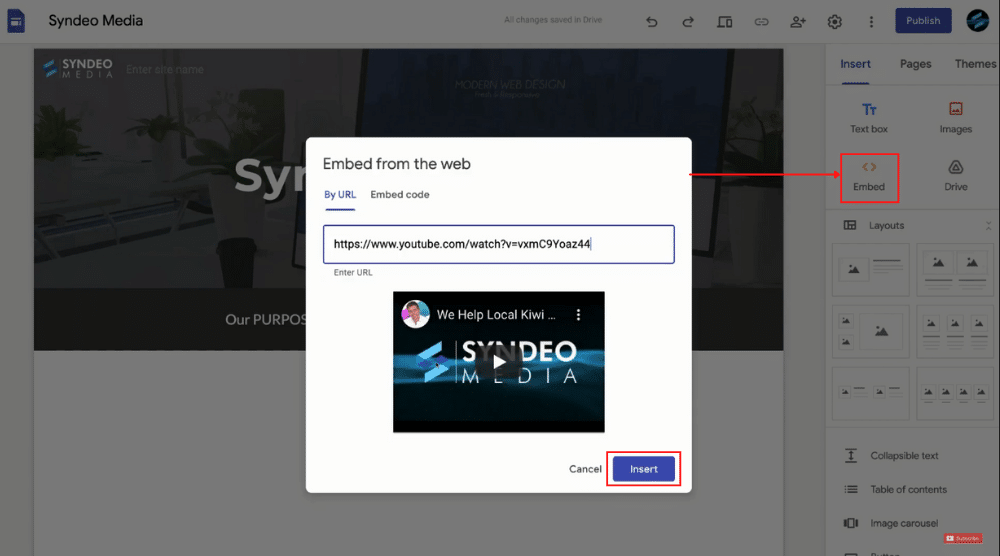
Videos help visitors to understand what your brand is about and thus boost the conversion rate. Just click on ‘Embed’, paste the URL to a YouTube video, and click ‘Insert’.
If you don’t have a video, you can skip this part. But if you have embedded a video, it’s best to place it in the center.
From the left-hand side, you can again change the section background for this video. We will choose a Google image for this one.
Remember to remove the readability adjustment as we did in the header for this Google Sites tutorial. That’s going to make the background slightly darker.
Again, you don’t need to use a gallery image, you can always experiment with other options.
Read more: How To Create a Free Website with Google Sites
9. Add a Layout
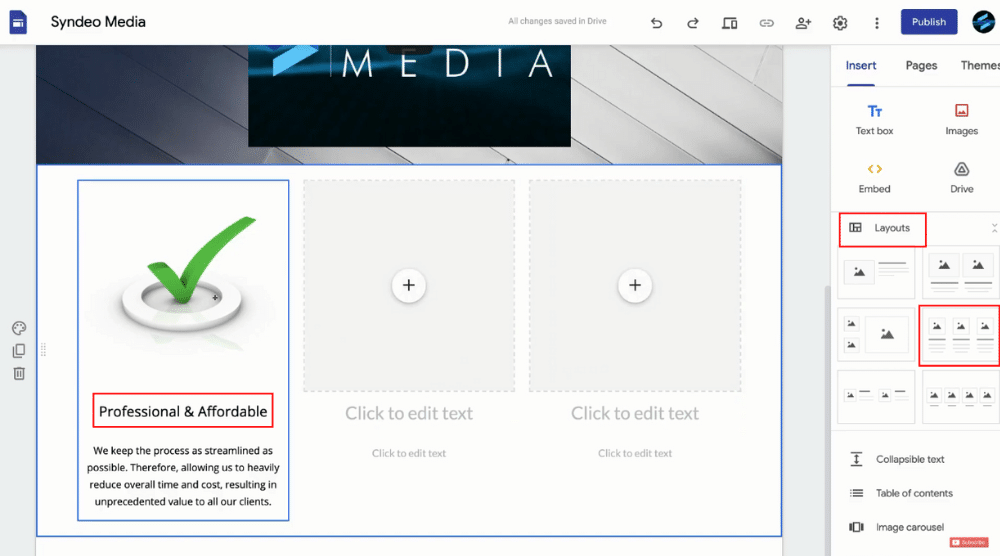
For that, we can choose from the predesigned layouts that you’ll find on the right-hand side. For example, we will select the 3-section layout and drag it below the video.
In each section, add images and content about why people should choose us as the solution for them.
Click on any of the sections, and select ‘Upload’ from the drop-down.
Select the image, and then click ‘Open’.
Now, you can add some text like ‘Professional & Affordable’ just below the image.
Below it, include a brief description. You can choose to format the text with the available options, if necessary.
Follow the same process for the other two sections as well. Again, you can change the section background if you like.
For now, we will leave the background white. Depending on how the website turns up, we can change the background later, if needed.
Read more: Google Workspace Tutorial for Beginners
10. Create a Submission Form
The contact form would also come in handy to follow up with your potential customers with a phone call or email.
To create a submission form using Google sites website builder, navigate to your right where you will find plenty of elements or Google tools that you can integrate with your website.
Just below the layouts, you will see an option named ‘Forms’.
First things first, we will navigate back to Google Drive.
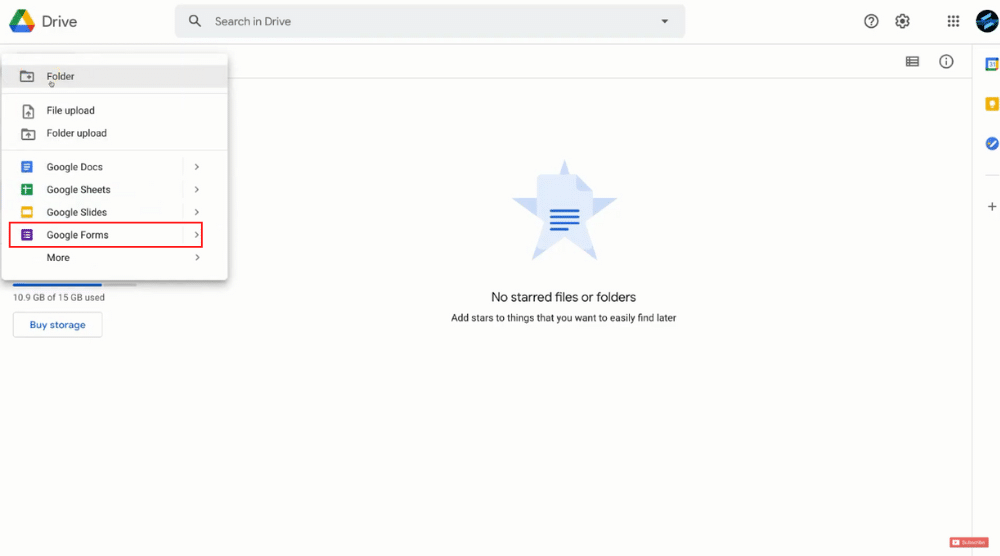
By clicking on ‘New’ you can come down to ‘Google Forms’.
In the next step, name your form and this is going to appear on your website. For this Google Sites tutorial, we will name it “Get in Touch Today”!
Come down to add the form description “Fill out this form and we will be in touch ASAP”.
On your right, click on the ‘+’ icon to add a question.
From the drop-down, you can pick the type of answer (such as MCQs or short answers). We will select ‘Short answer’.
In place of ‘question’, type ‘Name’.
Make sure you’ve got ‘required’ turned on.
Then navigate up to Settings and click ‘Collect emails’. Hit Save.
Your form can now start collecting emails.
Now, we will add a third question, select ‘Paragraph’ from the drop-down, and add “Let Us Know How We Can Help?” Again, click on ‘Required’.
You can now navigate over to Settings and then select ‘Presentation’.
Now, add a quick confirmation message, “Thank you for your message, we will be in touch shortly”! Once users fill out the form, this is the message they will see. Hit Save.
Besides, you can also choose a theme color from the top right.
We are going with the color blue-gray to keep up with the tone of the brand.
Under the ‘Responses’ tab, you will see all your responses that you can also view in Google sheets.
Here’s a detailed tutorial on creating a Google Form.
Alternatively, you can use a powerful tool called Zapier that allows you to connect your Google form with a CRM or Gmail. Learn how to get started with Zapier here.
Ensure that you name your form “Google Sites Form” to avoid any confusion while importing it.
Back on your site, now you can insert the contact form that you just created and align it to the center. Again, change the section background by selecting an image from the gallery.
Your form is now ready!
Read more: How To Add Local Business on Google Maps
11. Add a Map
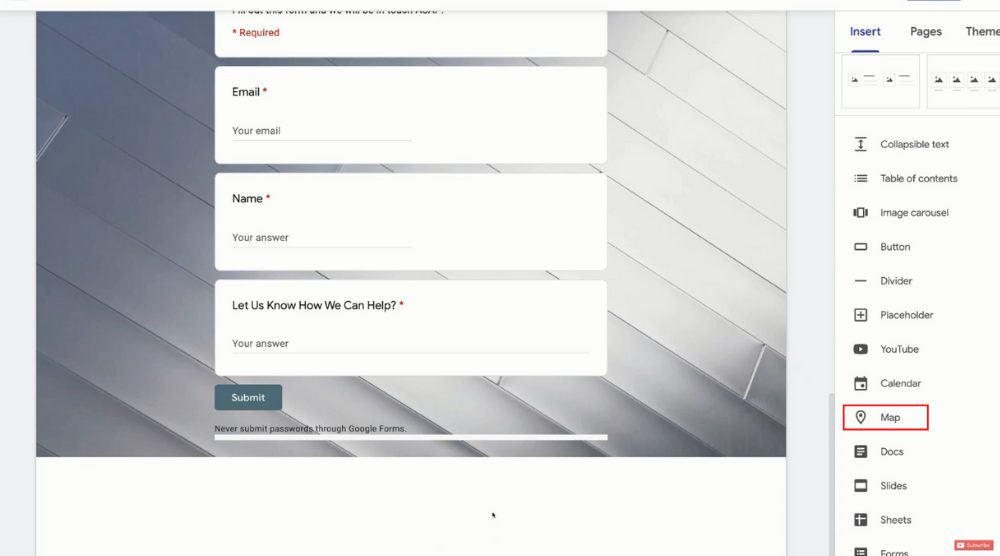
This is for local businesses that want to add their physical location. For a multi-page website, the map is added to the contact page. Just select ‘Map’ from your right and type in your business location.
Make sure that the location is correct before clicking ‘Select’.
To add a large divider above the Map, we will select ‘Text box’ again, drag it below the contact form, and then change the section background to a darker color.
Add another text box below it that says “Find Our Location”. Again, you can tweak the formatting of the text as you like.
Read more: How To Use Google Calendar
12. Add a Footer
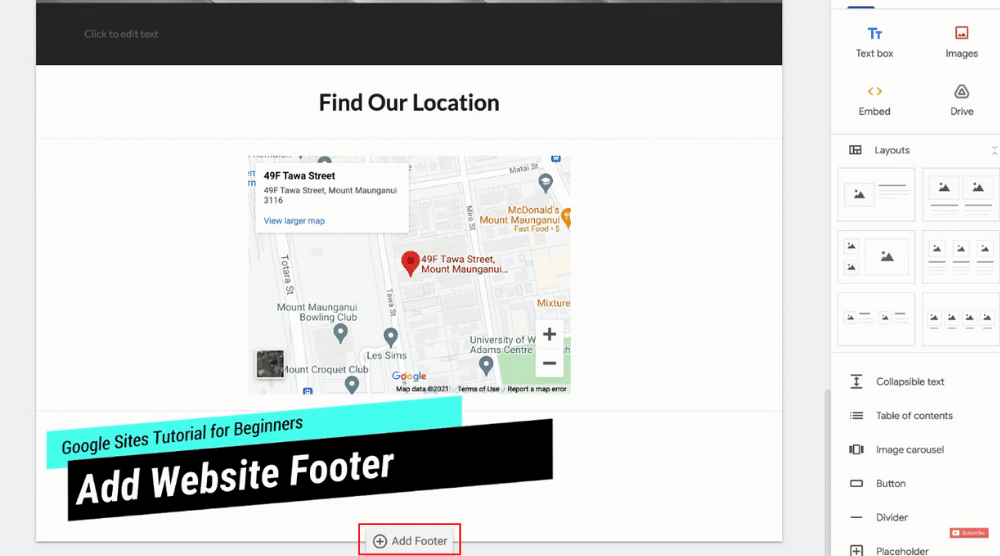
Footer can be a privacy policy, location information, developer information, etc.
You just need to click on ‘Add Footer’. Add your business name, copyright, terms and conditions, and privacy policy.
You can add a link to the privacy policy that takes the visitor to the relevant document.
You can basically do this for any text on your one-page website.
Read more: How To Create Group Emails in Google Workspace
13. Preview and Publish
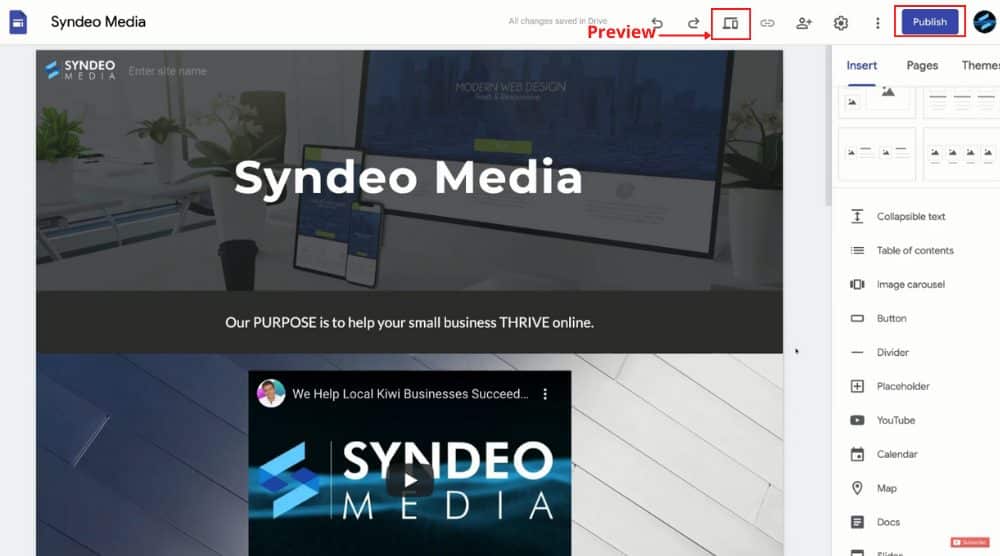
To see how your website looks on multiple devices such as desktop, tablet, and mobile, just click on ‘Preview’.
On the one-page website builder, you will find the option to undo or redo anything before you finally publish. Besides this, you can also add other people to engage and collaborate with you on your new website.
Under the Settings, you can add brand information as well.
When you’re ready, navigate up to ‘Publish’ and then come down to add your business name. Because we’re creating a free website, you will see a branded domain.
If you have a custom domain, you can add that as well. Then click ‘Publish’.
Your single-page website has been published successfully!
Also read: How to build a premium WordPress website
How to use Google Sites (Video Guide)
As mentioned before, navigate through different themes and experiment to see what works best for your single-page website.
You can always add additional pages if needed.
Take the time to go through all the elements, layouts, and Google tools. If you are a complete beginner, you can always check out the video tutorial to help you get started with Google Sites.
In this “Google sites tutorial for beginners,” you will get an in-depth walk-through of creating a single-page website for your small businesses.

