Are you looking to set up Google Ads conversion tracking for your WordPress website?
Google Ads is an incredible platform that helps promote your business right in front of your potential customers.
But did you know that Google Ads also allows for conversion tracking – a valuable tracking feature to help you measure and track important events happening on your website?
In this Google Ads conversion tracking tutorial for beginners, we’ll explain how to set up WordPress conversion tracking using Google Ads.
Are you ready? Let’s learn how to track your conversions!
Next, in this Google Ads conversion tracking tutorial, we need to create a conversion action.
We’ll initiate Google Ads conversion tracking for a service-based business (for today’s example).
Using Google Ads, we can send paid traffic to the booking form on our website.
We can then track form submissions as a conversion using the following method outlined in this guide.
In this example, when an individual submits the booking form after entering their details, this will be measured as a successful conversion.
For step 2, take these actions:
Click on Tools and Settings (refer to the screengrab)
Locate ‘Conversions’ in the ‘Measurement’ column and click on it
Tap on the ‘New Conversion Action’ button
Next, choose the type of conversion you wish to track: 1) track actions on your website 2) track actions on your app 3) track calls from your ads or website 4) important data from Google Analytics
We’ll choose ‘track actions on your website’ as our Google Ads conversion goal. Under website conversion, these are the metrics we can track: online sales, link clicks, page views, and sign-ups.
Next to ‘Goal and action optimization’, choose ‘Submit lead forms’ from the drop-down menu
Name your conversion in the given field. We’ll name it ‘Booking Form Lead’ in this Google Ads conversion tracking tutorial. This name is for your own reference within your account.
Next to ‘Value’, select the option that says ‘Use the same value for each conversion’
Add an average value of each lead that this business generates. We will enter NZD 300 just as an example. However, you also have a second option, which is to ‘use different values for each conversion’. There is a third option which is to not use any value at all (not recommended).
Under ‘Count’, select the number of conversions you wish to count for every click or transaction. Choosing ‘Every’ is the correct option if you wish to track purchases.
Let’s say a person clicks on your Google Ads and then makes a purchase through the booking form on your website.
Later on, they make another purchase by revisiting your website – this time not by clicking a Google Ad.
Those two purchases will be recorded under that single click!
Therefore, the customer made two purchases using the first ad click.
Although they clicked on the Google Ad only once, they made two purchases, which is why they are recorded as two conversions.
If you choose ‘One’ under ‘Count’, only the first interaction will be recorded.
Since we’re generating leads, in this WordPress Google Ads tracking tutorial, we’ll keep ‘One’ selected.
Click-through Conversion Window
Continuing with step 2, you now want to set up the click-through conversion window.
You see, people don’t always buy immediately after clicking a Google Ad. It may take days or even weeks for them to return to your website!
Here you want to select a window post-ad-interaction to track the conversions.
However, for this Google Ads conversion tracking tutorial, we’ll pick ’30 days’ from the drop-down.
This means that if someone revisits the booking form 31 days after clicking your Google Ad, it won’t be counted as a conversion because it’s outside the click-through conversion window.
However, if they revisit and complete the purchase in, let’s say, 15 days – it will be considered a conversion.
Engaged-view Conversion Window
This is important if you’re running video ads.
Here you want to choose the timeframe post-video-ad-engagement that you wish to track conversions for.
So, it’s essentially the same as a click-through conversion window but for video ads.
Let’s say, we set the engaged-view conversion window as three days, a conversion after that specific time duration will not be counted.
View-through Conversion Window
Tracking this type of conversion is important if someone sees your ad but doesn’t interact with it (i.e, does not click the ad or view the video ad).
However, they may convert later after some amount of time has passed.
How long do you want to track that conversion?
That is what the view-through conversion window is!
For this Google Ads conversion tracking tutorial, we’ll keep it one day.
Attribution Model
This allows you to allocate credit per ad interaction for your conversions.
We have these options:
Last click – the last click that converts gets all the credit
First click – the first click gets all the credit
Linear – credit gets distributed equally for all clicks that end in conversions
Time decay and position-based
Although we advise selecting ‘Last-click’ as the preferred attribution model, especially if you are setting up Google Ads conversion tracking for the first time.
Once you start generating data within your account, then ‘Data-driven’ is the best approach.
In this model, Google Ads distributes credit based on past data for a specific conversion action.
Keep ‘Last click’ selected and hit ‘Create and Continue’.
That concludes step 1 of 3!
We chose a conversion goal, set a conversion value, selected the count, picked the click-through conversion window, engaged-view conversion window, view-through conversion window, and the attribution model.
Now let’s continue with this WordPress Google Ads conversion tracking guide.
Setting up a conversion tag can be daunting for beginners, but don’t worry!
We’re going to walk you through it step-by-step.
For step 3 (refer to the screengrab), take these actions:
Under ‘Tag setup’, select ‘Install the tag yourself’ [Note: If you have access to the help of a developer, choose ‘Email the tag’ instead of ‘Install the tag yourself’. Scroll down, enter the developer’s email address, and click ‘Send and Continue’. Your developer will then handle the next steps.]
Copy the global site tag (the code snippet shown in the ‘Install the tag yourself’). We need to install this tag on every page of our WordPress website
Step 4: Install Plugin (HFCM)
To install the conversion tag onto your WordPress website simply navigate the following steps.
Login to your WordPress website
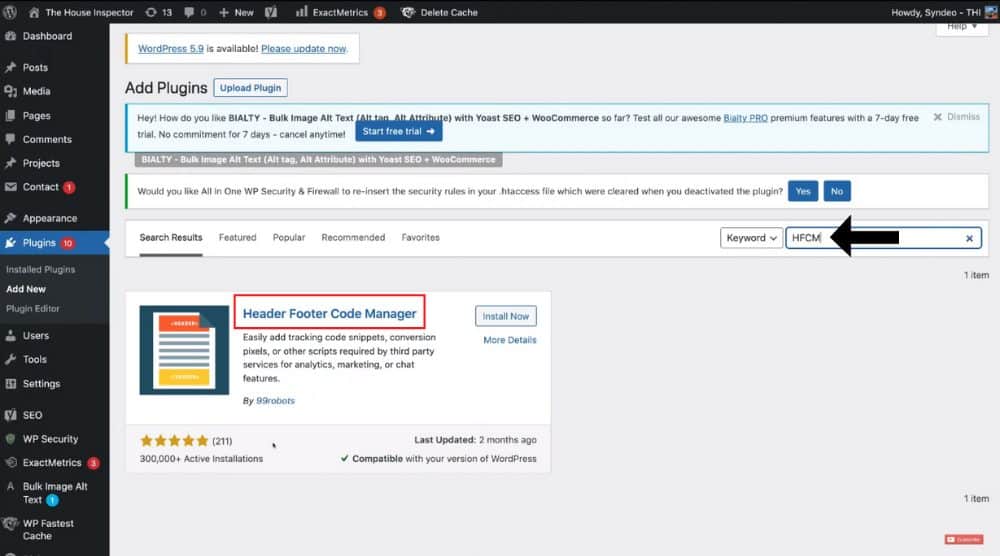
Click Plugins > Add New
Type in ‘HFCM’ in the plugin search bar
Locate ‘Header Footer Code Manager’ and hit ‘Install Now’ (refer to the screengrab to ensure that you install the right plugin). We also advise you to back up your website(Learn how to backup your WordPress website here) before installing any. This is because sometimes plugins can clash with each other and your website could go down.
Now locate the HFCM plugin on the navigation panel and click on it
Select ‘Add New Snippet’ and name it. We’ll name it ‘Global Site Tag – Google Ads’ for this Google Ads conversion tracking tutorial.
Under ‘Snippet Type’, make sure ‘HTML’ is selected
Under ‘Site Display’, make sure ‘Site Wide’ is selected
Under ‘Location’, make sure ‘Header’ is selected
Scroll down to ‘Snippet/Code’ and paste the global site tag that you copied earlier
Hit ‘Save’
Step 6: Add Event Snippet
Continuing into step 6, we now need to install the event snippet:
Head back to your Google Ads account
Copy the event snippet code and navigate back to your WordPress website
Tap the ‘Add New Snippet’ button and name it ‘Event Snippet – Google Ads (Booking Form Conversions)’. This is for our own reference.
Again, ensure that the snippet type is HTML
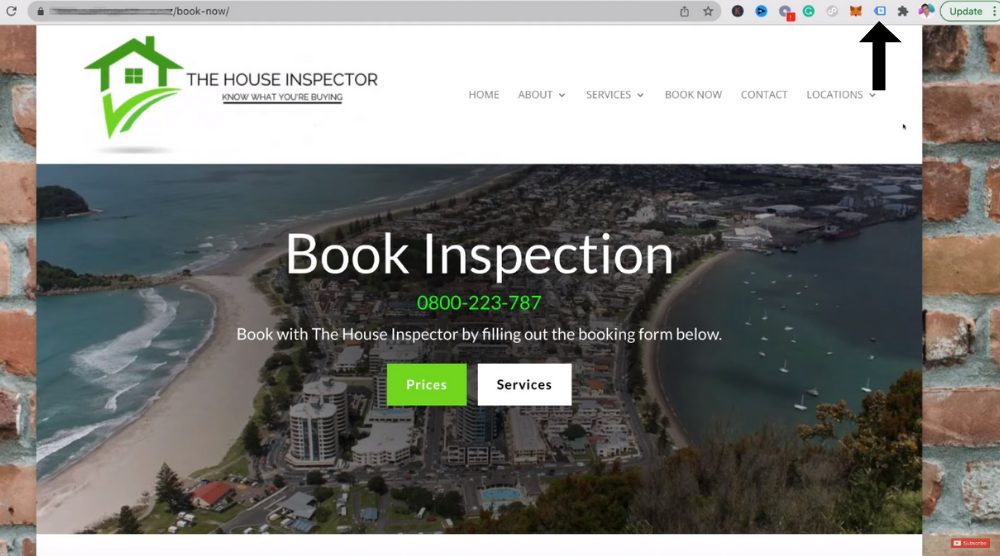
Next to ‘Site Display’, choose ‘Specific Pages’ from the drop-down
Under ‘Page List’, select the thank you page. When a visitor completes the booking form, they’ll be taken to the thank you page. That’s going to be recorded as a conversion.
Next to ‘Location’, select ‘Before Content’
Scroll down to ‘Snippet/Code’ and paste the event snippet code copied earlier
Hit ‘Save’
Head back to your Google Ads account and hit ‘Next’
In the next step, you just need to click ‘Done’.
On the Summary page, you’ll see the newly created conversion action.
Currently, the status is unverified and it can take up to three hours before you’re verified.
If you head back to your Google Ads account, you’ll be able to see the conversions (in a separate column) under your campaigns.
You can also see the cost per conversion and the conversion rate.
And that’s how you create and track conversions within Google Ads!
That concludes our WordPress Google Ads conversion tracking tutorial.
Watch The Full Video Guide Here
We also have a full video tutorial that you can check out below to give you a visual walkthrough of this process. Enjoy!
Frequently Asked Questions
Do You Need Conversion Tracking For Google Ads?
Although you can use Google Ads (without conversion tracking), if you want to see how many clicks are converting into sales on your WordPress website, you’ll need to set up conversion tracking for Google Ads.
What’s The Difference Between Google Ads And Google Analytics?
Google Ads only shows Google Ads clicks, whereas Google Analytics is much more in-depth, showing clicks across all channels (and much more!)
Should You Use Google Ads Or Google Analytics?
For WordPress Google Ads conversion tracking, Google Ads is enough. But if you’re after a more comprehensive view of your website, Google Analytics is the way to go.
Hi! My name is Stewart, I have a strong passion for digital marketing, business software and small business strategy.
My #1 goal is to provide simple, understandable and actionable information for small businesses located all over the world.
I'm a lover of travel, water sports and spicy food!
We use cookies on our website to give you the most relevant experience by remembering your preferences and repeat visits. By clicking “Accept”, you consent to the use of ALL the cookies.
This website uses cookies to improve your experience while you navigate through the website. Out of these, the cookies that are categorized as necessary are stored on your browser as they are essential for the working of basic functionalities of the website. We also use third-party cookies that help us analyze and understand how you use this website. These cookies will be stored in your browser only with your consent. You also have the option to opt-out of these cookies. But opting out of some of these cookies may affect your browsing experience.
Necessary cookies are absolutely essential for the website to function properly. These cookies ensure basic functionalities and security features of the website, anonymously.
Cookie
Duration
Description
cookielawinfo-checkbox-analytics
11 months
This cookie is set by GDPR Cookie Consent plugin. The cookie is used to store the user consent for the cookies in the category "Analytics".
cookielawinfo-checkbox-functional
11 months
The cookie is set by GDPR cookie consent to record the user consent for the cookies in the category "Functional".
cookielawinfo-checkbox-necessary
11 months
This cookie is set by GDPR Cookie Consent plugin. The cookies is used to store the user consent for the cookies in the category "Necessary".
cookielawinfo-checkbox-others
11 months
This cookie is set by GDPR Cookie Consent plugin. The cookie is used to store the user consent for the cookies in the category "Other.
cookielawinfo-checkbox-performance
11 months
This cookie is set by GDPR Cookie Consent plugin. The cookie is used to store the user consent for the cookies in the category "Performance".
viewed_cookie_policy
11 months
The cookie is set by the GDPR Cookie Consent plugin and is used to store whether or not user has consented to the use of cookies. It does not store any personal data.
Functional cookies help to perform certain functionalities like sharing the content of the website on social media platforms, collect feedbacks, and other third-party features.
Performance cookies are used to understand and analyze the key performance indexes of the website which helps in delivering a better user experience for the visitors.
Analytical cookies are used to understand how visitors interact with the website. These cookies help provide information on metrics the number of visitors, bounce rate, traffic source, etc.
Advertisement cookies are used to provide visitors with relevant ads and marketing campaigns. These cookies track visitors across websites and collect information to provide customized ads.