By learning how to add your Instagram feed to WordPress, you’ll be able to showcase your images and videos directly from Instagram on your website.
Did you know that you can boost sales, conversions, and brand awareness through this fantastic activity of cross-promotion?
Not to mention, it will dramatically improve the amount of audience engagement and reach!
Don’t have a WordPress website?
Check out our complete WordPress beginners guide.
How to Embed Instagram Feed on your WordPress Website?
In this brief tutorial, we’re going to explain how to embed your Instagram feed on WordPress (for Elementor, Divi, and Gutenberg).
Read more: Divi vs Elementor comparison guide.
Step 1: Install the WordPress Instagram Feed Plugin
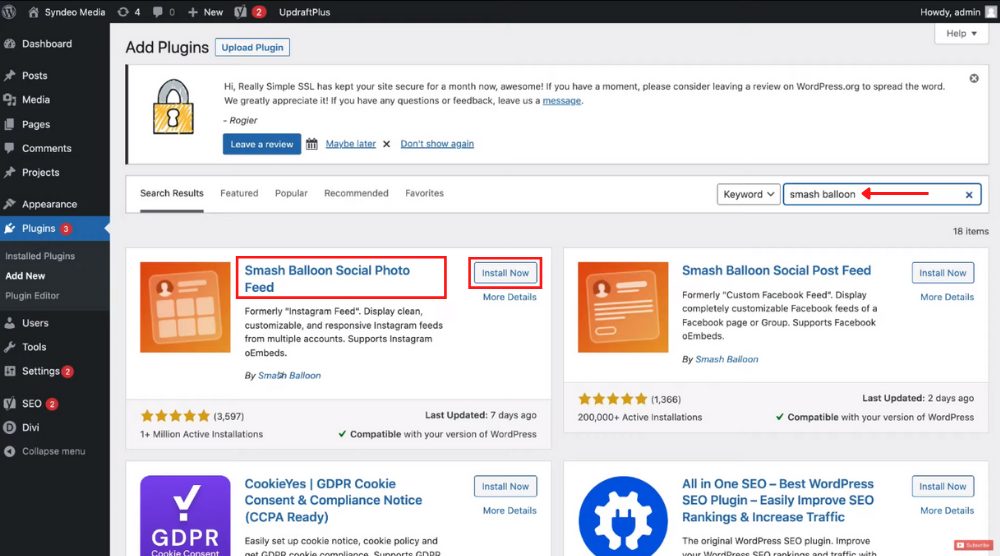
The first step to embed your Instagram feed onto your WordPress website is to install an Instagram feed WordPress plugin called Smash Balloon.
To do that:
- Log in to your WordPress dashboard.
- Hit ‘Plugin’ on the navigation menu.
- Select ‘Add New’.
- Type ‘Smash Balloon’ in the search bar.
- Find the ‘Smash Balloon Social Photo Feed’ by Smash Balloon.
You’ll see this plugin has over a million active installations and 3000+ reviews!
Before you install ANY plugins, it’s always best practice to backup your website.
- Hit ‘Install Now’.
- Click Activate’.
Read More: How To Backup Your WordPress Website for free.
Step 2: How to connect Your Instagram Account to WordPress
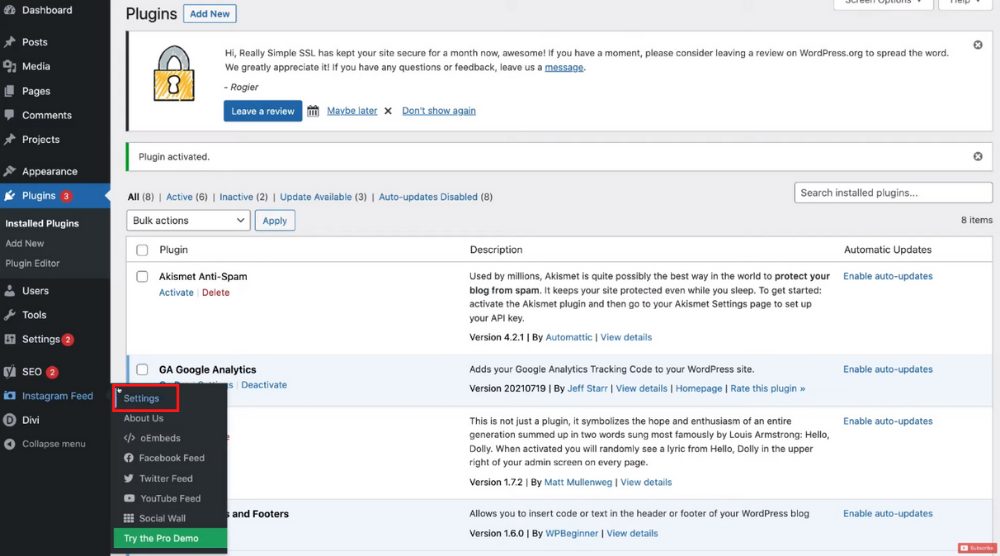
Once your plugin has been activated, follow the steps below:
- Click on ‘Instagram Feed’ on the navigation menu.
- Hit ‘Settings’.
- Select ‘Connect an Instagram Account’.
- Make sure ‘Personal’ is selected under ‘Account Type’
- Click on ‘Login with Instagram’.
- Hit ‘Allow’
- Select ‘Connect This Account’
And there you have it! Your Instagram account is now successfully connected with Smash Balloon.
Read more: How to create an Instagram business account.
Step 3: How to configure Instagram feed settings
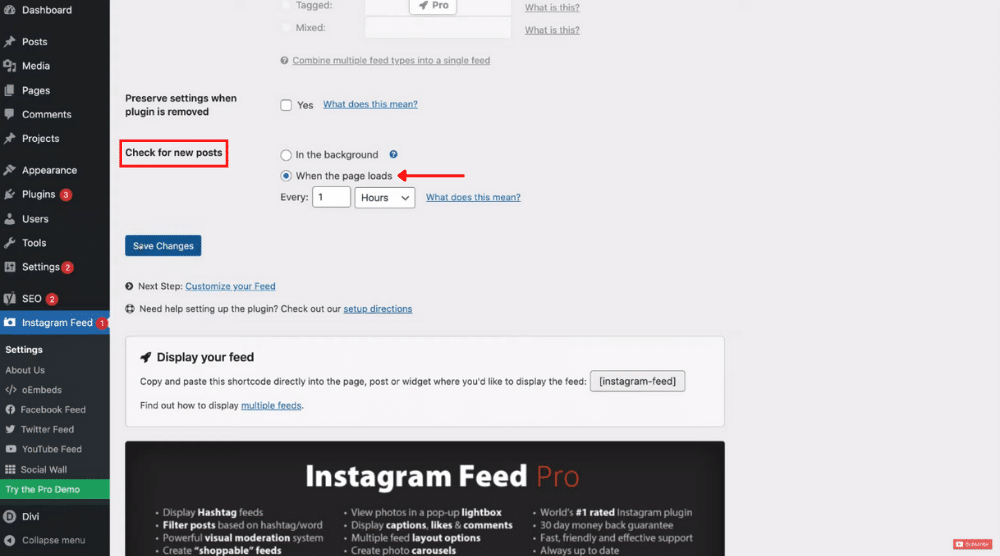
To configure your Instagram feed plugin settings:
- Click ‘Instagram feed’ on the left-hand side bar.
- Within your Instagram feed settings, scroll down until you find ‘Check for new posts’.
We recommend keeping ‘When the page loads’ selected.
- After that, choose a time frame for loading your posts.
- Remember to save your changes.
Read more: How to create business Instagram reels.
Step 4: How to customize Your Instagram Feed
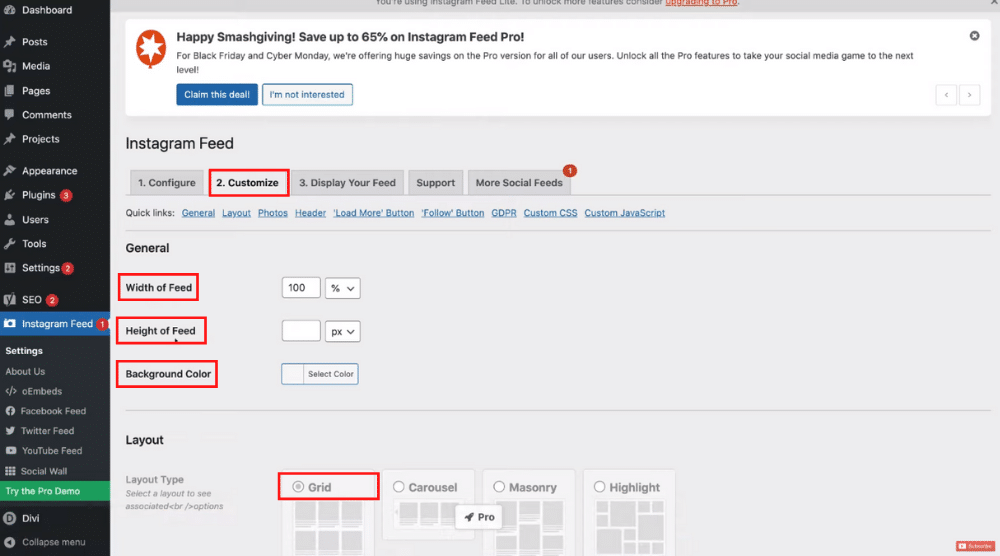
Now it’s time to customize your Instagram feed!
To do this:
- Next to ‘Configure’, clik the ‘Customize’ tab.
- Here you can customize the width, height, and background color of your Instagram feed.
- Choose a different layout if you like.
However, we recommend keeping the grid view selected since it looks more professional).
- Also, you can choose the number of photos, columns, and padding around images.
- Under ‘Sort Photos By’, select ‘Newest to oldest’.
- Scroll further down to ‘Header’,.
- Make sure the ‘Show Feed Header’ check box is selected.
- You can choose to show your bio text on your WordPress Instagram feed.
- If you prefer, you can add a custom bio text instead.
- Below this, you may change the header text color as well.
Remember, you can change these settings at any time later on.
- Click ‘Save’ to save your changes.
Read more: How to connect Facebook to Instagram.
Step 5: Display Your Feed
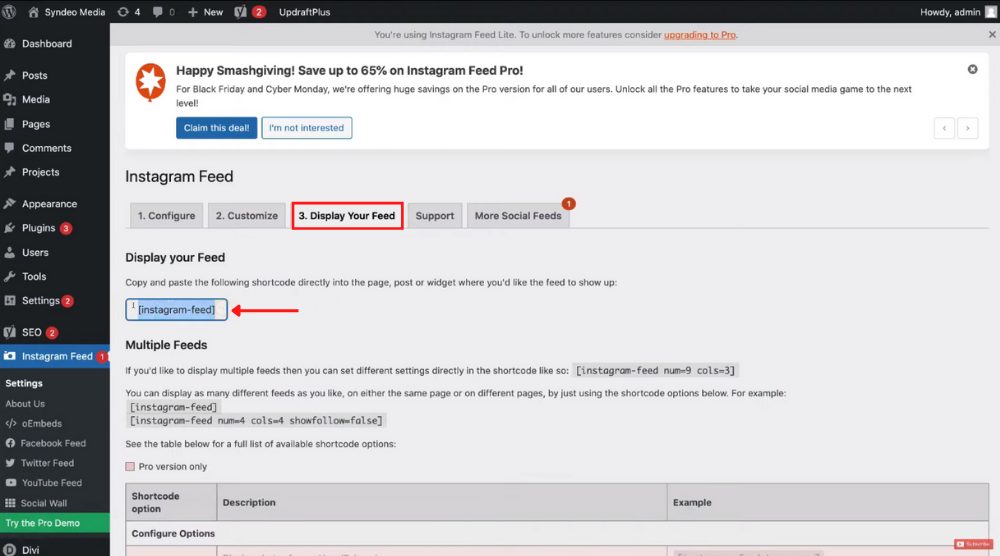
The next step is to copy your Instagram feed code:
- Next to ‘Customize’, click ‘Display Your Feed’.
This is where you can copy your Instagram feed code.
- Simply Right-click the code.
- Copy the code.
The next step is to add the Instagram feed to your WordPress website by embedding that shortcode directly onto your website pages.
We’ll show you how to do this shortly!
You can also display multiple feeds by customizing the shortcode based on the number of photos and columns.
Now let’s get stuck in and show you how to paste this shortcode into Gutenberg, Divi, and Elementor!
Read more: How to connect Twitter to Instagram.
How to add your Instagram Feed into Gutenberg
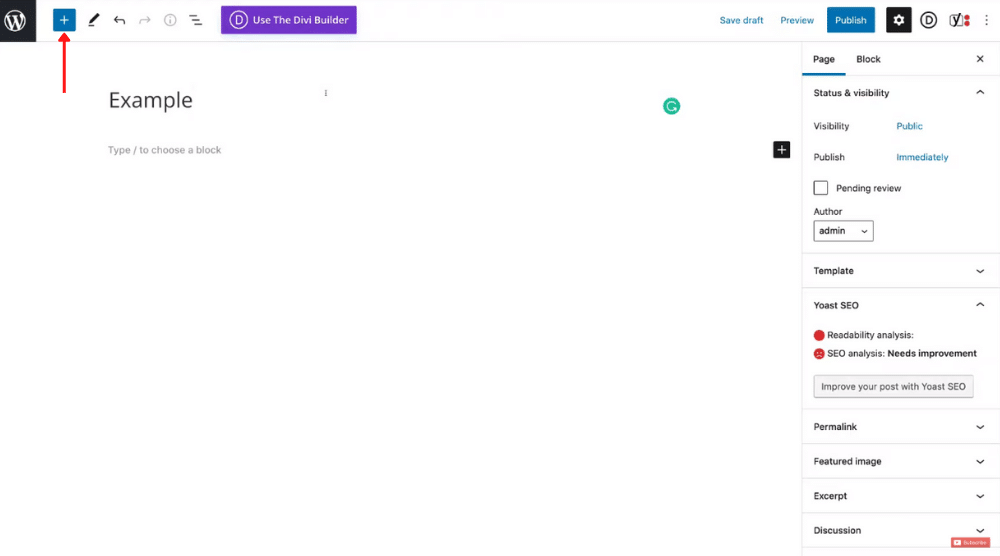
Follow the steps below to add your Instagram feed into Gutenberg:
- Within the Gutenberg editor, click the add button (the ‘+’ icon in the upper-left corner).
- Type in ‘short’ in the search bar.
- Select ‘Shortcode’ from the suggestions.
- In the Shortcode block that you’ve just added, right-click and select ‘Paste’
- Click on ‘Publish’ in the upper-right corner.
- Hit ‘Publish’ again.
- Select ‘View Page’ to see how the Instagram feed looks like on your website page.
Your Instagram feed will now be displayed!
- Click ‘Load more’ to see more images from your feed.
- You’ll also notice the ‘Follow on Instagram’ button next to ‘Load more’.
Read more: How to setup a CDN for free for WordPress.
How to add your Instagram Feed into Divi
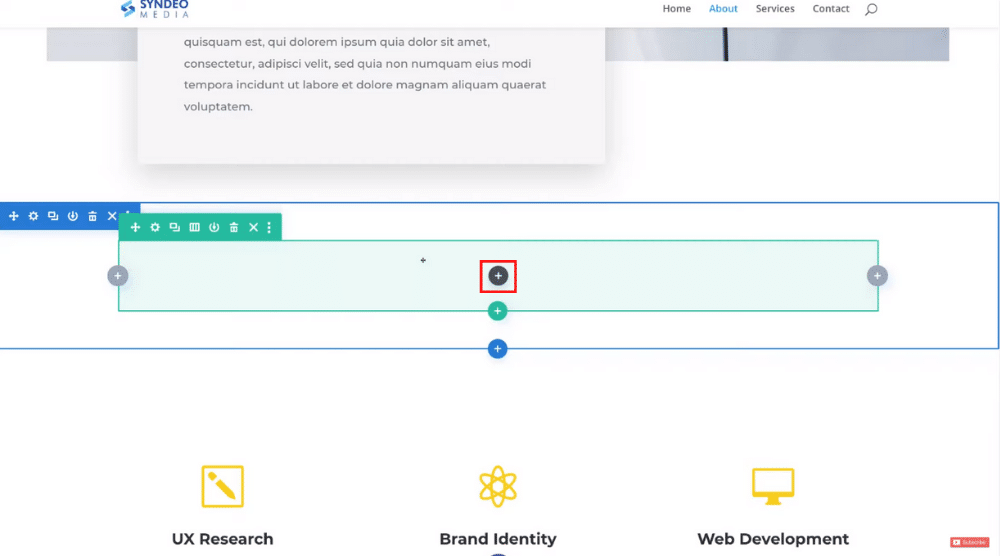
To add your Instagram feed using Divi’s visual builder, you’ll need to follow the below steps:
- Inside Divi’s visual builder, find the section and row where you want the Instagram feed to be displayed.
- Select the ‘+’ icon to add a module.
- Pick the text module.
- Under ‘Text Settings’, click ‘Text’ next to ‘Visual’.
- Replace the default text with your shortcode (refer to the screengrab).
- Click ‘Save’.
And congratulations! You’ve successfully added your Instagram feed to Divi!
Read more: How to use Divi theme.
How to add your Instagram Feed into Elementor
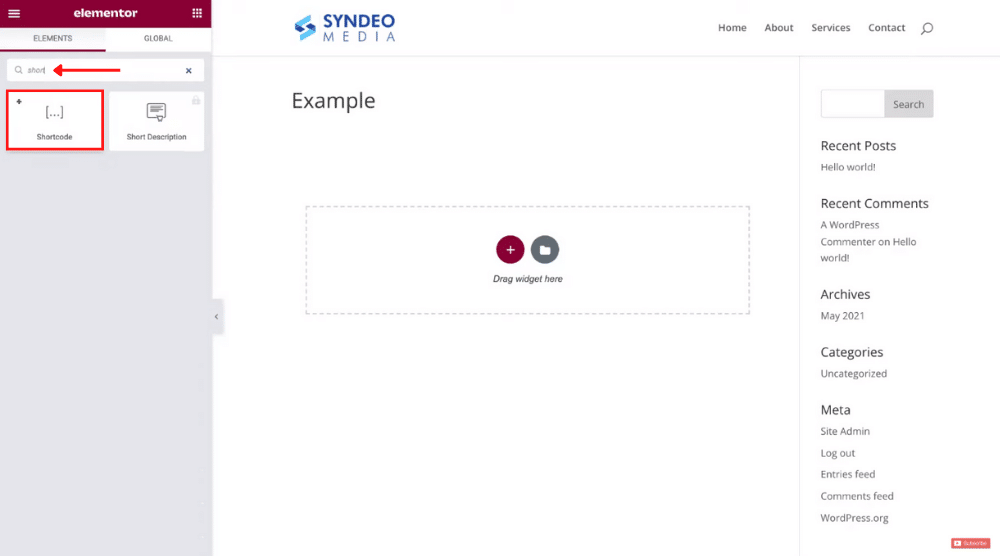
To add your Instagram feed in Elementor:
- Enable the Elementor page builder.
- Locate your shortcode through the search bar on the left-hand side (just like Gutenberg).
- Drag and drop the shortcode on your website page where you want it to go.
- Under ‘Shortcode’ (on your left), press right-click and select ‘Paste’.
- Click ‘Update’.
- View your changes to see the Instagram feed.
Read more: How to create a website using Elementor cloud
Instagram Feed WordPress Plugin Tutorial (Video Tutorial)
The Instagram feed WordPress plugin called Smash Balloon allows you to seamlessly embed your Instagram social media feed directly onto your website pages.
And you can do this completely for free!
Check out our video tutorial to ensure you don’t miss any steps. Enjoy!
