Table of Contents
In this Wix tutorial, we will explain how to use Wix for free and paid, an all-in-one website builder for small business owners.
Known for its simplicity in building even a full-featured website in minutes, the Wix website builder has gained immense popularity over recent years. It’s time to dive into our Wix tutorial for small business.
Wix provides access to Artificial Design Intelligence (ADI) technology, a user-friendly visual drag-and-drop editor, over 500 professional website templates, and extensive app integrations.
The Wix website builder is ideal for business owners with little to no website building and design experience.
How to use Wix & Build a Free Professional Website?
The best part is – as your business grows, Wix will grow with you.
In this Wix tutorial for small businesses, we’re going to walk you through how to build a free professional website using both Wix ADI and the more advanced Wix editor (if you want more control over the customization options of your website).
Wix Editor vs Wix ADI
Using the Wix ADI, you can easily build a personalized website by answering a few basic questions.
However, to further customize your website, you can switch to the Wix editor.
Using this more advanced option, you will have full control over the design interface and functionality of your website.
1. Getting Started with the Wix Website Builder
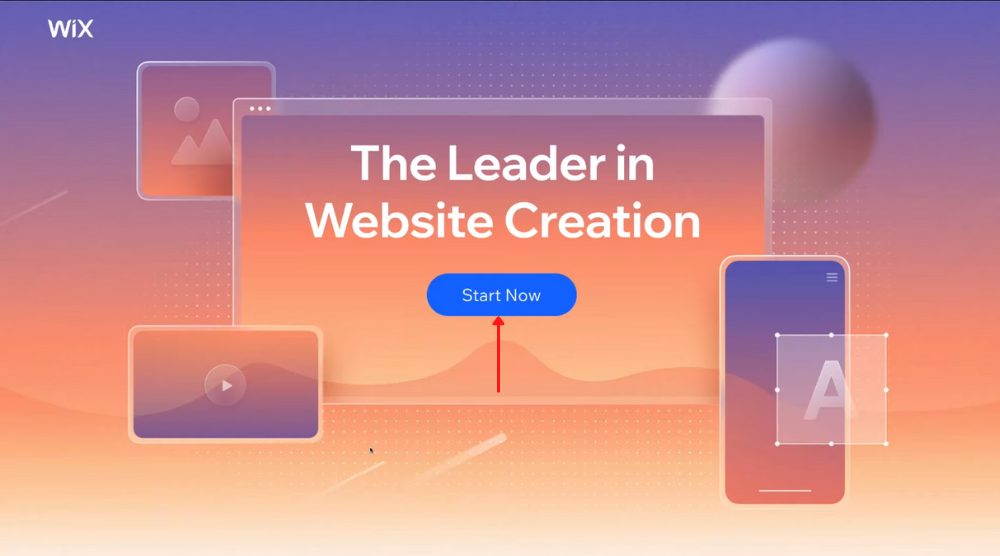
Navigate up to ‘Start Now’ and then fill out your information to get started.
Signing up with either Facebook or Google is also an option. For this Wix tutorial for small businesses, we’re going to enter the email, password, and then click ‘Sign Up’.
Select ‘Get Started’ and then proceed to answer a few questions about your website and business type.
In the first question, you need to choose the type of small business website you plan on creating.
In the search bar, enter your business type or keyword related to your business to locate the appropriate option.
For this tutorial, we’ll choose ‘Building Contractor’.
Hit Next.
Read more : How To Setup Google Ads Conversion Tracking for Wix
2. Adding Features to Your Website
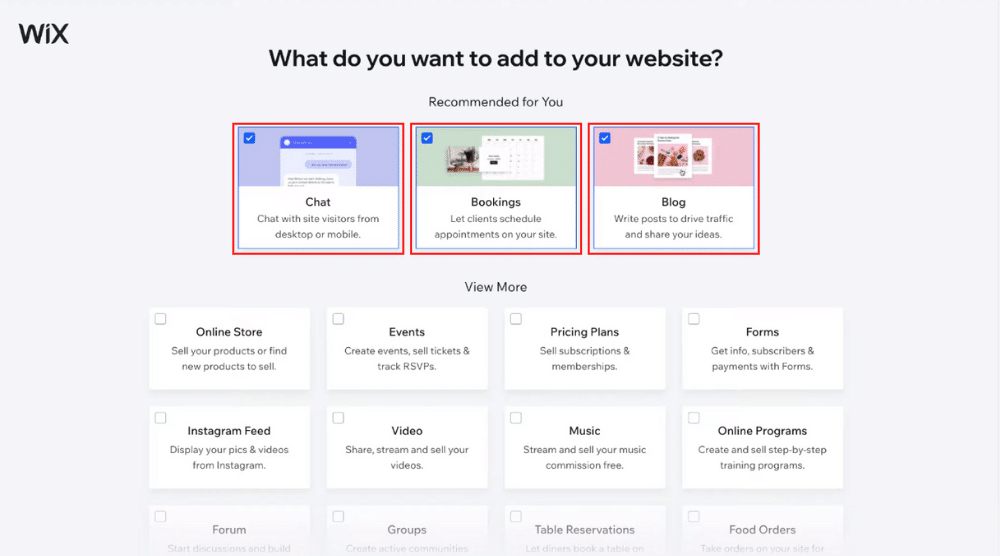
It could be a feature that allows you to chat with your visitors or allow them to schedule appointments on your website.
We want both of these features for the purpose of our example website, so we’ll select ‘Chat’ and ‘Bookings’ from the given options.
Moreover, to help your website rank higher on search engines, you may also add a ‘Blog’ section to regularly push content and drive traffic.
This feature is also important for informing and educating your visitors. Feel free to look through other features offered by the Wix website builder.
Example: Say, you’re in the hospitality industry and want to create a restaurant website, then adding the ‘Table Reservations’ option is one of the right features for you.
This would allow people to book a table through your website. Other features such as ‘Food Orders’ and ‘Restaurant Menus’ are essential too for a restaurant’s website.
However, since we’re creating a website for a building contractor in this tutorial, we don’t need these features. You can always add new features to your website later on.
Therefore, go ahead and hit ‘Next’ and proceed to the next step.
Now, you’ll be asked if you’ve ever created a website before. Since this is a beginner’s tutorial, we’ll select “This is my first time” as our preferred option.
As mentioned earlier we’ll learn about ADI technology in the next section.
Read more : How to Connect Google Analytics 4 with Wix
2. Introducing Wix ADI Technology
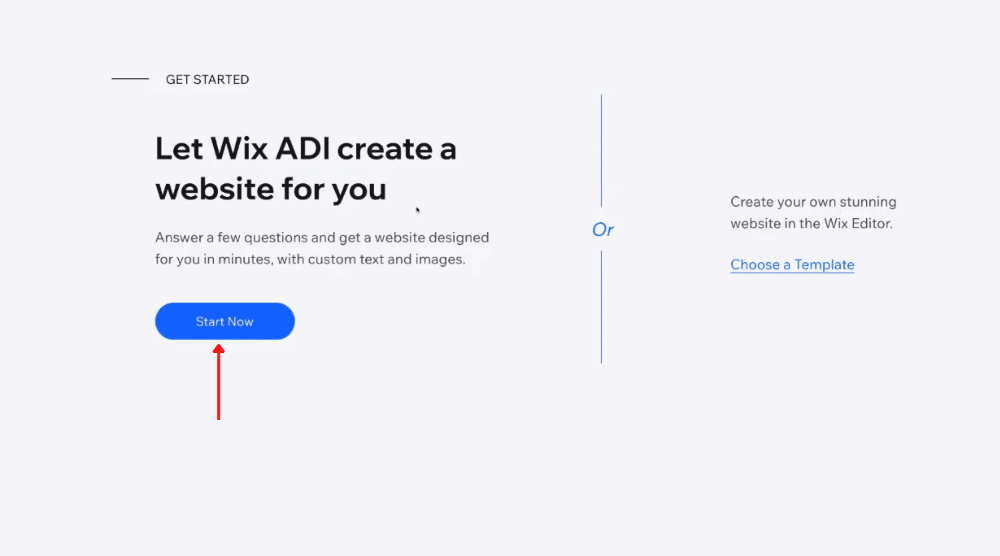
- Click ‘Start Now’ to begin.
- Add your business’s name and hit ‘Next’. For this Wix tutorial for small businesses, we’re going with ‘Ace Construction’ as our business’s name.
If you already have a website, Wix will now ask you to import your content.
For that, you just need to copy-paste your website’s URL in the field provided.
Assuming that as a beginner you don’t have an existing website or a Google My Business listing, you may simply click ‘Next’ without inputting any information.
Next, you’ll be required to add further information such as logo, address, phone, fax, and social accounts.
In the case that your business doesn’t have a logo yet, check out our Canva tutorial to create one from scratch free of cost.
Watch this tutorial to understand the step-by-step process of creating a free logo.
Once you’ve uploaded your business logo, hit ‘Next’. Here, we’ll pick a website theme that best represents our brand.
For this Wix tutorial for beginners, we’ll select a theme named ‘Emerge’ and click ‘Continue’.
In the following step, you may create a color palette based on the logo you’ve just uploaded.
Click ‘Use These Colors’ in the bottom right corner. But if you’re not too sure about these colors, you can instead click ‘Skip’ and pick out appropriate colors later on.
Read More: Canva Free Logo Maker
3. Choose a Theme and Color Palette
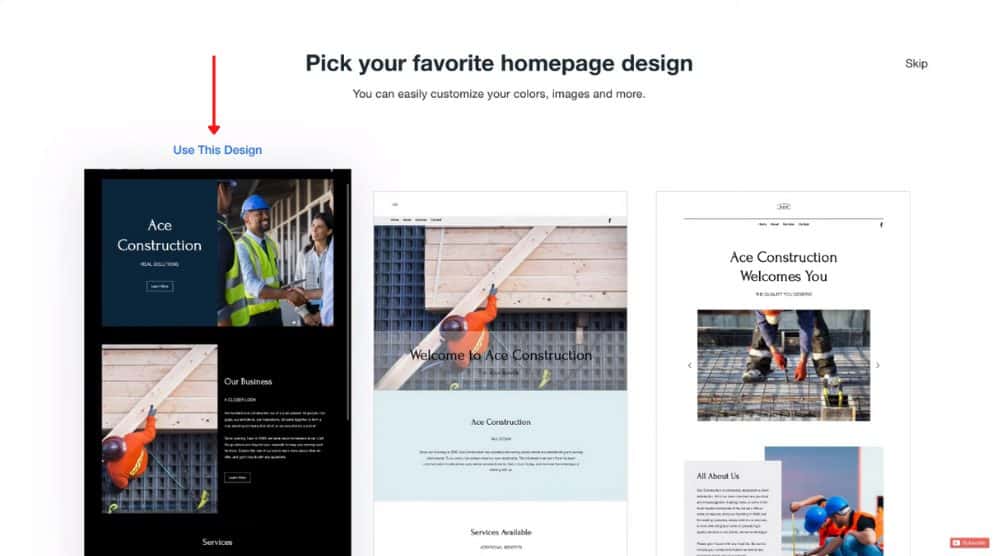
Hover your cursor over each of the homepages and scroll down to view the complete design.
For this Wix tutorial, we’ll go with the dark theme shown on the far left-hand side of our screen.
Click ‘Use This Design’ on your favorite home page (we will show you how to customize this page shortly!).
Read more : How To Add Facebook Pixel to Wix
4. Adding Pages to Your Website
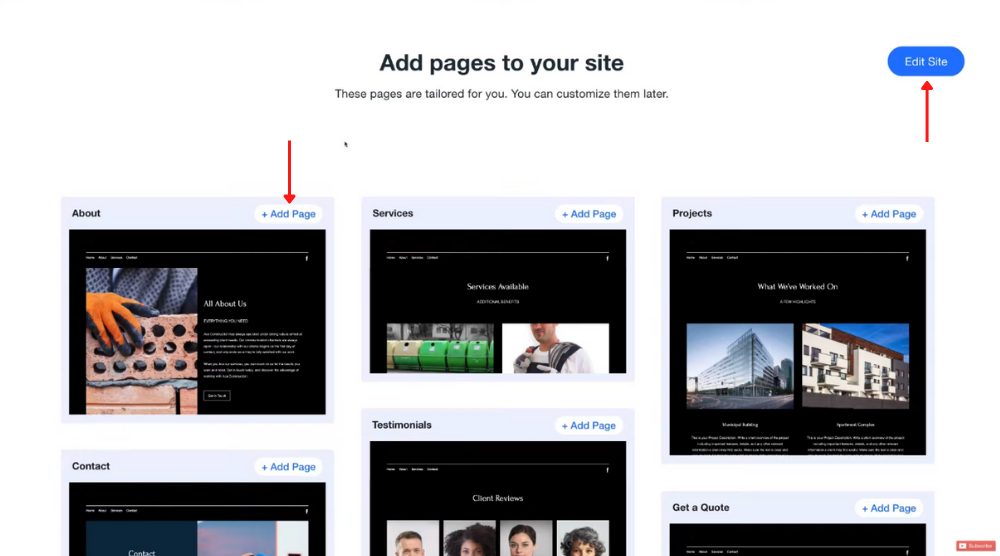
Select ‘Add Page’ to add individual web pages using the Wix website builder.
After selecting all your website pages, click ‘Edit Site’ in the top-right corner.
Your ADI-generated website is now ready! You can now start editing the home page and your other website pages.
For instance, you can simply change, format, or delete the images, text, buttons, and sections by clicking on each of the elements on your pages.
To find other website pages, drag your cursor to ‘Page’ Home’ on the top-left which will open a menu.
Now, select a page that you want to edit. Also, by clicking ‘Add Page’, you can add additional pages to your website.
Read more: Create A Free Website and Sell Products on Wix Online Store
5. Editing the Website Menu
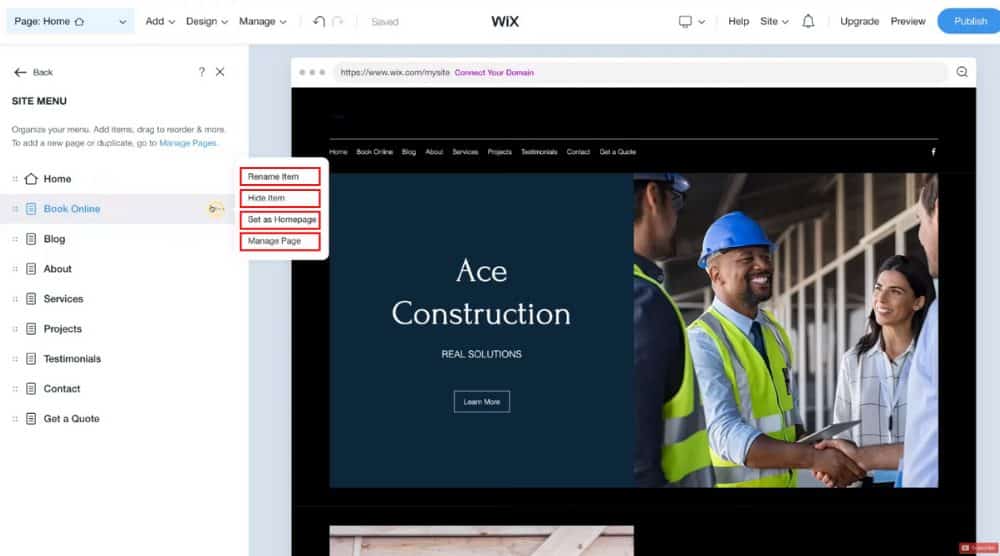
For each menu option on your left, you’ll notice the following options:
- Rename Item
- Hide Item
- Set as Homepage
- Manage Page
You can also add another menu item or rearrange the existing ones.
For example, you can drag and drop ‘Projects’ as a sub-item under ‘About’. You can also do the same for ‘Testimonials’. Every time you make a change, it’s automatically saved on Wix.
Moreover, you can undo or redo your edits if you do something wrong (refer to the screengrab).
6. Customizing the Sections (Edit)
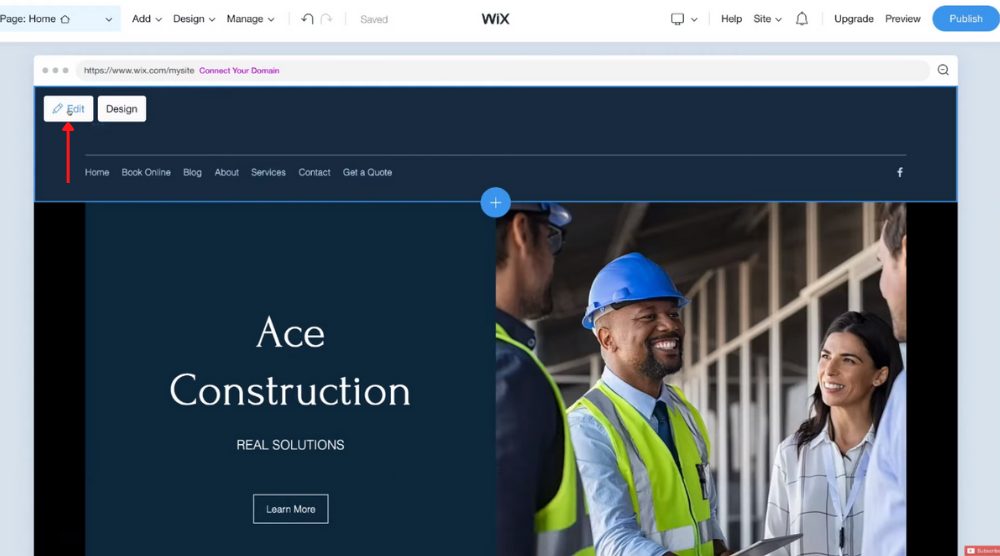
Now, to edit any section, simply hover over them and click ‘Edit’.
This will bring up information on the left-hand side. You can now start editing the section design, business name, tagline, phone number, button, or replace your logo.
For instance, if you wish to add your phone number, it will appear on the far right-hand side of your screen.
Apart from that, you can link the button (CTA) to another page on your website by simply clicking on it, selecting ‘Page’, and then choosing the page you want to link from the drop-down menu.
7. Customizing the Sections (Design)
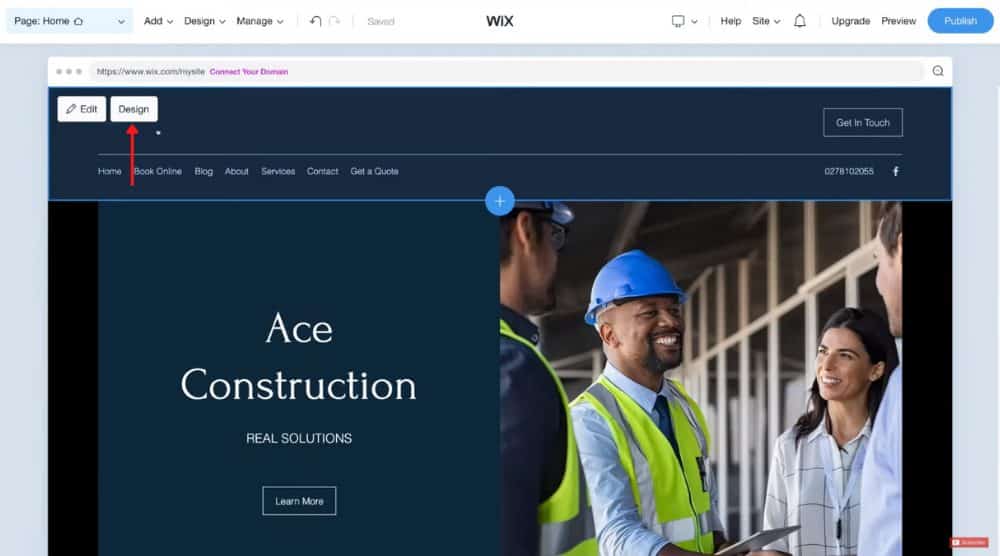
On the left, you can select from a variety of designs for each particular section.
You can do this for any section on your web page. Besides the design, make sure you edit the content according to your requirements.
Next to ‘Design’, click on the three vertical dots to find other options:
- Duplicate
- Move to
- Adjust height
- Delete
By clicking the downward arrow on the right-hand side, you can also move the section down. This is how you customize each section using Wix ADI.
Also, if you navigate up to ‘Add’ on the top-left, you can either select ‘Page’ or ‘Apps’.
If you click ‘Apps’, you’ll find many how to use Wix apps (Blog, Groups, Online Programs, Online Store, and more) that you can add to your website.
You can also delete any of these apps if you don’t require them.
To add individual sections, point your cursor to any of the sections and click the ‘+’ sign above or below them.
8. Editing Website Theme/Design
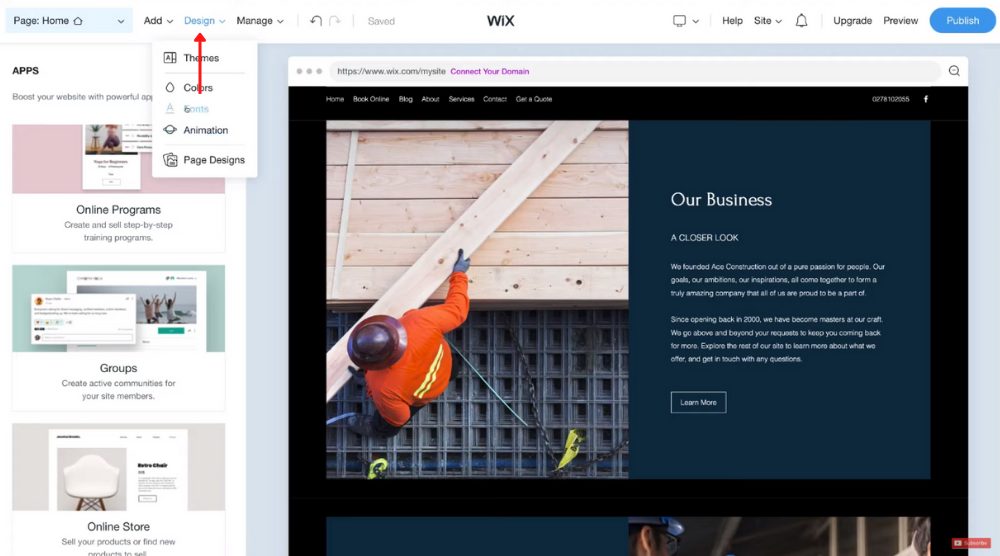
Click on it and select the appropriate options to change the overall theme, colors, fonts, and animations of your website.
9. Managing Functionality
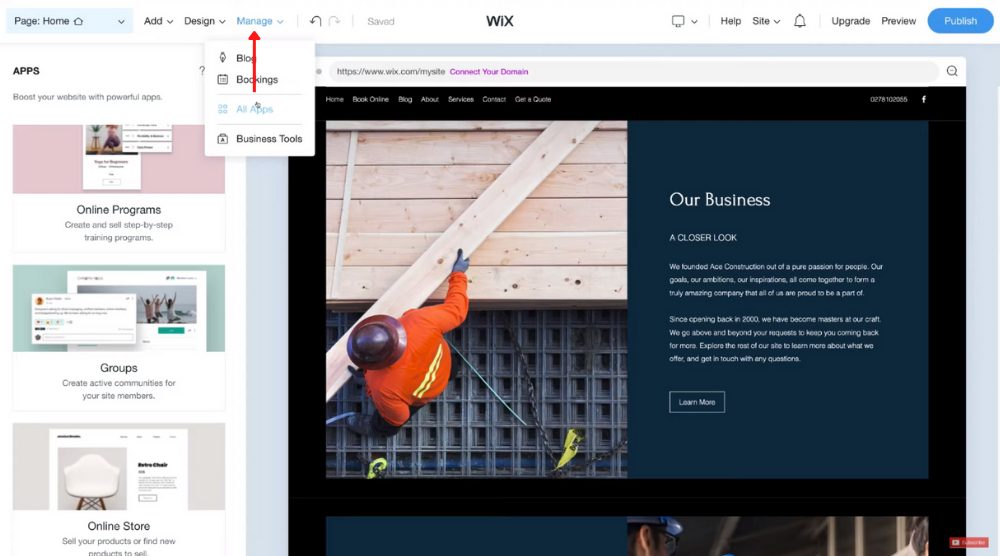
This is where you can create a blog, manage bookings, and access all your apps within the Wix website builder.
Moreover, on the far right-hand side, you’ll find the option to preview your website on mobile devices and desktops.
You can also customize the way your website looks on mobile devices. Also, to access the knowledge base within how to use Wix, you can tap on ‘Help’ next to preview.
Adjacent to that, we have ‘Site’. This is where you can navigate back to your Wix dashboard.
Here, you’ll also find ‘Settings’ and other backend settings. Next to ‘Site’, you’ll find the notification center.
Next to this you can find the option to upgrade to a premium account.
We’ll now move on to explaining how to build a website & know how to use Wix using its visual drag-and-drop editor.
As mentioned before, this more advanced Wix editor gives you unlimited freedom in terms of the design capabilities, layout, style and functionality of your Wix website.
10 .Using the Wix Editor
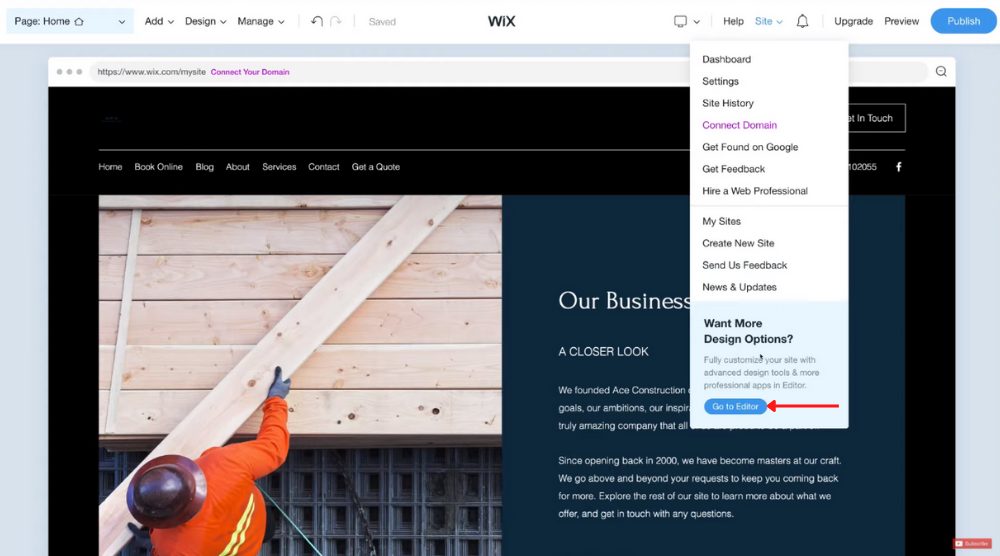
You’ll notice that we’re in the Wix ADI at the moment.
Choose ‘Switch to Editor’ to load your website in the Wix editor.
At first, it may look quite daunting compared to the Wix ADI as you can drag, drop, resize and move essentially any element on your website.
With practice, you can build a more comprehensive website.
However, you’ve to be careful as you can easily, by mistake negatively affect the responsiveness of your website.
So, we don’t recommend using the Wix editor for complete beginners.
Check out our video below this post to learn how to use the Wix editor.
11. Exploring the Wix App Market
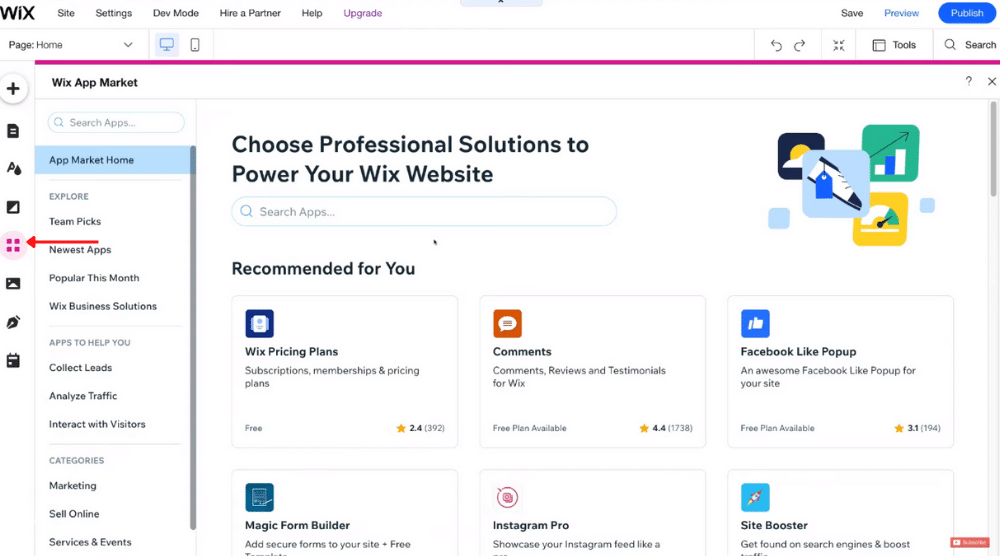
Click on it to access the Wix App Market. Here, you can search for specific apps and add them to your website.
Some of these apps are paid which means that you will need to upgrade to a premium plan in order to access them.
And that is a brief overview of the Wix editor vs ADI.
12. Publishing Your Wix Website
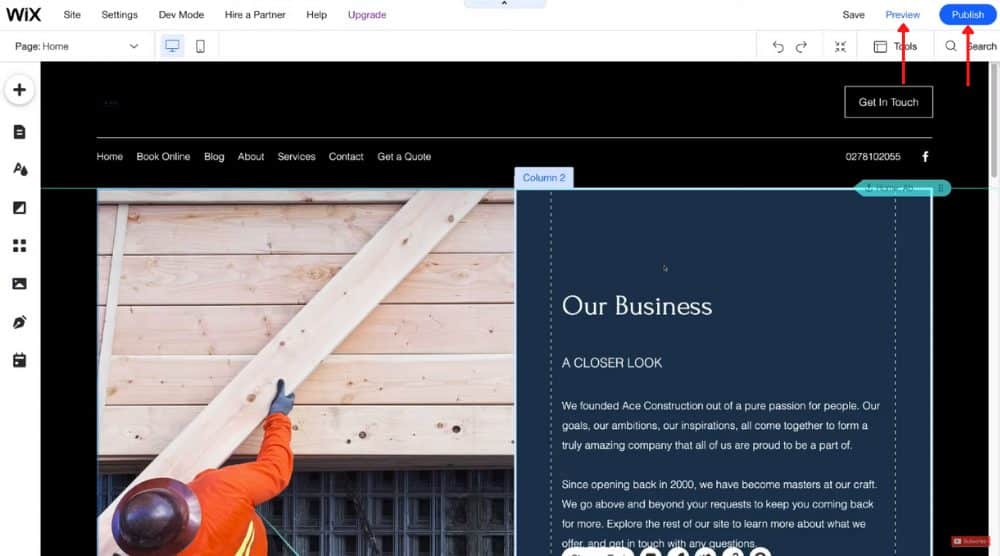
If you’re satisfied with it, go ahead and hit ‘Publish’.
Your website is now live!
Simply click ‘View Site’ to view your website live.
Navigate through your new website to explore all the features from a user’s perspective and make changes to your website if needed.
You can always unpublish your website or customize your website anytime.
Unfortunately, a free website comes with promotional branding as you may notice at the top of your website.
To remove the branding, you will need the premium Combo plan. This will make your website look more professional.
Head back to your Wix account and simply click on ‘Upgrade Now’.
Click on ‘Upgrade’ to view the paid plans offered by the Wix website builder and to remove the Wix branding upgrade to the Combo plan.
Or feel free to choose any of the four plans that best suit your business’s requirements. You have access to a 14-day money-back guarantee on all plans.
Which is the Best Website Builder for Your small business?
Wix Tutorial for Small Business (Video Tutorial)
That is everything we wanted to cover in this Wix tutorial for beginners to build your free small business website in minutes.
If you want to have a more detailed understanding of the Wix Editor and Wix ADI, we have a video tutorial just for you.
So enjoy watching this video and feel free to drop a comment and leave your feedback or ask any question you may have.
Enjoy!
Disclosure: Some of these links on this page are affiliate links, meaning we will get a commission if you buy through them, this helps support our education-based platform – thank you in advance.

