Table of Contents
In this HubSpot website builder review, we are going to show you how you can easily create a stunning website using one of our favorite online platforms, all for free!
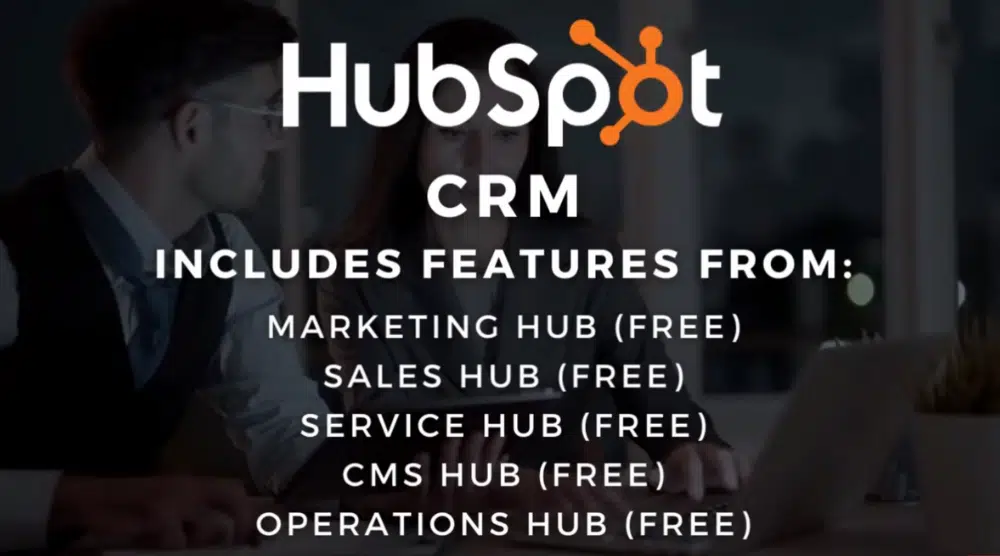
We love to talk a lot about HubSpot’s free CRM (customer relationship management) software due to the immense value that their platform offers small businesses.
However, did you know that recently, HubSpot launched its free website builder as part of its new CMS Hub free plan?
Not only can you now manage all your contacts, create landing pages, engage in email marketing, manage tickets, your sales pipeline, and tasks in one easy-to-use CRM, but now you can even create your own website, completely for free!
HubSpot is a one-stop shop for all things needed to kick-start your small business and thrive online.
We’re going to dive into a review of HubSpot’s free website builder within their CMS Hub and identify if this new free feature is sufficient for small businesses looking to create and launch a professional website.
If you’re interested in reading more about our Top Free Website Builders click here.
Hubspot Website Builder Review 2022:
Let’s launch into this review and tutorial of HubSpot’s free CMS hub where you can access the free website builder!
1. Getting Started with HubSpot’s Website Builder
Get started with Hubspot for FREE here
*The link above is an affiliate link, which means we will get a commission if you upgrade to a paid plan (with no extra cost to you). This helps support our education-based website and we thank you in advance!
To get started, you’ll need to log in to your account.
If you’re completely new to HubSpot and don’t currently have a HubSpot account, we suggest you read our guide on how to get started with HubSpots free CRM here.
You can then sign up for HubSpot’s free CRM.
Once you’ve created your CRM account:
- Simply log in.
- You’ll then arrive at your dashboard.
It’s important to note that when you sign up with HubSpot, you’ll get started with and have access to all the impressive free features that their CRM has to offer such as:
- Managing contacts.
- Sales pipeline.
- Tasks.
- Email marketing and more..
Recently, the free website builder was added to this collection of free features within the CRM (through their CMS hub).
So, what exactly is a CMS?
CMS stands for Content Management System.
This is basically a fancy name for a data-driven website.
Read more: How To Create a HubSpot Website
2. HubSpot CMS Hub. Free vs Paid.

What’s the difference between HubSpot’s free website builder and their paid website builder?
Follow the below steps to find out:
- Navigate up and click on your ‘Profile’ in the top right-hand corner of your dashboard.
- Simply head down to ‘Pricing and features’

This will take you to all HubSpot’s products and plans. We’re just going to focus on the CMS in this review.
- Click on ‘CMS’.
- Scroll down below the pricing plans options.
- Click on ‘See all features’ under the starter plan.
This is where we can identify the differences between the free HubSpot CMS hub, which gives you access to the free website builder, and the ‘Starter’, ‘Professional’ and ‘Enterprise’ plans. (These are premium paid plans). (see screengrab).
To continue this this HubSpot Website Builder Review, we’ll take a look at the main differences between the free plan versus the ‘Starter’ plan (first-tier paid plan):
Website Pages:
Free plan:
Access of up to 25 website pages for your website.
Starter plan:
Access of up to 50 website pages that you can create for your website.
HubSpot Branding:
Free plan:
Different assets all have HubSpot branding that you can’t remove.
For example, when creating website pages, forms, adding live chat or Facebook Messenger integration.
Also, you can create a blog, however, your blog will also have HubSpot branding attached to it that you can’t remove.
Starter plan:
You can remove HubSpot branding from all of these.
Removing HubSpot branding will make your website a lot more professional and is one of the huge benefits of upgrading to a paid plan.
Key features of the free plan:
- Access to all the free tools that the CRM has to offer.
- Drag and drop editor.
- Mobile optimization.
- SSL certificate – this will show your website visitors that your website is secure.
- Multi-language content for your website pages with the free website builder.
- Premium hosting.
Key features that are not included in the free plan:
- 1:1 technical support.
- HubSpot mobile app.
Essentially, the main thing you’ll notice when creating a small business website with HubSpot’s free plan is the obvious HubSpot branding that you’ll always have on your website.
If you are interested in upgrading to a paid CRM plan and want to learn more about HubSpot’s easy-to-use app you can read our HubSpot mobile CRM tutorial here.
Read more: How To Use HubSpot Meeting Scheduler
3. How To Access The Free Website Builder

Now that we’ve covered all of the main features the CMS hub includes, let’s dive deep into this HubSpot website builder review by showing you how you can start setting up your website using the newly added free website builder that HubSpot now offers.
To do this:
- Exit out of ‘Pricing and features’.
- Navigate back up to the top and click on ‘Marketing’ in the top left hand corner.
- Select ‘Website’ from the drop-down menu.
Here, you’ll see two options.
- Website Pages.
- Blog.
We’re going to go ahead and click ‘Website Pages’.

If it’s your first time playing around with the HubSpot website, then what you want to do is:
- Navigate down and click ‘Start setting up’.
Read more: How To Create a Sales Hubspot Pipeline
4. Progress Bar

One of our favourite features for beginners that HubSpot offer (and that we absolutely couldn’t leave out of our HubSpot website builder review) is the progress bar (see screengrab).
The progress bar makes it super easy for complete beginners to learn how to navigate through the process of actually creating a website inside of HubSpot.
For example: If you navigate down to ‘Show previous tasks’ you can see all the tasks that are required for creating a website.(see screengrab).
As you can see, there is a cross and a tick through each of the stages we have completed
If it’s your first time here, you won’t see a tick and a cross through each of these different stages.
You’ll only receive a cross and a tick once you’ve completed them.
5. Website Themes And Pages

Next, follow these steps below to learn how to create a website page and theme:
- Navigate back up to ‘Marketing’.
- Head down to ‘Website’ and click on ‘Website Pages’ again.

Again, now adding your website page is extremely easy to do:
- Simply navigate over to the right hand side and click on ‘Create’.
- Come down and click on ‘Website page’.
- A popup box will appear.
- From here, you’ll need to name your website page under ‘Page name’.
For the purpose of this HubSpot website builder review and tutorial, we’re going to go ahead and name it ‘Home’.
This is the first page that we want to create.
Above your ‘Page name’, you’ll see the ‘Website’ field has already been filled with the free HubSpot URL that you get to use to create your free website (see screengrab).
However, you can also purchase a custom domain and connect this with your HubSpot website. (We’ll talk more about that later).
Once you’ve entered in and are happy with your page name:
- Come down and select ‘Create page’.

This will take you to ‘Theme templates’ (see screengrab).
What is a theme template?
Think about the theme template as the overall layout of your website and the overall design of your website pages.
Hubspot’s free CMS Hub allows you to choose from 30 + free pre-made website themes.
Each of these themes has its own website pages that you can create.
Follow these steps below to learn how to navigate your way around theme templates:
- Navigate down the selection of pre-made website themes and choose one that you like.
Because we want to create a home page, we’ll select the ‘Home’ template
Once you’ve selected your template:
- You can preview the template before deciding if this is the template that’s right for you.
Alternatively, if you don’t like any of the current themes of if they don’t suit your brand:
- Navigate up to the top and click on ‘Theme’. Currently, ours is ‘Environmental’. (see screengrab).
- You can then click on ‘Change theme’ from the drop-down menu to change the theme type.
This is where you can access the 30 + different free website themes.
You can also preview each of those themes before selecting one.
6. Editing Your Overall Theme Template

Once you’ve chosen your theme, you can edit it to your liking. To do this:
- Again, click ‘Theme’.
- Select ‘Edit’ from the drop down menu.
For example, if we want to go ahead and use this environmental theme we can click on ‘Edit’.

This will take you to where you can edit the overall theme settings (see screengrab).
To edit your theme:
- Navigate up to ‘Global colors’ over on the left hand side.
- A drop-down menu will appear.
- From here, you can change the primary color for every website page by simply clicking on the color.
- A color chart will then appear. Select what color you want the primary color to be.
- You can also change the secondary color.
- Next, you can change the ‘Tertiary’ color, ‘Title’ color and ’Body’ color.
For this hubspot website builder review and tutorial let’s change our primary color to light green as an example:
You can see the primary color, on the menu, the button and the text color have been changed because we changed the primary color.
Once you’re happy with your color schemes on this particular page, you can check out your theme on different pages. To do this:
- Navigate up to ‘View on’ at the very top of your screen.
- You can then go ahead and choose a different template page.
For example, if you click on ‘Contact page’, that’s going to take you to the contact page template.
From here, you can see the primary color has changed here also.
Once you’ve checked the color scheme works for all your pages, you can think about different elements within your theme.
If you head back over to the left-hand side, you can change a bunch of your ‘Global theme’ settings.
Some of the other elements you can edit are:
- Global fonts.
- Spacing.
- Typography
- Buttons.
- Forms.
- Tables.
HubSpot lets you have access to change and customize your entire theme! Take the time to navigate around these theme settings and make any changes.
Once you’re happy with your theme:
- Simply navigate down to ‘Apply changes’ at the bottom of your left-hand side bar.
Before you go ahead and publish those changes live on your website:
- You can click on ‘Preview’ in the top right hand corner.
That’s going to preview all your different changes.
- You can then view what those changes look like across different devices
- Then go ahead and click ‘Publish’.
7. How To Customize Pages

Firstly, let’s navigate back to ‘Content creator’ on left-hand side
That’s going to take us back to our theme templates.
Remember, we selected the ‘Home’ template under the environmental theme that we want to create for the purpose of this HubSpot website builder review
- Come down and find the template you want to choose.
- Click ‘Select template’ on that template.

It is important to note that unfortunately like we mentioned earlier if you want to remove the HubSpot logo and branding from your website, you’ll need to upgrade to at least the CMS Hub starter, which is the first tier paid plan within the CMS Hub.
Once you’ve clicked on your template, you’ll have access to the easy to use drag and drop page builder we mentioned earlier.
With each website page that you want to create, you have access to this easy-to-use visual drag-and-drop builder.
How does it work?
Once you’ve clicked ‘Select template’, you’ll be taken to the editing page.
Over on the left-hand side is where you have access to ‘Modules’.
These are block modules that you can simply click, drag and drop into your website page.
For example, if you wanted to add a text element below this cover over here (see screengrab) what you would do is:
- Simply navigate over to ‘Rich text’.
- Next, click then drag.
- Simply place this element where you want.

We’re going to add this text element here (See Screengrab).
That’s going to add that text element above these two sections here.
- You can then simply click and change any of the automatic text inside the element.
- Head up above your page and you’ll see that you have access to formatting options so you can change the font size and font, the color and more.
If you want to delete your module:
- Navigate over to the right-hand side of your text box (or other modules) and select the rubbish bin logo.

In addition to this, you can add a new section :
- Click the ‘+’ button on your theme page (see screengrab)
- This will bring up a popup box ‘Add section’ showing different theme sections you can add.
These are premade sections from the theme that we selected earlier in this HubSpot website builder review.
- Select ‘Custom’.
- You can simply add any section you like by clicking ‘Select’ on the chosen section you want to add.
- That will then add that section in that area.

- You can navigate over to ‘Layout’ (next to ‘Custom’) and add a layout.
For example, if we click the ‘3’ layout option, that’s going to create a three-column section (see screengrab).

- From there, you can simply drag any of the modules on the left hand side into these sections.
We’ll go ahead and drag an ‘Image’ module.
This will drag a blank image into the section you choose.
What you can then do is:
- Add an image here if you like by selecting ‘Replace’ on the left-hand side bar.
With each of the other modules on the screen, for example, if we click here on the left-hand side panel, you can make any changes to your website pages.
You can customize any of the premade modules on your page using the options on the left-hand side panel.
All of these page customization options have been examples of how you can customize your content under the ‘Content’ header at the top of your page.
In addition to ‘Content’, you’ll find three other customization options above your page that you can click on and edit:
- Settings
- Optimize
- Publishing options

Under ‘Settings’ you’ll need to add your page title before you can publish your page.
- Click ‘Settings’.
- Under ‘Page Title’ you can go ahead and add your website page.
For this HubSpot website builder review and tutorial, this is our home page.
Take the time to go through and add all your settings for each of your website pages.

Next to settings, we have another cool feature that the free HubSpot CRM has to offer which is called ‘Optimize’.
Follow these steps to navigate around this feature:
- Click on ‘Optimize’.
This generates basic optimization recommended stations for your website page.
For example, under ‘Meta description’, we have three recommendations (see screengrab).
This is something we really like and were impressed with when conducting this HubSpot website builder review!
A lot of website builders don’t give you recommendations in terms of different optimizations you need to make in order for your website to perform as best as possible online.
This is ideal for complete beginners that are just getting started out with building their website!
For example, if you’re a complete beginner, you might not even know what a meta description is, but at least you’ll have a recommendation that shows you how to add the meta description.

Next to ‘Optimize’ you’ll see ‘Publishing options’. This is where you can choose to publish the website page now, or schedule for later (see screengrab).
- Simply click on ‘Publishing options’.
- Select ‘Publish now’ or ‘Schedule for later’.
Make sure you take the time and create all your different website pages first before you publish your website! To do this:
- Click ‘Save’ once you’ve finished editing that current page (in the left hand top corner).
- Navigate back and click on ‘Exit’ (next to save).

That’s going to take you back to your ‘Website Pages’ (see screengrab).
Ready to publish your website? Follow these steps:
- Navigate over to ‘More’ next to each of your website pages.
- Come down and simply click ‘Publish’.
You want to publish all your website pages, all the website pages that you have finished creating.
Before we talk about creating a primary menu for your website, we’re just going to quickly go ahead and create one more website page using the same process we just showed you for the purpose of this HubSpot website builder review you. Ex: Home Page
As you can see, we now have an ‘About us’ page and a ‘Home page’ (see screengrab).
Both of these are currently in draft mode and they’re not live.
8. Create a Primary Menu

Firstly, what is a primary menu?
A primary menu is a menu across your page of different website pages.
This is going to enable easy user navigation.
To create a primary menu:
- Stay on the same ‘Website Pages’ screen we are currently on.
- Click ‘Edit’ on your website page.
You can select any website page that you want to edit.

- Then, navigate up to your menu up & Click (see screengrab) and click on ‘Open in global content editor’.
Remember like we mentioned at the beginning of this Hubspot website builder review and tutorial, this is where you can make global changes to your entire website.
To add your primary menu, follow this step-by-step guide:
- Navigate up to ‘Content’ on the left hand side panel.
- Come down and click on ‘Primary navigation’.
- From here, you can then come down and either click edit (to edit the current menu that you have)
Or
- If you don’t have a menu, you can select ‘Create new’ to create a new menu.
We’re going to click on ‘Edit menu’.
When following the ‘Progress bar’ for creating your website, primary navigation is not mentioned.
This is something that we believe they could add to their progress bar.
It would really make it a lot easier for complete beginners to create their primary navigation.
This is super important for creating and bringing your website together.

However, let’s continue with this HubSpot website builder review and show you how to navigate around your primary navigation below:
- Come down and click ‘Add menu item’.

- Next, enter in your ‘Menu item label’.
- For this Hubspot website builder tutorial we will call it ‘Home’.
- Then head across and select a page.
- We’re going to select our ‘Home’ page.
- Come down and click ‘Add menu item’.
- Select ‘Add page link’.
For this Hubspot website builder review and tutorial we will call this ‘About us’.
- Then we’re going to select the ‘About us’ page (see screengrab).
Once you’ve finished adding in your items:
- Click ‘Publish’.

Next, it will head back to your ‘Global content editor’.
You can see that for ‘Menu’ on the left hand side, we have this new menu with the ‘Home’ and ‘About us’ page (see screengrab).
These pages are not published, so you’ll see the warning ‘This menu has pages that are in draft’.
If you want your pages to appear on your primary menu, then you need to publish each of those website pages.
We hope HubSpot adds this to their progress bar to make it a lot easier for beginners to follow, however hopefully we have helped to clarify how to navigate around and add your primary navigation to your website.
- Next, head back over to your website section.

Remember when you’re creating your website for the first time, you have access to this progress bar i.e Finish CMS Setup on left-hand side. (see screengrab).
Here you can see which stage of the setup you are at for completing and creating your website.
If we navigate up to ‘Website pages’, next to this we have ‘Landing pages’.
We’re not going to discuss landing pages in this HubSpot website builder review, however if you want to learn more about creating landing pages within HubSpot, you can check out our in-depth step-by-step tutorial here.
9. Adding a Blog (Optional)

Next to landing pages you’ll see the header ‘Blog’.
This is where we can create a blog.
At the moment we have one blog created.
To create a post for your blog:
- Click on ‘Blog’ next to ‘Landing pages’.
- Select ‘Create new post’ for that specific blog (see screengrab).
Alternatively,
- You can also navigate up to the top right hand corner and select ‘Create’.
- Then come down and click on ‘Blog post’.
With HubSpot’s free website builder, you have access to create one blog.
Within that one blog type, you can create all your different blogs.
Why create a blog?
Essentially, you want to use blogs to write valuable content that you then post online to promote your business, grow your brand awareness and be discovered online.
HubSpot gives you two options when it comes to creating your blog.
- Import existing blog posts.
- Simply create a new blog post from scratch or by using pre-made templates.
Let’s go ahead and click ‘Create new post’.
We created earlier a blog. If we click on the drop down menu, we cannot add an additional blog (unless we upgrade to a paid plan).
For this specific blog, we’re going to go ahead and create a blog post.
HubSpot makes this process exceptionally simple! All you would do is:
- Select ‘Create blog post’.

This will create your blog post.
- Add your blog post name in the title section.
- Come down and click ‘To add text’ (see screengrab).
This is where you would create your blog post.
You have access to all the formatting options up above your text.
You can also insert images and more!
This is all editable under the ‘Content’ header (similar to when we created a website page).
Also similar to creating a website page, you have access to:
- Settings.
- Optimize.
- Publishing options.
When you’ve taken the time to edit your post and are ready to publish your post online:
- Simply go ahead and click ‘Publish’.
10. Adding a Custom Domain (Optional)

You can continue using the Branded HubSpot domain, or alternatively, you can actually go ahead and connect a custom domain under the free HubSpot CMS Hub. (If you’ve purchased a domain from a domain provider and you want to connect that custom domain)
To add your custom domain:
- Exit out of your blog post.
- Navigate down to ‘Finish CMS setup’. (This is our progress bar) on the left hand side.(see screengrab).
- You’ll then see ‘Connect domain’ on your progress bar
- Navigate down and simply click ‘Connect domain’.
11. Free HubSpot CMS Hub – Final Thoughts
And that it is for our comprehensive walkthrough and review of HubSpot’s free CMS Hub and free website builder!
We believe that this free website builder is suitable for small and local businesses that want to take advantage of other free tools that integrate seamlessly with the website.
For example, managing your contacts, your leads, managing conversations, managing your email marketing, sales pipeline and tasks.
You can do all this within HubSpot’s free CRM!
If you’re looking for a basic yet easy to use and responsive website builder that also seamlessly integrates with other useful tools, then HubSpot’s free CMS is for you!
There are only a few issues that we can identify:
- Having a more comprehensive progress bar or setup bar that takes you through the entire process of launching your website.
- We feel like they miss a few vital components to actually creating your website. For example, how to navigate back to each of the customization options, accessing the global site editor, as well as how to create a menu.That’s something they’ve left out.
- HubSpot branding – there’s quite a lot of HubSpot branding on your website when you’ve published it, which can make your website less unique and quite unprofessional. Your website visitors can see that your website is branded with HubSpot.
However, the ‘Starter’ plan allows you to remove this branding.
When your business starts to grow and you start becoming more comfortable with navigating through all the different features that HubSpot has to offer, then we recommend upgrading to the ‘Starter’ plan (to essentially remove that branding).
That is it for our HubSpot website builder review of HubSpots free CMS Hub!
We have covered everything to help you identify if this free website builder is sufficient for your small business.
HubSpot’s Free Website Builder Review – Full Video Tutorial
Feel free to check out our in-depth video where we walk through a detailed review of HubSpot’s free website builder (CMS Hub) below.
