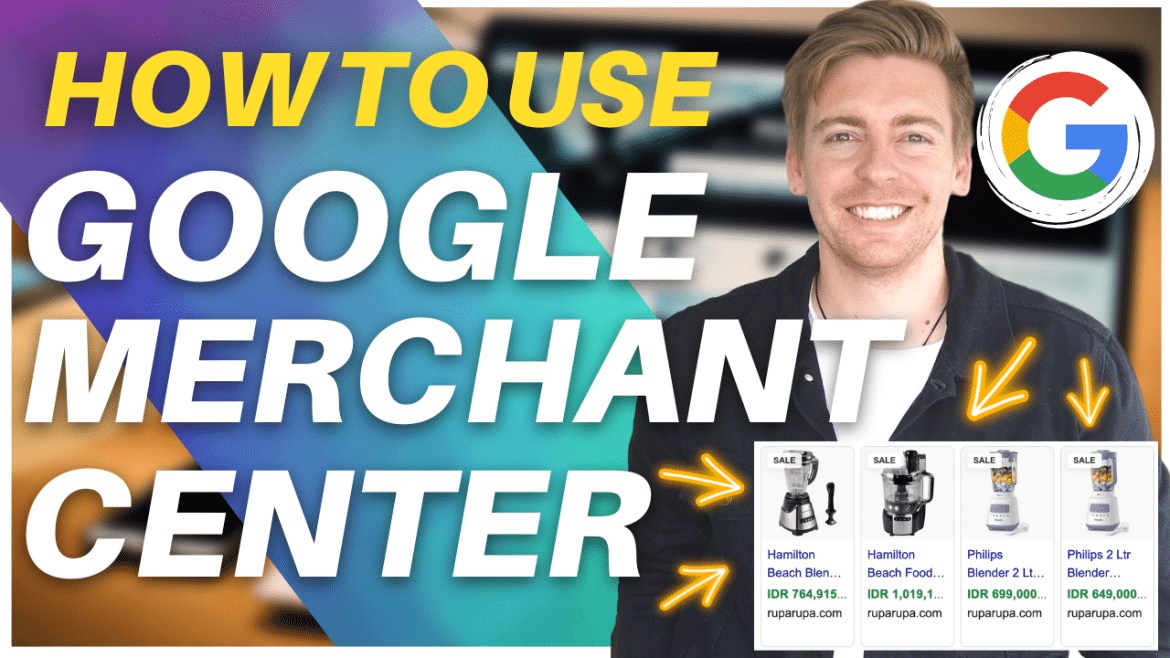
Do you run an eCommerce business and want to learn how to list products on Google shopping for free through the Google Merchant Center profile?
We are going to walk you through just how easy it is to set up Google Merchant Center, so you can learn how to list products on Google Shopping for your online store.
What is Google Merchant Center?
Google Merchant Center is a platform within Google that aids in helping eCommerce businesses grow online.
All you need to do is list your products within Google Merchant Center!
Then those products will appear in search results across Google.
This means that when people are searching on Google, they’ll be able to see your products and then go to your website to purchase those products.
This is a great way to reach more potential customers, increase brand awareness, and sell more products online!
This Google Merchant Center tutorial aims for beginners to show you how to list products on Google so your products can be listed and discovered for free on Google!
How To List Products On Google For FREE?
Want to learn how to use Google Merchant Center?
However, let’s go ahead and take a deep dive into the Google Merchant Center!
1. How To Get Started With Google Merchant Center
The first step to list your products on Google for free is to create a Google Merchant Profile for your online store.

To get started:
- Head over to your browser of choice.
- Type in ‘Google Merchant Center’.
- Find the ‘Google for Retail’ landing page or click here.
- Click ‘Get started’.

You’ll then be asked a few questions (see screengrab).
This is to establish if Google Merchant Center is right for your business.
It’s important to note that before we go any further than this platform is only suitable for eCommerce businesses that sell physical products.
- Below ‘Do you sell products online?’ Click ‘Yes’.
- Simply add in your website’s URL.
For the purpose of this tutorial on how to set up Google Merchant Center, we’ve added our Shopify store URL (see screengrab).
You can watch our beginner’s guide on How to create an eCommerce website with Shopify
Next:
- Under ‘Do you have a brick and mortar store? Select ‘Yes’ or ‘No’.
We’re going to click ‘No’.
- Select ‘Continue’.

You’ll then be redirected to a page where Google explains the Google Merchant Center and how to list products on Google for free.
One of the things we absolutely love about Google is that they don’t charge you to list your site on Google, and this is the same with your products!
You can add your products to Google completely for FREE, and we’re going to show you how in this Google Merchant Center tutorial.
Scroll down this page to see an example of where your products will show on Google search, Youtube, Images and Assistant that your customers can then simply head to your website to buy.
So in saying that, make sure all your products are listed on your website.
You can watch out for the tutorial on How to add products to your Shopify store

Once you’ve done that:
- Navigate down to ‘What you need’ (see screengrab).
So again, in order to set up a Google Merchant profile, you’ll need an online store with all the criteria shown above.
Take the time to analyze these important requirements and add anything you need before continuing with this tutorial!
Unfortunately, if you’re a service-based business that offers things like consulting, massages, and repairs, you’re unable to use the Google Merchant Center.
However, don’t worry!
If you’re a service-based business, you’re still able to get listed and appear on Google search and Google Maps by using Google Business Profile (a free business listing for local businesses).
When you’ve read through all the above information:
- Scroll down and click ‘Create a Google Merchant Center account’.
Read more: How to add your local business to Google Maps
2. How To Create a Google Merchant Center Account

- Type in your business name next to ‘Business name’.
- Select the business country.
- Add your time zone.
As you can see, we’ve added in our example business name, country, and time zone for the purpose of this how-to list product on Google shopping tutorial (see screengrab).
Next:
- Scroll down and tick any other tools you use below ‘What other tool do you use?’

- Click ‘Google Merchant Center terms and conditions’ to find out more before you tick this.
- Select ‘I’ve read and agree to Google Merchant Center terms and conditions’ at the bottom of the page.
- Click ‘Create account’ at the very bottom of the page.
- Simply click ‘Continue’.
And it’s as easy as that to sign-up and arrive inside the Google Merchant Center!
Read more: How To Connect Google Domain to Google Sites
3. How to Set Up Google Merchant Center

Before you can list your products on Google so that they display for free, you must complete some of these details over on the left-hand sidebar (see screengrab).
We’re going to walk you through these details now:
- Click ‘Add business details’.
This is where you should take the time to include details about your business including your address, phone number, and country.

Once you’ve done that:
- Select ‘Verify and claim website’.
Basically, you’ll need to verify your website address (which is super simple!)
- Next to ‘Verify your website’, click ‘See other methods’ (see screengrab).

- Select ‘Verify with Google Analytics’.
Google Analytics is another powerful Google product that lets you measure your website’s performance, traffic, and visitor behaviors.
Don’t have Google Analytics integrated with your website?
Make sure to check out our complete Google Analytics beginners guide here, where we guide you through everything you need to know about this incredible platform.

Once you’ve verified and claimed your website:
- Click ‘Setup shipping’ over on the left-hand sidebar.
- Navigate through the process of setting up your shipping information (see screengrab).
Remember, it’s important your shipping information is correct, and the same as what you have on your website.
- Type in your shipping service name next to ‘Shipping service name’.
- Add the countries you deliver your products to below ‘Country’.
We’re going to leave ours as ‘New Zealand’, however, you can add multiple countries if applicable.
Next:
- You’ll see ‘Delivery location’.
- Below this, tick ‘At the customer’s address’.
- Click ‘Next’.

Here you’ll be able to add various details about the delivery time of your products (see screengrab).
- Select the order cutoff time below ‘Order cutoff time’.
- Add the handling time below ‘Handling time’.
- And finally, add in the transit time below ‘Transit time’.
Once you’ve added those details:
- Click ‘Next’.

- Select the options that you provide on your website (see screengrab).
For example, if you provide free shipping for all your items then select ‘Free shipping’.
Once you’ve selected all the options you provide on your website:
- Click ‘Save’.

- Select ‘Add products’ on the left-hand side bar.
You’ll see three options for adding products to your Google Merchant (see screengrab).
1) Add products from your website.
This is where you claim your website, which we have already shown you how to do under ‘Verify and claim website’.
2) Add 1 product manually at a time.
3) Add multiple products at once.
The fastest way to add products is to verify your website, claim your website, then add your products from your website!
However, for the purpose of this how-to list products on Google tutorial, we’re going to click ‘Add 1 product at a time’.
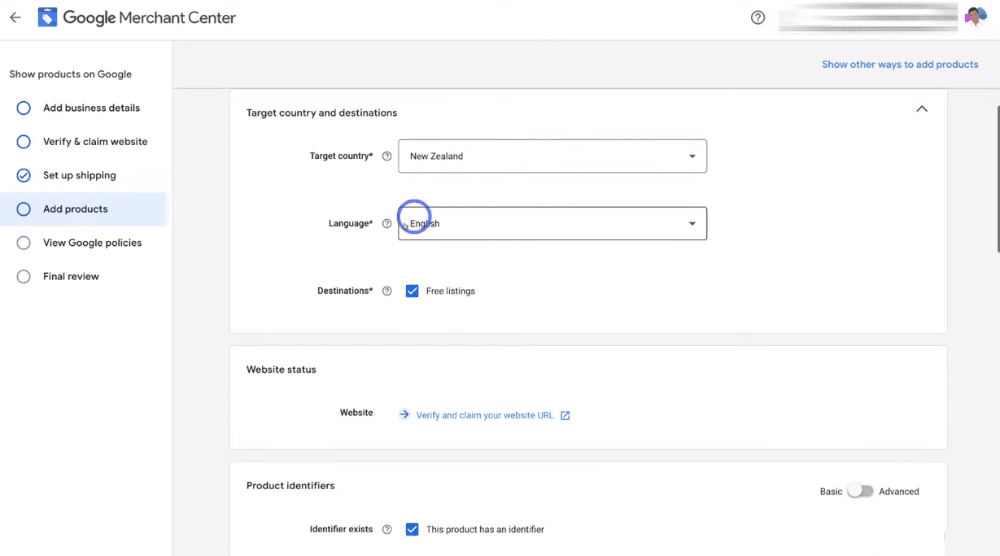
When you’ve clicked what option you’d like to list your products with, you’ll need to fill out your product information.
To do this:
- Select your target country next to ‘Target country’.
- Below that, pick your target language next to ‘Language’.
- Click the destination.
For our website, we want our listing for free to show on Google when customers are searching for our products.
Next:
- Scroll down to ‘Website status’.
- Here you’ll be asked to verify and claim your website URL once again.
Remember, this step is important and shouldn’t be missed as you will need to verify and claim your website to save and list your products on Google!
However, for the purpose of this Google Merchant Center tutorial, we’re just using a test web website, so we’re not going to verify this website.
Once you’ve done that:
- Head down to ‘Product Identifiers’.
- Here you can add a product identifier if you like.
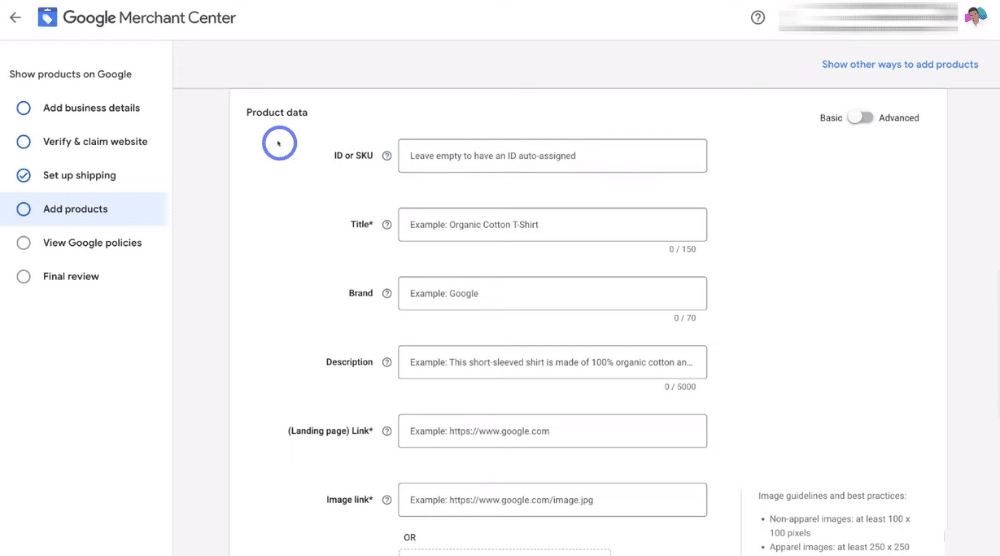
- Below ‘Product identifier’, you’ll see ‘Product data’.
This is where you can add all your product information details such as the stock keeping unit (SKU), product title, the brand, a description of your product, and then the link to your product page (the landing page) (see screengrab).
You don’t need to fill out all of this information if it isn’t relevant, however, you should make sure you add the title (the same title that displays on your website) as well as the description that you have on your product listing on your website.
This is because you want to make sure you have the same consistent information on both your Google Merchant Center and website.
Additionally, you can add images linked to your product:
- Under ‘Image link’, add an image link of your product or
- Click ‘Browse’ to upload the image of your product from your computer.
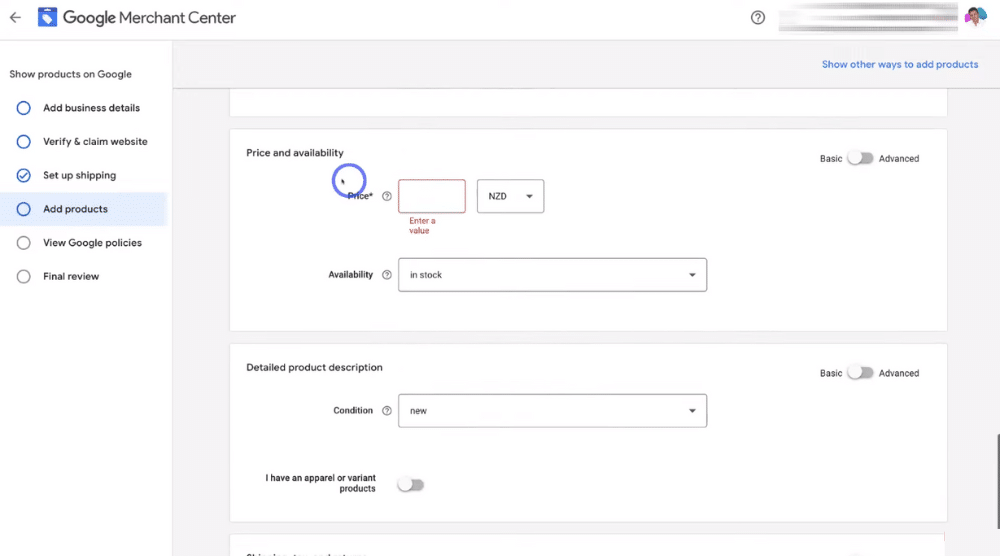
Next:
- Navigate down further to ‘Price and availability’.
- Enter in the price or your product.
- Add in the availability of the product.
Again, we recommend taking the time to ensure all this information is identical to the information listed on your website.
Once you’ve done that:
- Scroll down to ‘Detailed product description’ (see screengrab).
- Here you can add any additional information about your product.
- Type in the condition of your product next to ‘Condition’.

- Additionally, select the ‘On’ button next to ‘I have an apparel or variant products’ if there are any alternatives to your products.
Here you can select if you have different attributes or variations such as colors, sizes, genders or age groups for the product (see screengrab).
Next:
- Add your shipping services below ‘Shipping, tax and returns’ if you haven’t already (we explained how you can complete this process under ‘Set up shipping’ earlier.
When you’re happy with all your product information:
- Click ‘Save’ at the bottom of the page.
- Navigate back up to the top.
Again, we’re not able to save this page because we haven’t verified and claimed our website.
Next:
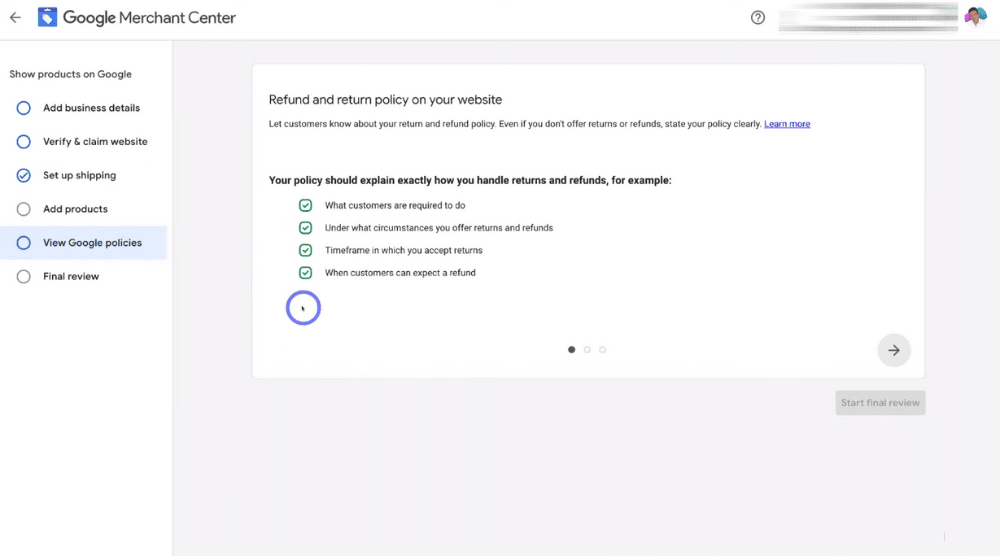
- Click ‘View Google policies’ in the left-hand side bar.
This is where you can make your way through the Google policies (see screengrab).
- Lastly, click ‘Final review’ on the left-hand sidebar to view the final review of your product after adding all the information we’ve just shown you.
And that is everything you need to do to initially set up your Google Merchant Center and list products on Google for free!
Read more: How To Switch To New Google Analytics
4. How To Manage Your Google Merchant Center Listings
Now that you’ve learned how to set up Google Merchant, we’ll show you how to manage your listings on your Google Merchant Center.
To do that:
- Click the back arrow in the upper left-hand corner of the page.

That’ll bring you back to your Google Merchant Center ‘Overview’ and is where you’re able to manage your product listings.
On this page, you’re able to view the performance of your free listing, which is the number of clicks each day (see screengrab).
Haven’t finished setting up your account yet?
- Click ‘Continue’ on this page to complete the steps we’ve just covered.
Additionally, you can view all Google announcements here (see screengrab).
Next:
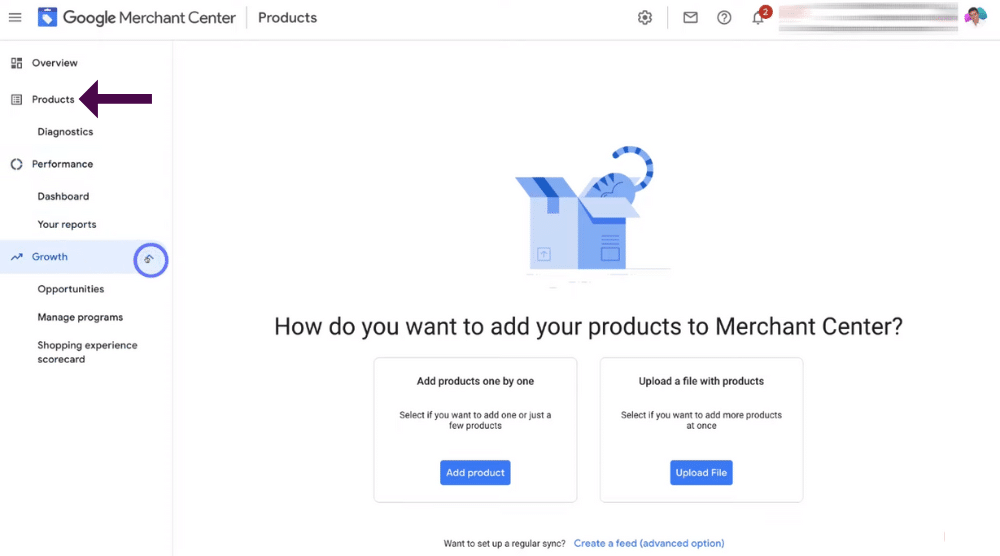
- Click ‘Products’ on the left-hand side bar.
This is where you can see every product that you’ve uploaded to the Google Merchant Center.
- Within ‘Products’, you can also edit and add any additional products if you like.
- Click ‘Performance’ from the drop-down menu below ‘Products’ to view the performance.
- Select the drop-down menu next to ‘Performance’.
- Click ‘Dashboard’ to see your dashboard.
- Select ‘Your reports’ to look at any reports.
Below this:
- Click the drop-down next to ‘Growth’.
- Here you’ll be able to view ‘Opportunities’, ‘Manage programs’ and ‘Shopping experience scorecards’ (see screengrab).
However, that brings us to the end of this Google Merchant Center tutorial.
You should now be confident in how to set up Google Merchant Center Profile, so you can begin listing your online products on Google (completely for free!)
How to List Products On Google Shopping For Free – Full Video Tutorial
This is such an easy way for you to showcase your product listings on Google for shoppers to simply purchase from your online store.
The best part is it only takes a few minutes to set up and is FREE!
If you’d like to learn more about this process, make sure to check out our video tutorial below for a more visual approach on how to list products on Google using Google Merchant Center.
